The joy of photographing comets (without telescopes)
Comets are among the most fascinating celestial bodies in the sky! They are frozen objects in our solar system, or even the space beyond, which when their orbits enter warm areas close to the sun, a beautiful long tail of gas, dust and ions forms behinds. Tails of a comet are the product of evaporation of frozen materials on the nucleus and interaction of those materials with high-speed solar winds and mostly designated forms two visible tails, dust tail and Ion tail. The dust tail mainly consists of micrometer-scale particles. The dust tail is wide and slightly bent because of the pressure of the light from the sun and the orbital action of the comet's nucleus. The Ion tail comprises electrons and ions that are ionized by the sun's ultraviolet radiation.

The size of a comet nucleus is typically less than ten kilometers, but in contrast tails extend very long through space, for instance the length of dust tails is typically between 1 and 10 million kilometers! It means that the length of a comet's tail is several times more than the sun diameter. In this respect, we could expect to see some of these beautiful creatures even with unaided eyes in the night sky! This happens in the real world one a year to see a comet with naked eyes. Although many of those are faint and unspectacular, what about imaging them?
With the aid of current high-efficient cameras and lenses, taking colorful pictures of these temporary visitors to Earth's night skies is possible and really enjoyable! In this article, I would like to introduce you to how to capture comets with simple equipment without a telescope. The only crafts needed is a camera body mounted on a stable tripod and of course a high-quality lens.
Equipment considerations
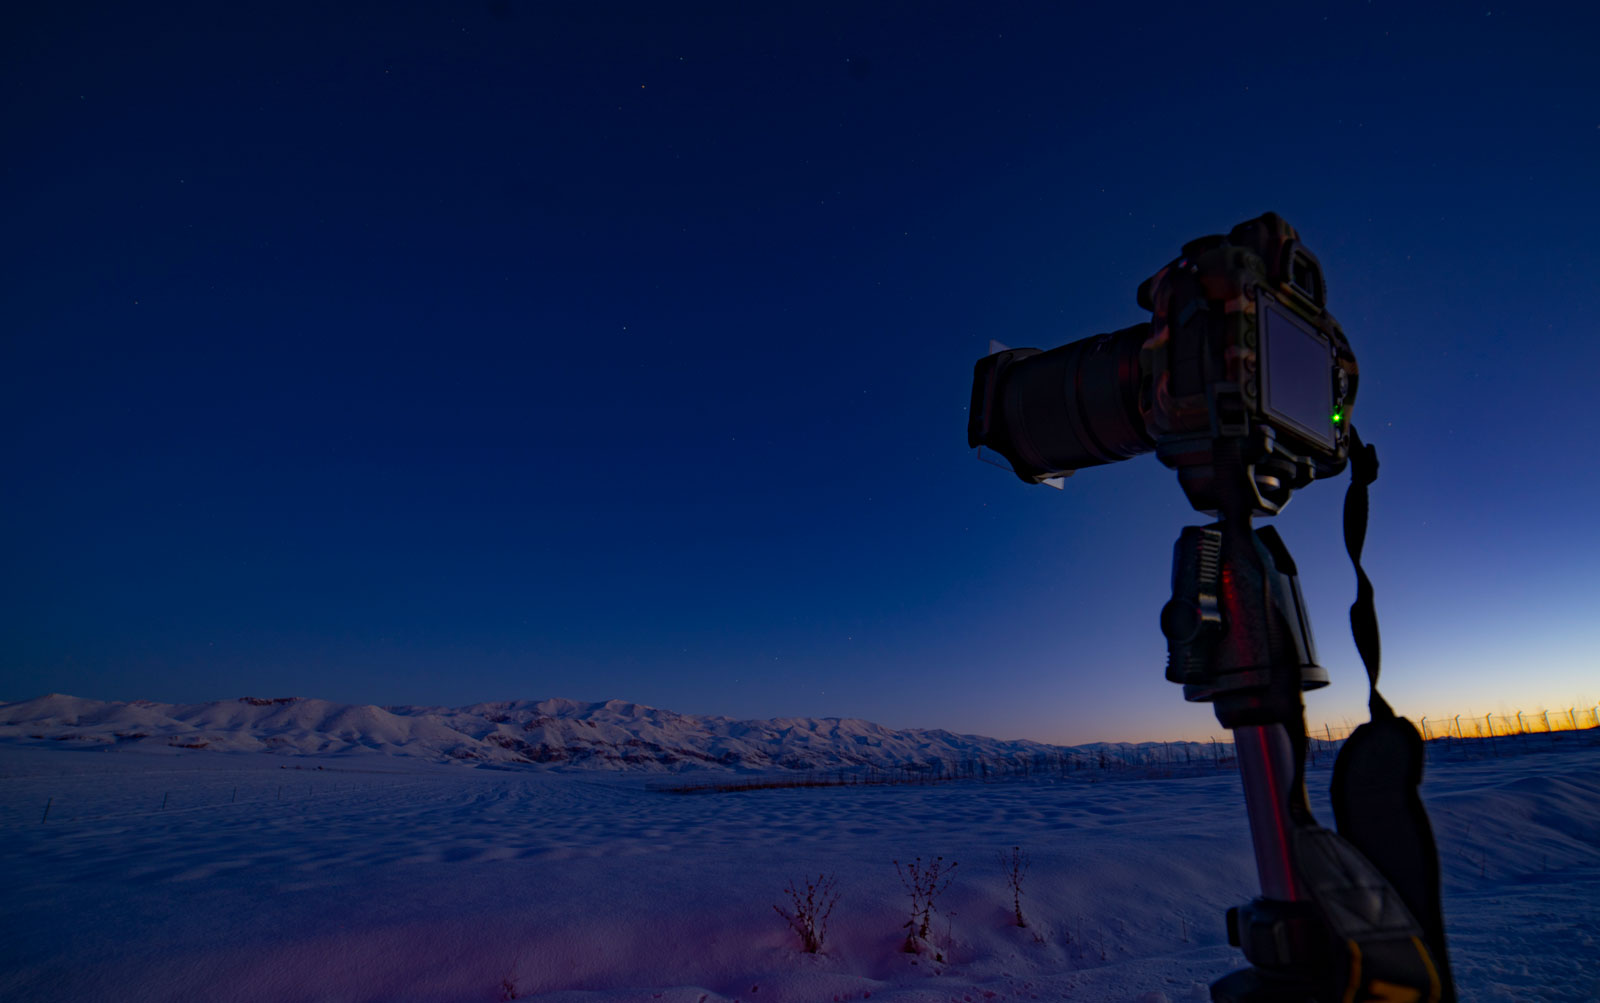
There is lots of room for imaging bright comets with a camera on a fixed tripod. Comets are moving objects in the sky, especially around their closest approach to the sun (perihelion point) where they shine in their maximum brightness. Even trackers have limitations for tracking comets in sidereal mode, so using fast lenses are a must for comet photography. For bright comets, my usual advice is a fast normal lens for wide imaging of comets and foreground. A fast prime has enormous power of light gathering, and could easily be incorporated for mosaic pictures to produce a wide-angle field. Of course, for the camera body, a low noise sensor like modern full frames is preferred but the lens is always considered much more important. And at least, the third element of craft is a stable tripod to handle lens and body steady well during long exposures.
Select the best location/Set the best time
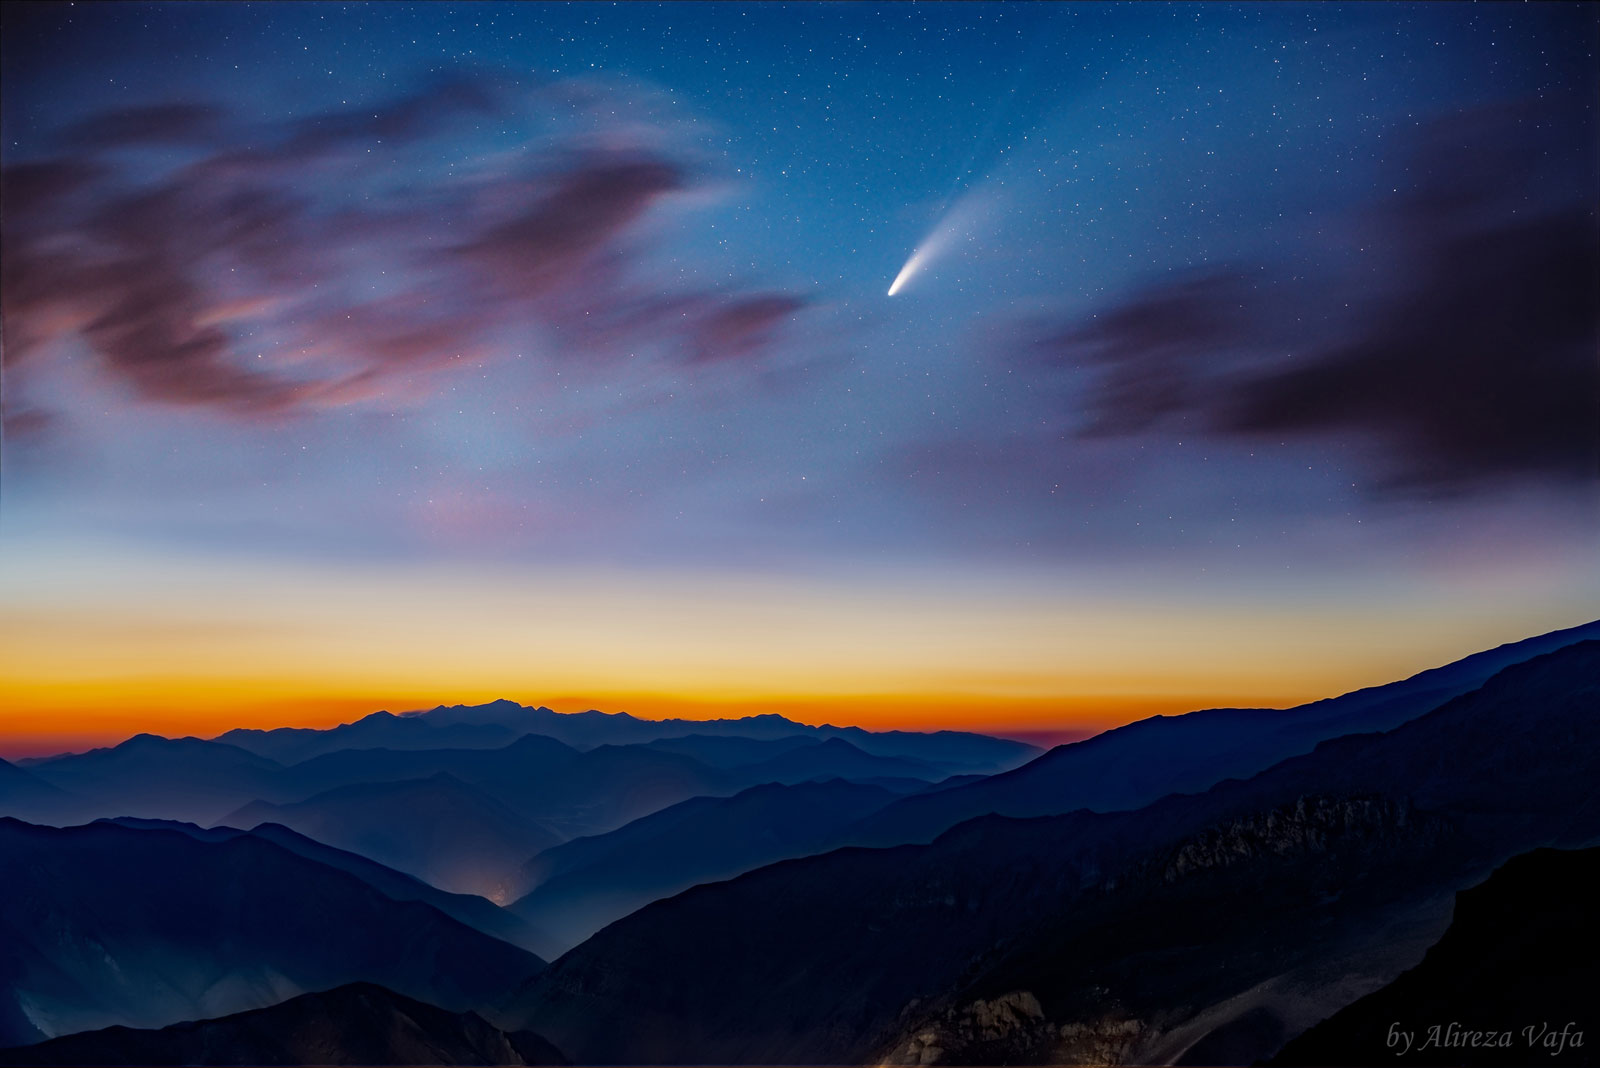
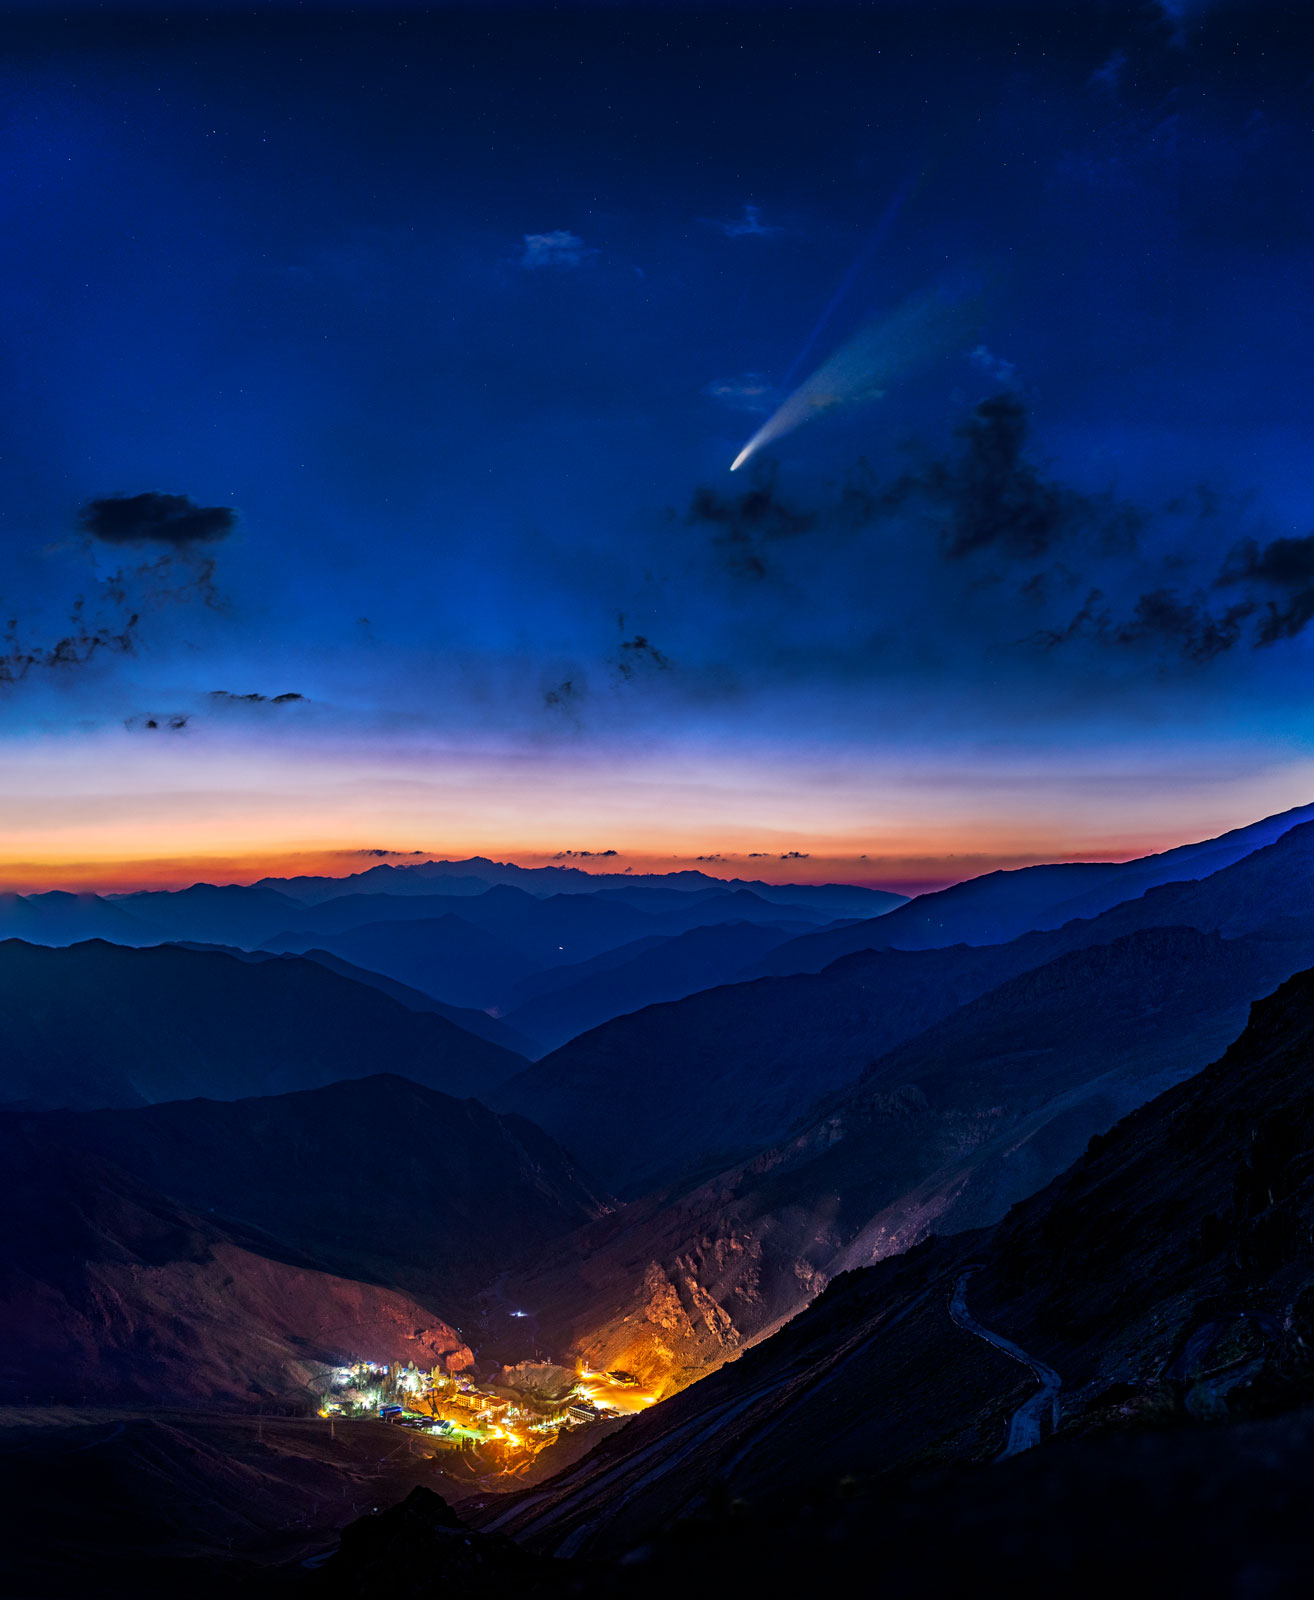
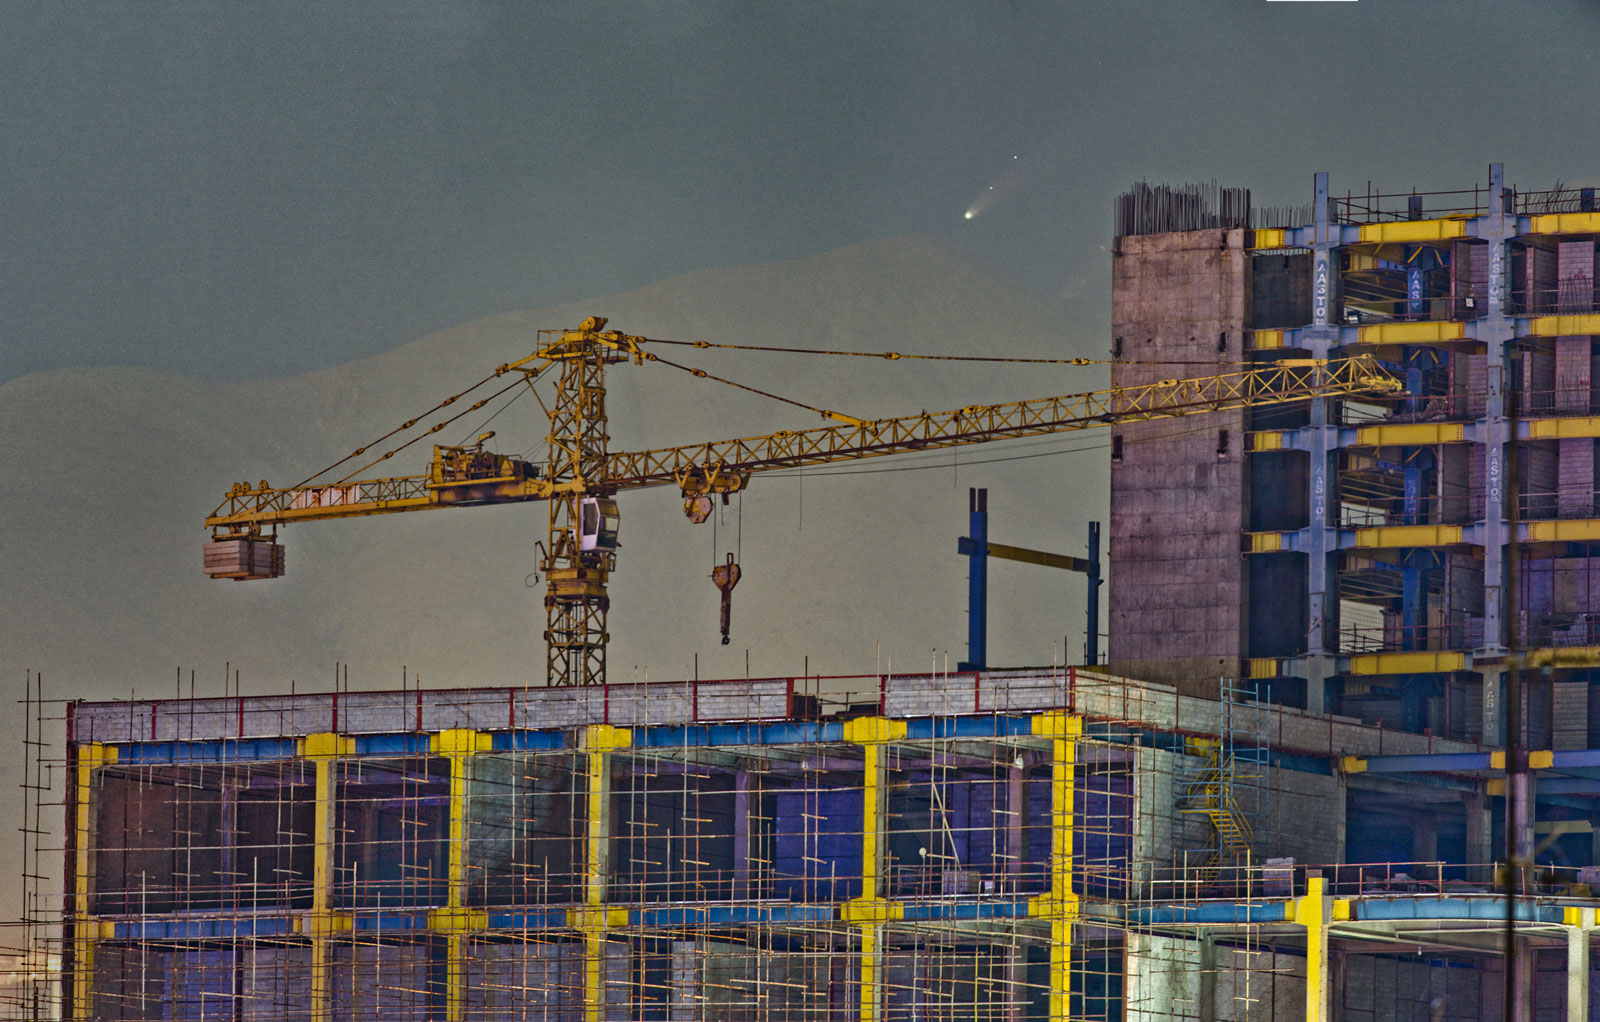
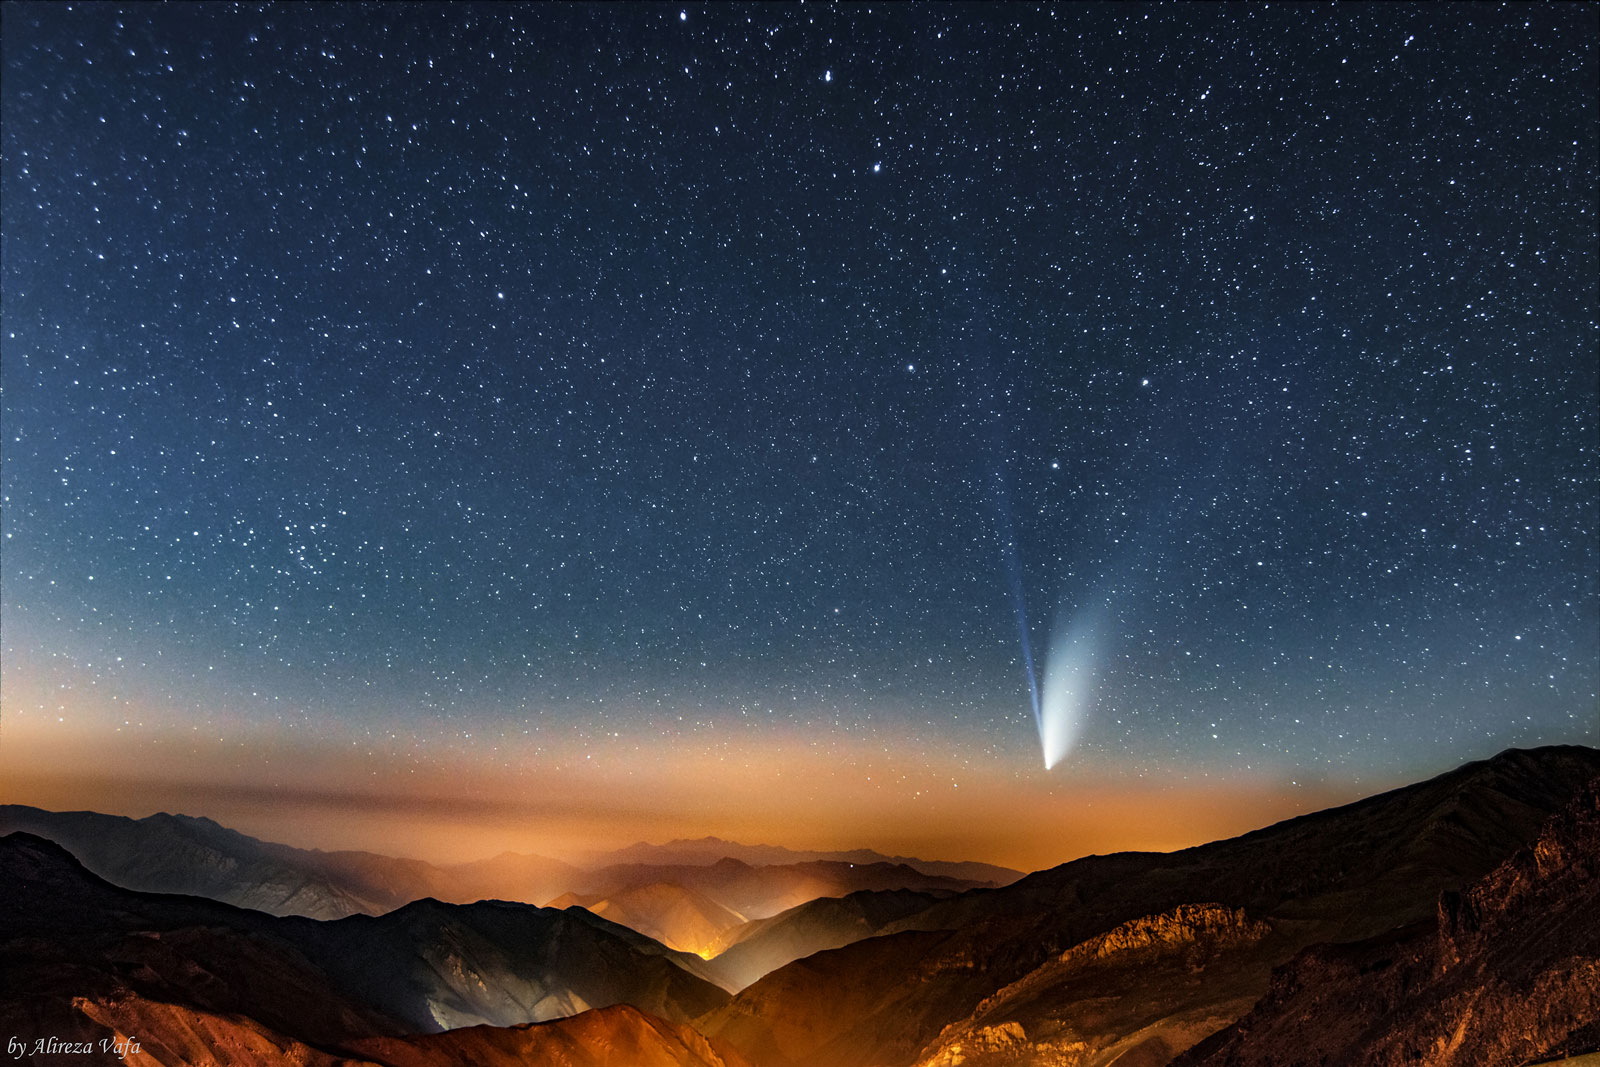
Comets and all-night sky gems need a dark location to observe and photograph. For instance, I remember on the brightest recent comet at summer of 2020, comet C/2020 F3 (NEOWISE), it was hardly visible with a binocular from city light pollution but when you go away under dark skies, glorious dust tail of the comet was stretched through the sky with naked eye. The exact condition is presented on imaging as shown on the below images: number of details of NEOWISE comet resolve in city light versus ideal conditions.
Comets are temporary visitors of the inner solar system, and their brightness in our sky depends on how close they are to the Sun and of course the distance to our mother Earth. So, when a comet is close to the sun (before/after its perihelion) also not far from our own planet, we could expect to see it in its brightest condition. But there are more considerations too. Let me give an example on the recent comet, C/2022 E3 (ZTF), in which its closest approach to earth was on February 2nd 2023. The comet was just past its perihelion around January 12th and all things seemed perfect to capture it on its maximum brightness condition all through the night. But actually, there was a very small time window to see and capture this comet before it descended. The reason was the moon in the sky! Our natural satellite is the second bright heavenly object in the sky and its presence could easily wipe out dim celestial objects like a comet. So, in the case of Comet ZTF in its brightest value, we had only 50 minutes after the moonset around 5 a.m. to dawn to capture it in the dark sky.
In the field
As we have severe time limitations both from movement of stars (if you simply put the camera on a tripod without tracker) and in addition from the dynamical state of the comet as we talked earlier, we should set exposure settings parameters in order to detect weak light signals. There is a simple formula to calculate your maximum exposure time (Tmax in seconds) before the stars and celestial bodies shows their movement on your image:
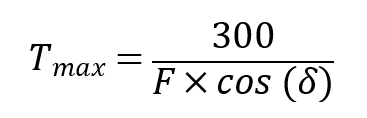
Here F is your lens focal length and should be insert in millimeters and ![]() is the declination* of part of sky you imaging. If you don't want to struggle with mathematics (which I don't recommend you at all), you can simply put 1 instead of cosine function.
is the declination* of part of sky you imaging. If you don't want to struggle with mathematics (which I don't recommend you at all), you can simply put 1 instead of cosine function.
* Declination is the angular distance north or south from the celestial equator measured along a great circle passing through the celestial poles.
As an example, if you select to use a normal lens (F=50mm) and you are taking a photo from big dipper constellation within 60 degree then cos 60 = 0.5 so your maximum allowable time exposure before the stars move would be:

By using this simple formula, we can calculate our shutter speed for untracked astro-imaging, then we should set the other two remaining factors of exposure triangle; Aperture and ISO. I personally prefer to use maximum apertures in high quality lenses like my Tokina opera 50mm F1.4 FF in case of comets, so the possibility to set ISO in lower values brings me higher dynamic range and lower noises. In any case, take test shots and examine the results before catching the final shot or the consequences of final images.
We are in the digital era and at this time I recommend you to capture several photos even for a single shot for dim objects at night like comets. Capturing a series of exposures has many advantages especially in the post processing step. You can increase the amount of signal versus noise when you have several frames and this is critical when you are limited to small exposures for the night sky.
Post processing
Post processing is the half of digital photography and astrophotography is not an exception. The limitations on Light gathering of dim celestial bodies usually leads to low signal images with lots of issues, so the post process is considered a must do.
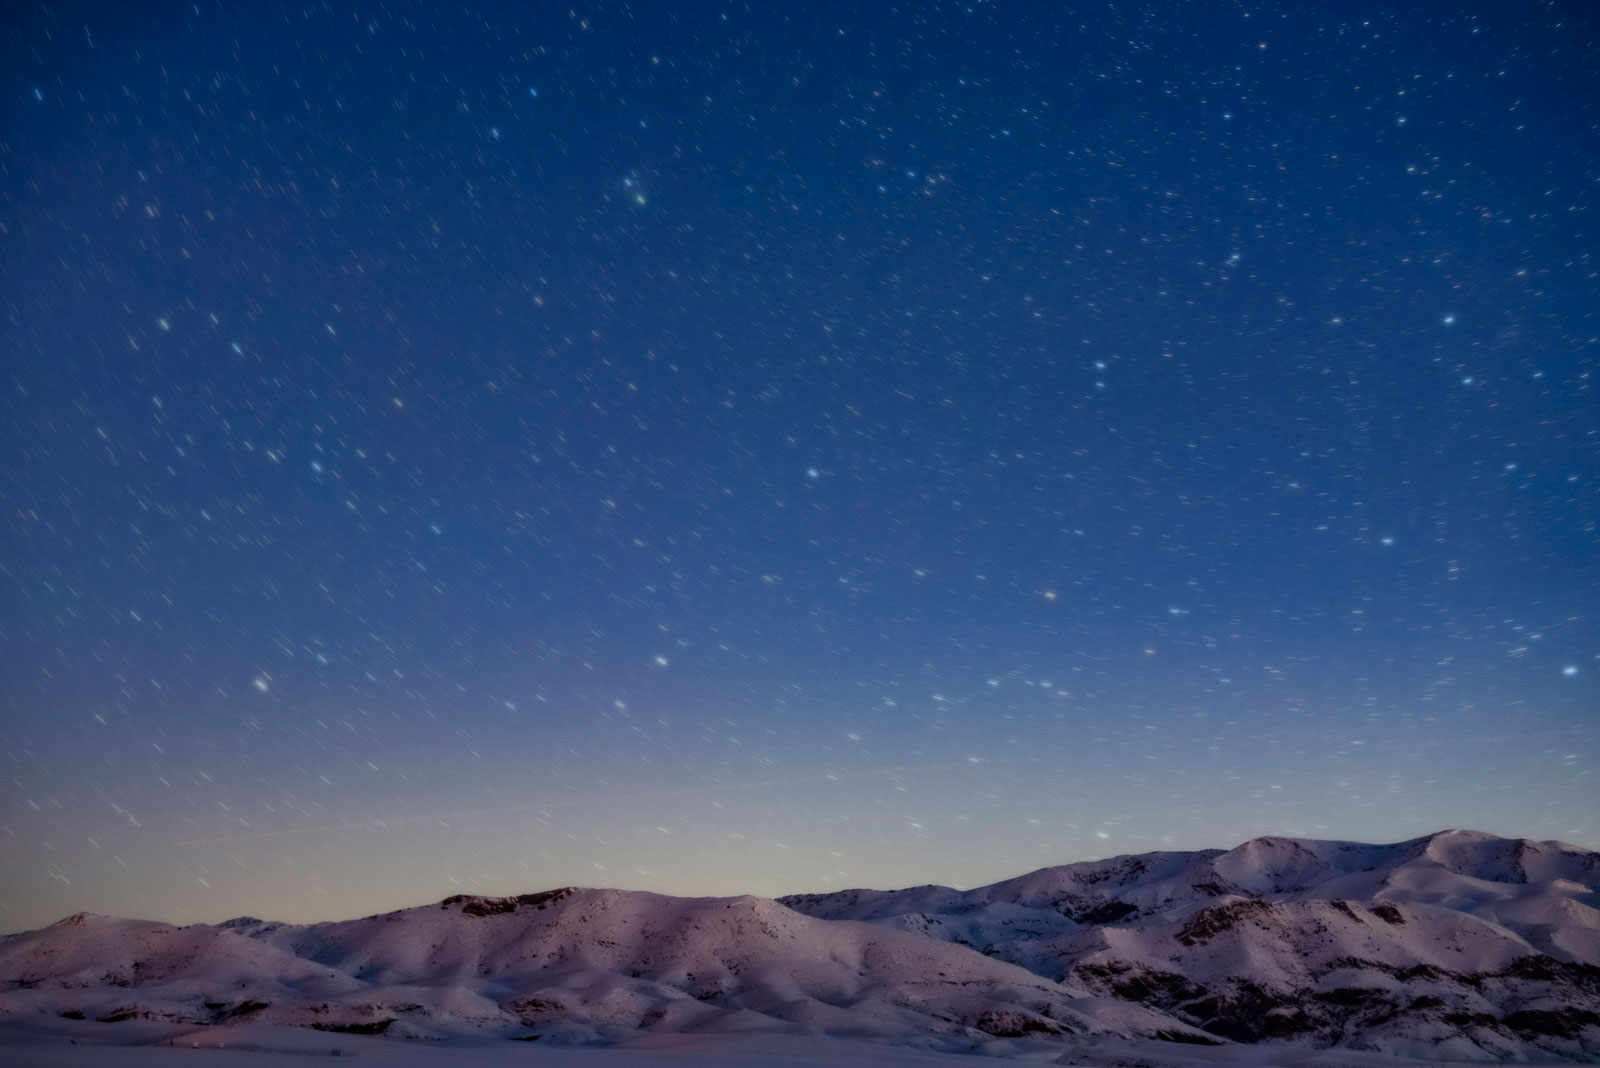
When we take short exposures of a comet and foreground as the output of fixed tripod technique, both celestial objects (the background sky) and the terrestrial ones (foreground) have a low ratio of signal to noise. Main trick in increasing the amount of signal to noise usually took place in two different stacking processes for each background and foreground separately, then adding results together for the final clean image.
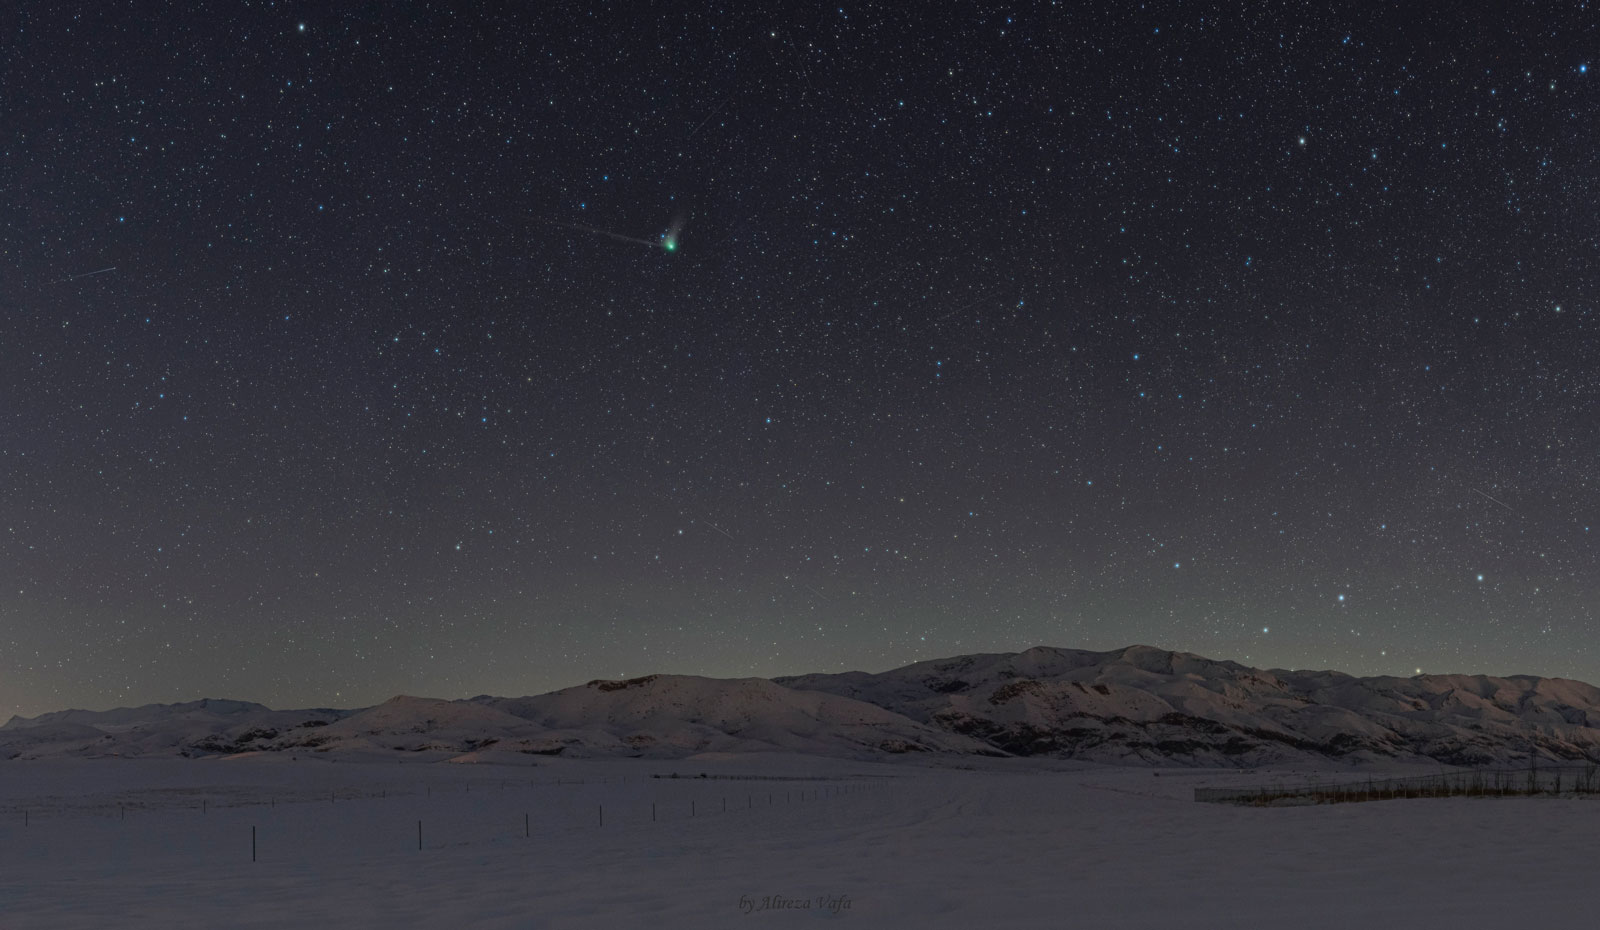
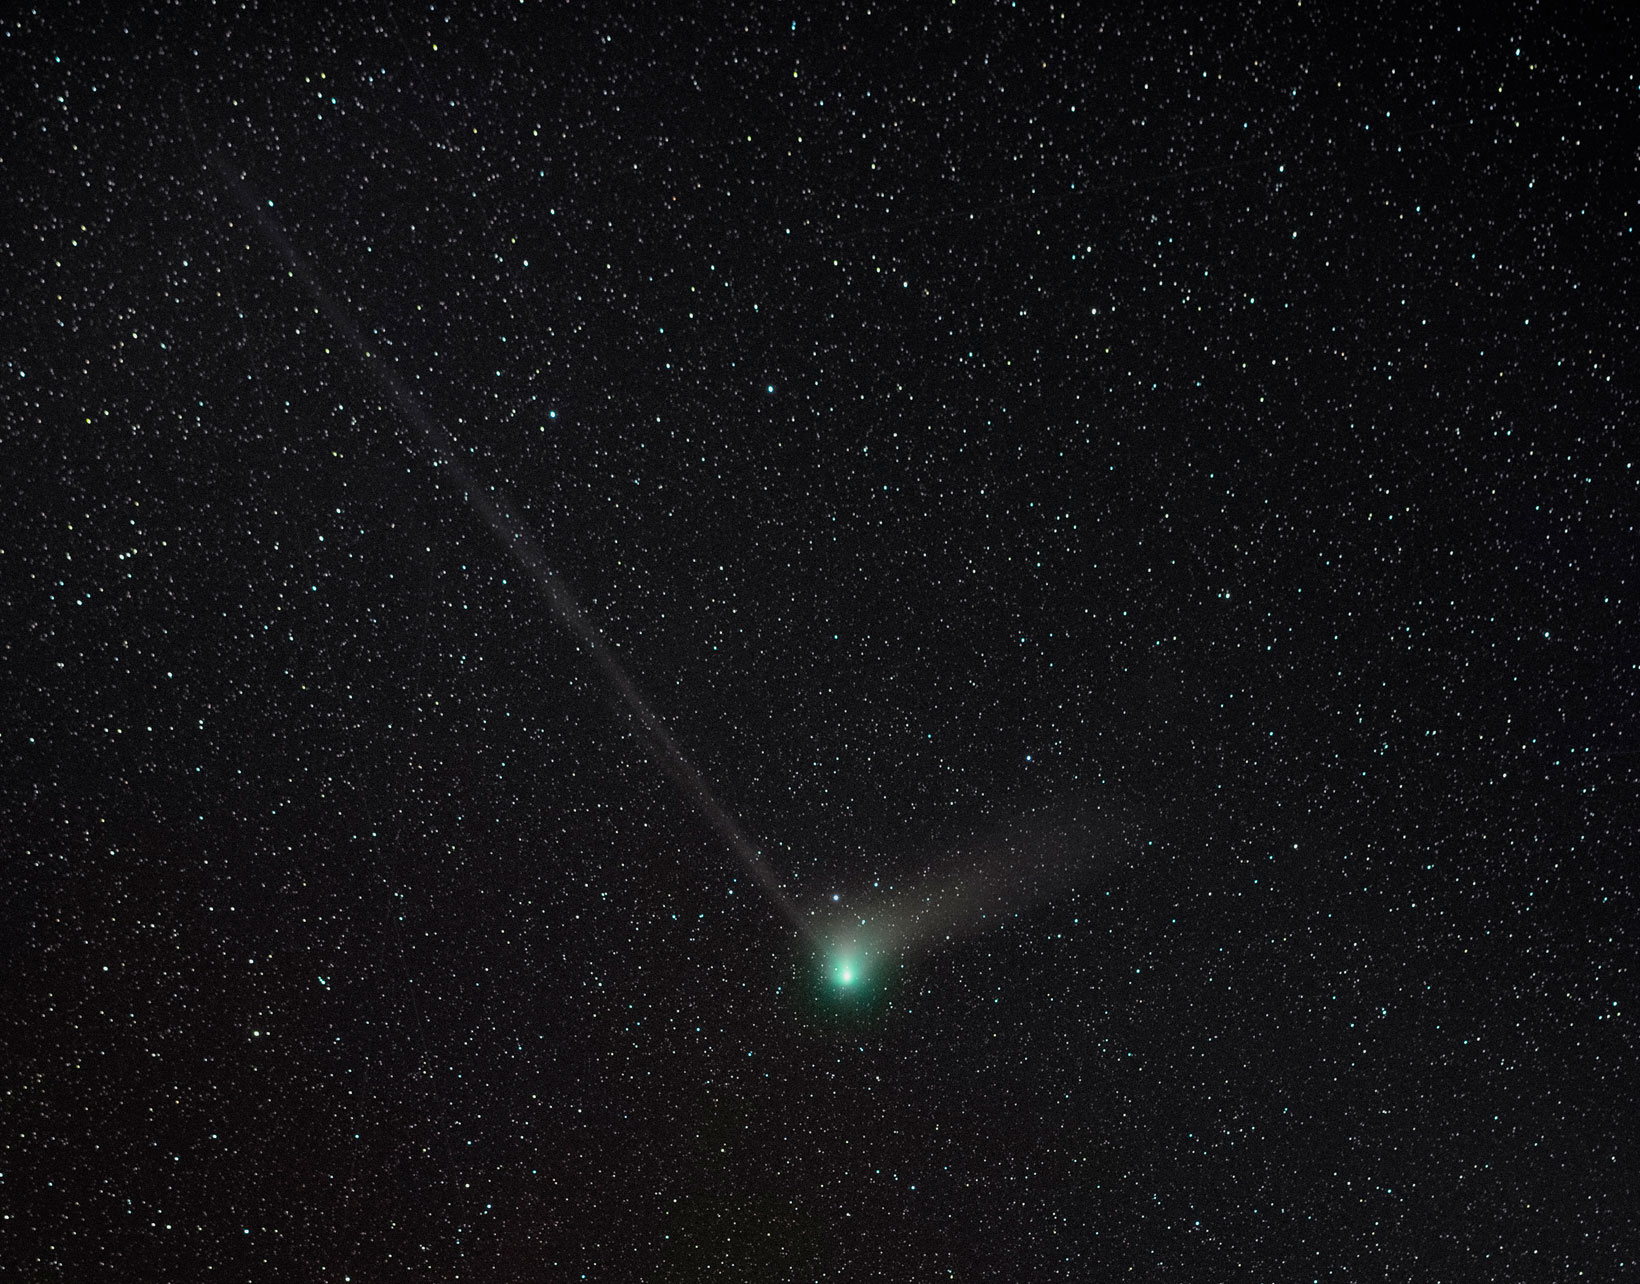
Let review the sequences of post processing steps on my recent green comet photo as follow;
I select 17 consecutive exposures to stack them in two different approaches. The reason for selecting this number relies on two facts. First the comet itself is moving in star backgrounds that will be shown if selecting larger numbers (means longer time), and the second important fact is that for the final combination of stacked stars and stacked foreground photos, the time difference should not be too much.
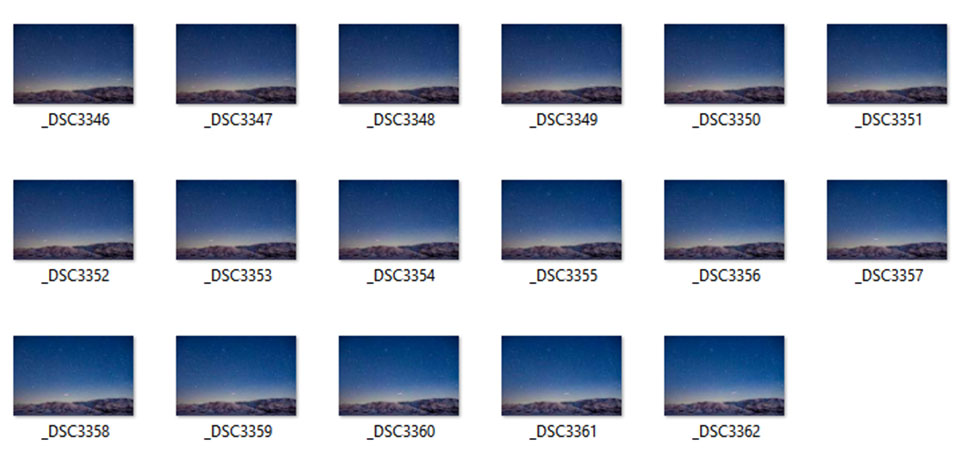
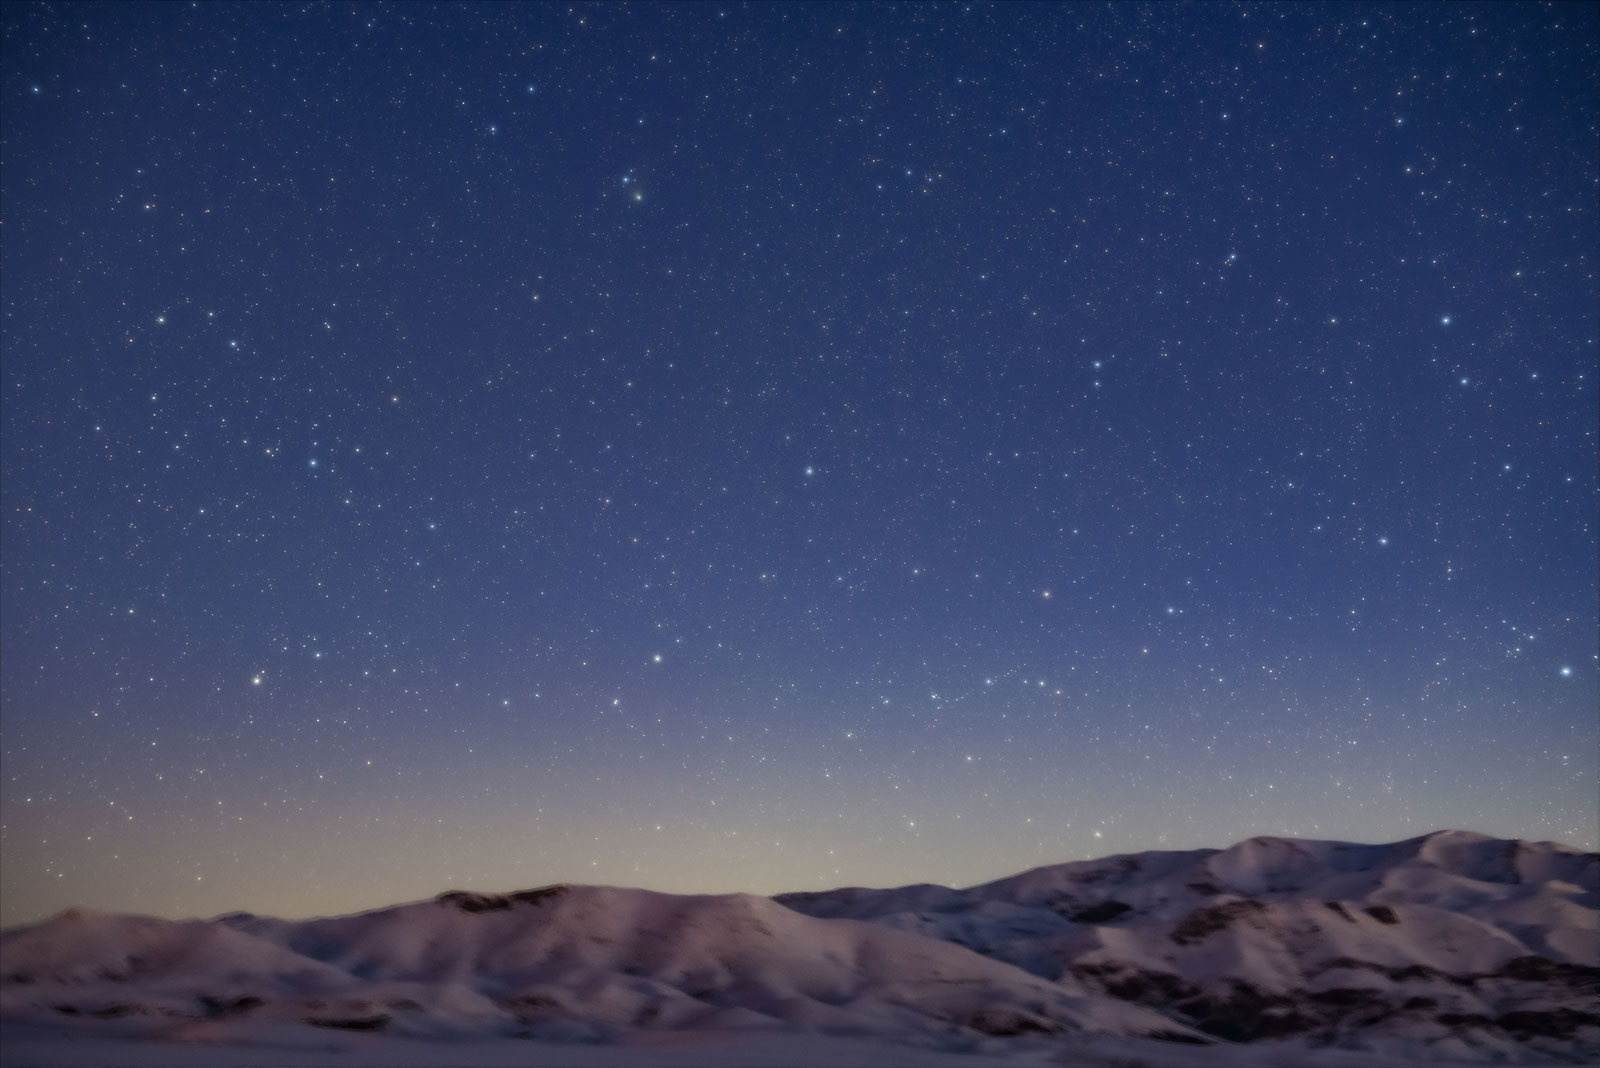
So first stacking the moving sky contains all stars, comet and other celestial objects together. They all should stack in the same positions above each other but of course in this arrangement the foreground which is rotated with respect to sky will not be at the same position. This process could easily be done in DeepSkyStacker (DSS). DSS is a freeware for astro-photographers that simplifies all the steps of registering and stacking very easily. You can download it from this link.
Now it is time to stack different sequences of exposures with foreground in focus. This process could easily be done in general post processing software like Adobe Photoshop. You can find the steps at this link in Adobe website.
Now it's time to stack the enhanced night sky image with the enhanced foreground image to produce the final image. Here the tricks are different based on the type of horizon and foreground subjects profile but all based on aligning the foreground image in a layer below the blurred image and managing to eliminate the blur part in a natural way. Let me leave this part to your own creativity and of course some googling.
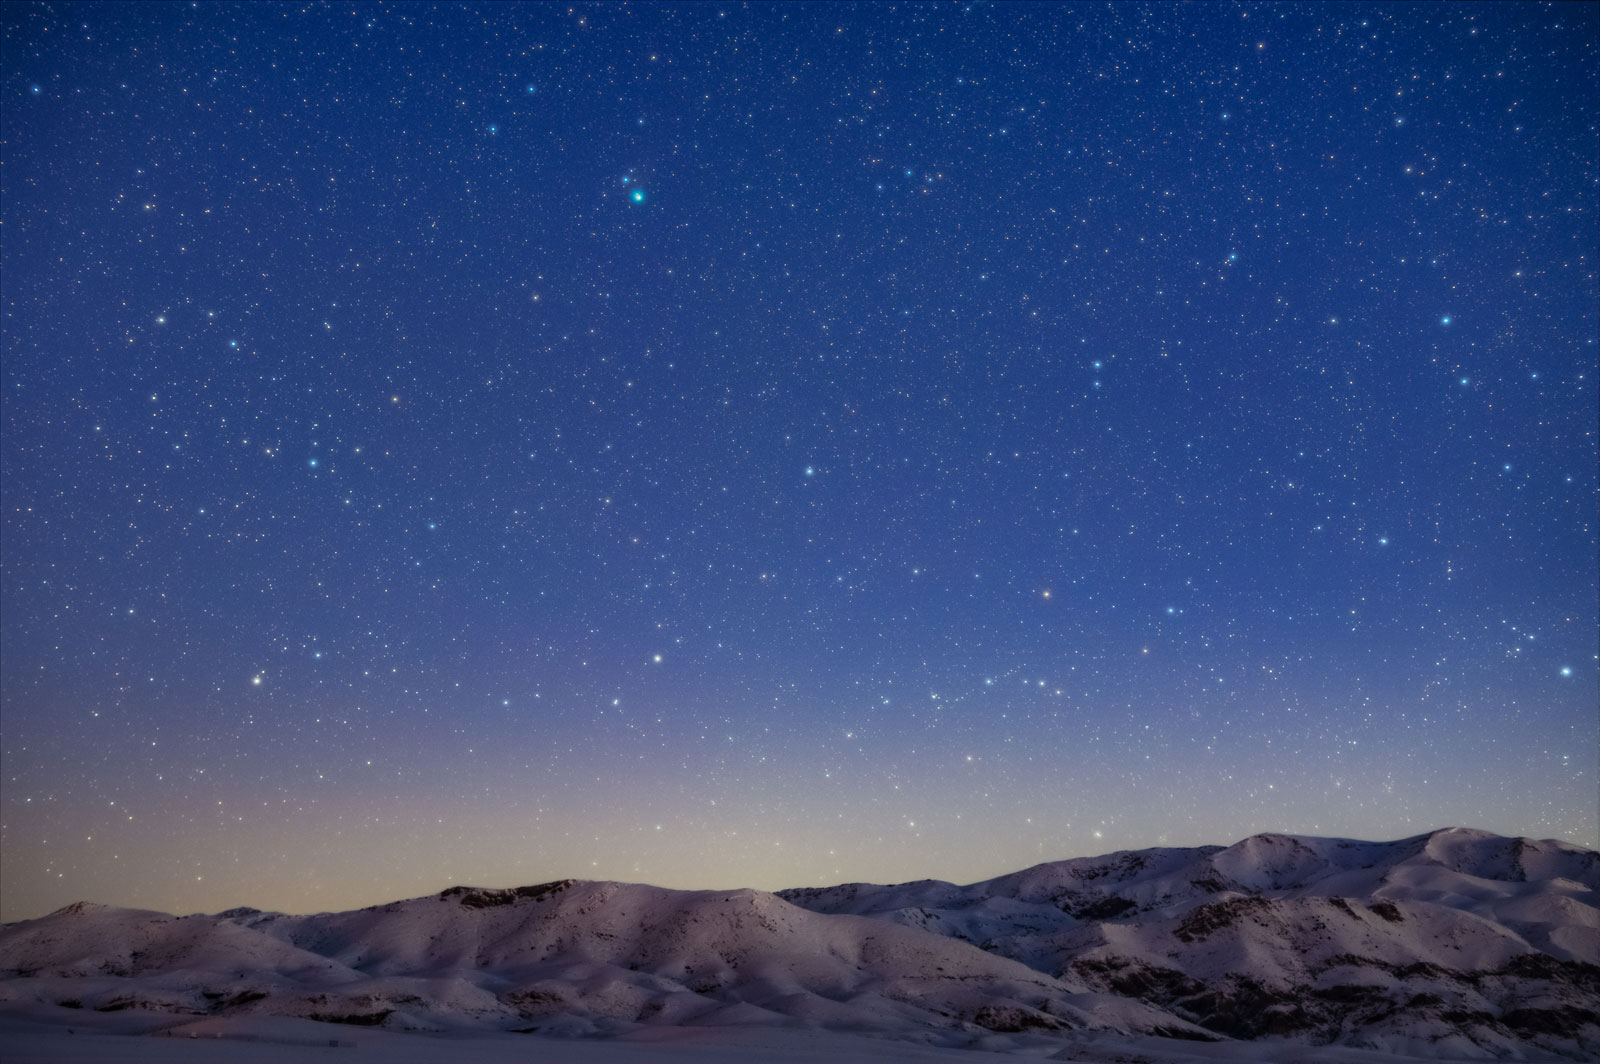
The final image now produced, with both the sky and ground with lots of details and enhanced in quality. It is a real joy to have a quality photo of a comet with this thrilling joy frozen forever in the photo.
Let me emphasize the potentials of consequential imaging again. This approach has advantages both in enhancing the quality of the image in addition to the possibility to process consecutive images as a time-lapse video.