Introduction to Image Averaging
As photographers, we all know about different techniques well used in day-to-day photography: HDR, panoramas, focus stacking and long exposure. There is though a technique that despite not being new is less known and used, one can improve our shootings and help us in some tricky situations. So let's talk about Image Averaging.
What is Image Averaging?
Image Averaging involves stacking multiple photos taken from a fixed position with identical settings and using a software such as Photoshop to average the pixels and increase the information taken from each image to reduce noise and simulate longer shutter speeds.
Advantages and disadvantages of Image Averaging over a traditional long exposure by ND filters.
Disadvantages of using ND filters:
- Expensive ND filters.
- Usually have a color cast.
- In daylight, you need a very dark ND filter.
- Thermal noise that might appear in very long exposures as your sensor grow warmer.
- We have to be careful about light leaks due to misalignment of the filter or poor construction or defects of the filter holder.
- All the filters and adapters take a lot of space including the protection much needed for such fragile and expensive glass.
- You can't stop a long exposure to make adjustments while in a middle of the process, especially in critical situations such as sunsets.
- You will need to retake the whole shot if you bump the camera during the long exposure or someone or something is suddenly obstructing the camera.
Advantages of Image Averaging:
- An alternative way if ND filters not fit your budget range.
- If the surface is unstable due to sudden moves, or strong wind makes a long exposure almost impossible, then by taking multiple shots rather than a single long one we can filter the ones we don't need and use the others.
- You can watch, refocus, or change settings as you go.
- You can introduce elements that in traditional time-lapse need to be as stable as possible.
- No more bulky equipment.
- Use the images taken with this method for a time-lapse.
Disadvantages of Image Averaging:
- The major disadvantage of this technique is the number of pictures required.
- Huge storage space.
- Depending on the number of pictures you need a good PC or Laptop.

A much more viable alternative to HDR where movement can create unpleasant ghosting.
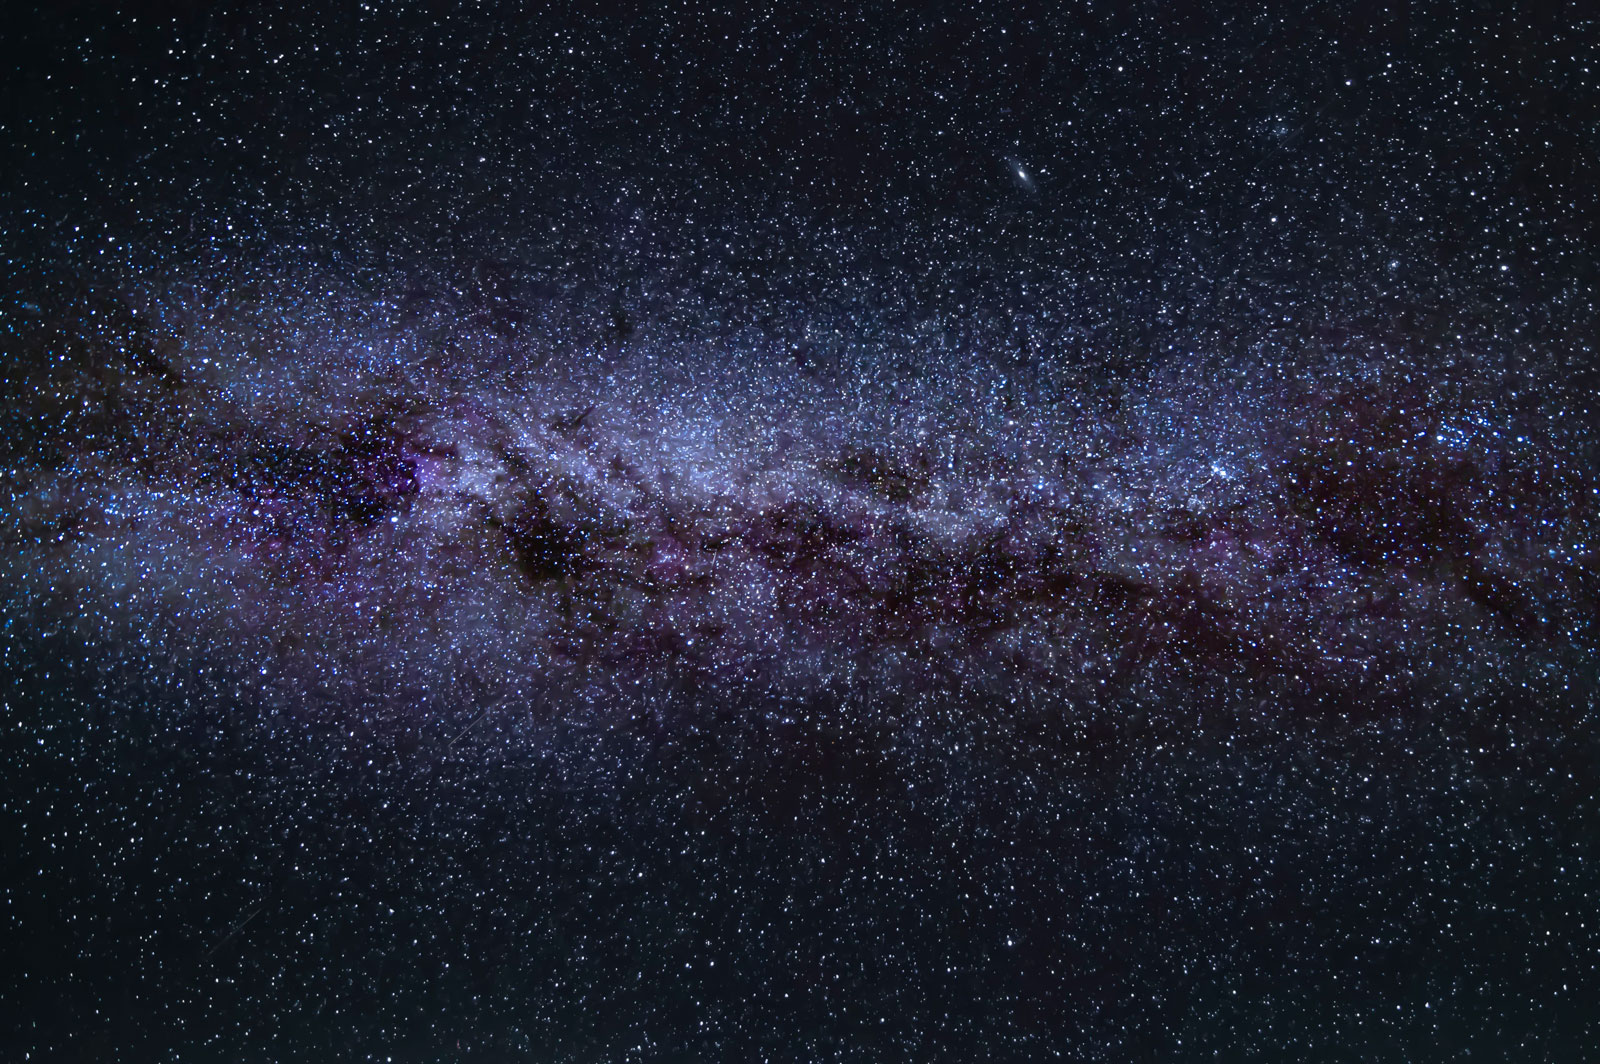
Astrophotography
Probably this branch of photography is the most familiar with this technique. To get the amazing details of the Milky Way, various constellations or especially the deep-sky subjects, you need an equatorial mount so your camera to be able to keep the subject in the sky in a perfect motion in sync with the rotation of the Earth. The series of long exposures taken then need to be processed later through software such as Sequator, DeepSkyStacker, SIRIL etc.
The downside is that this equipment is quite expensive, heavy and not very "friendly" to beginners. A lot of us use the 500 rule to calculate the maximum exposure time at which the stars will appear in the photo as points. If you are using a full-frame DSLR, you divide 500 by the focal length in seconds. If you are using a crop sensor camera, you divide by the crop factor.
But I try to travel light and thus had to find alternatives for getting high-quality results. I found that for me instead of a 500 rule it's rather an NPF Rule (N = aperture, P = pixel density, the distance between the pixels on the sensor, also called pixel pitch, F = focal length) so using the Image Averaging technique we can get some more basic detailed astro images than we could get with a single exposure and we can get over the risk of getting a star trail when we don't want to, and get rid of the ISO and thermal noise.
How to make an Image Averaging
I strongly recommend using a tripod or a very stable surface. It can be done by hand, but the results often leave something to be desired.
Combine with an ND filter, Variable filter or C-PL filter or ND and C-PL.
Using the Lightroom and Photoshop follow these steps by selecting either all photos or just a few of them then in the Library or Develop module, Choose Photo> Edit In> Open As Layers In Photoshop.
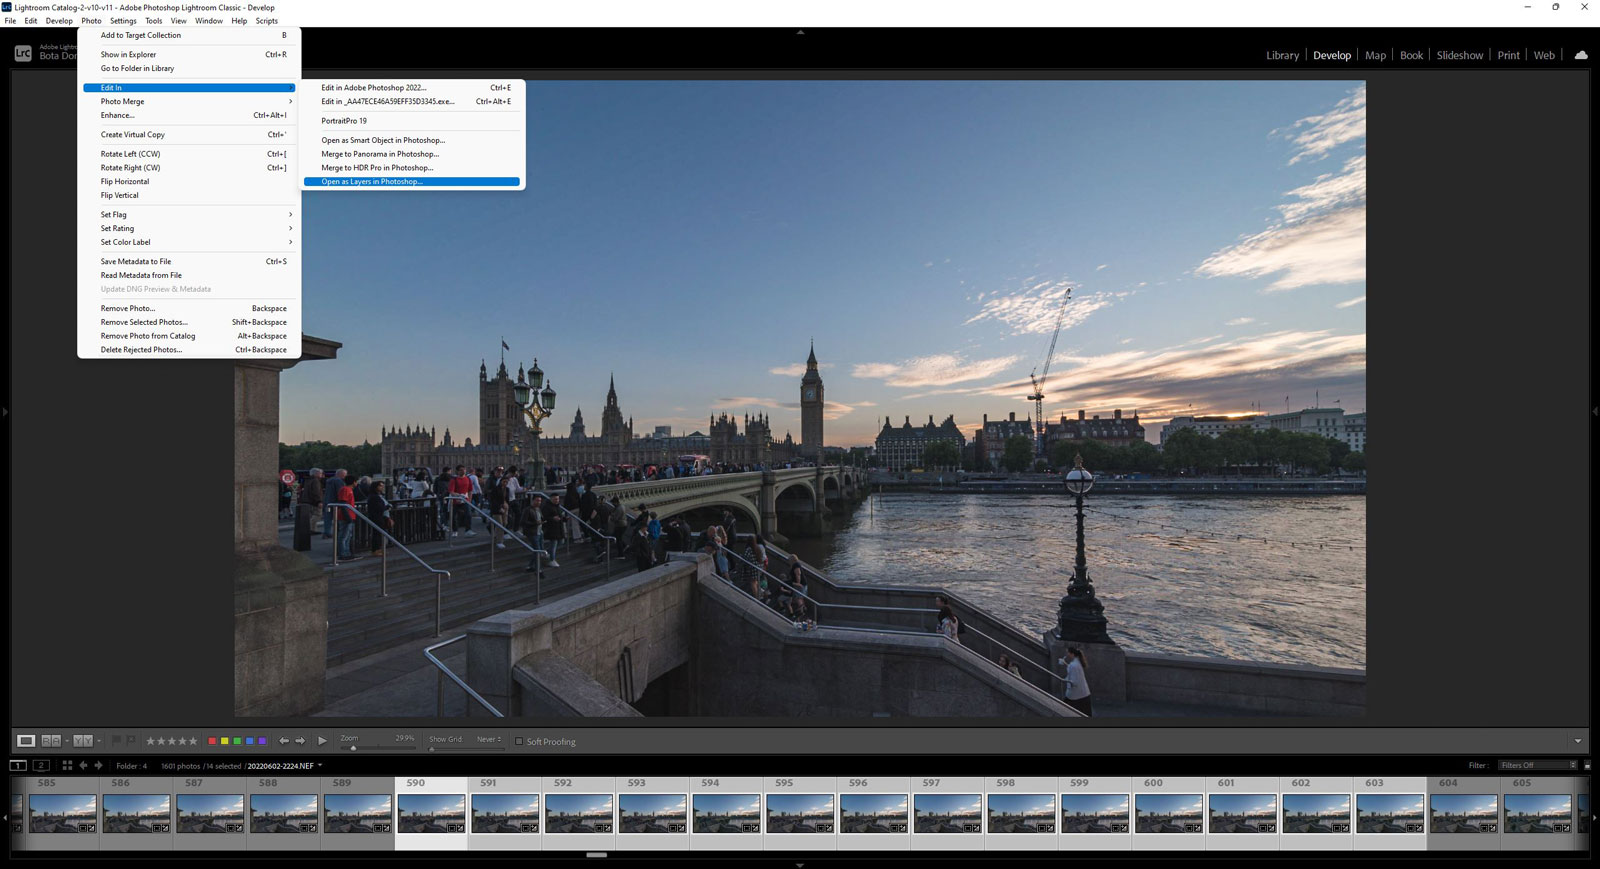
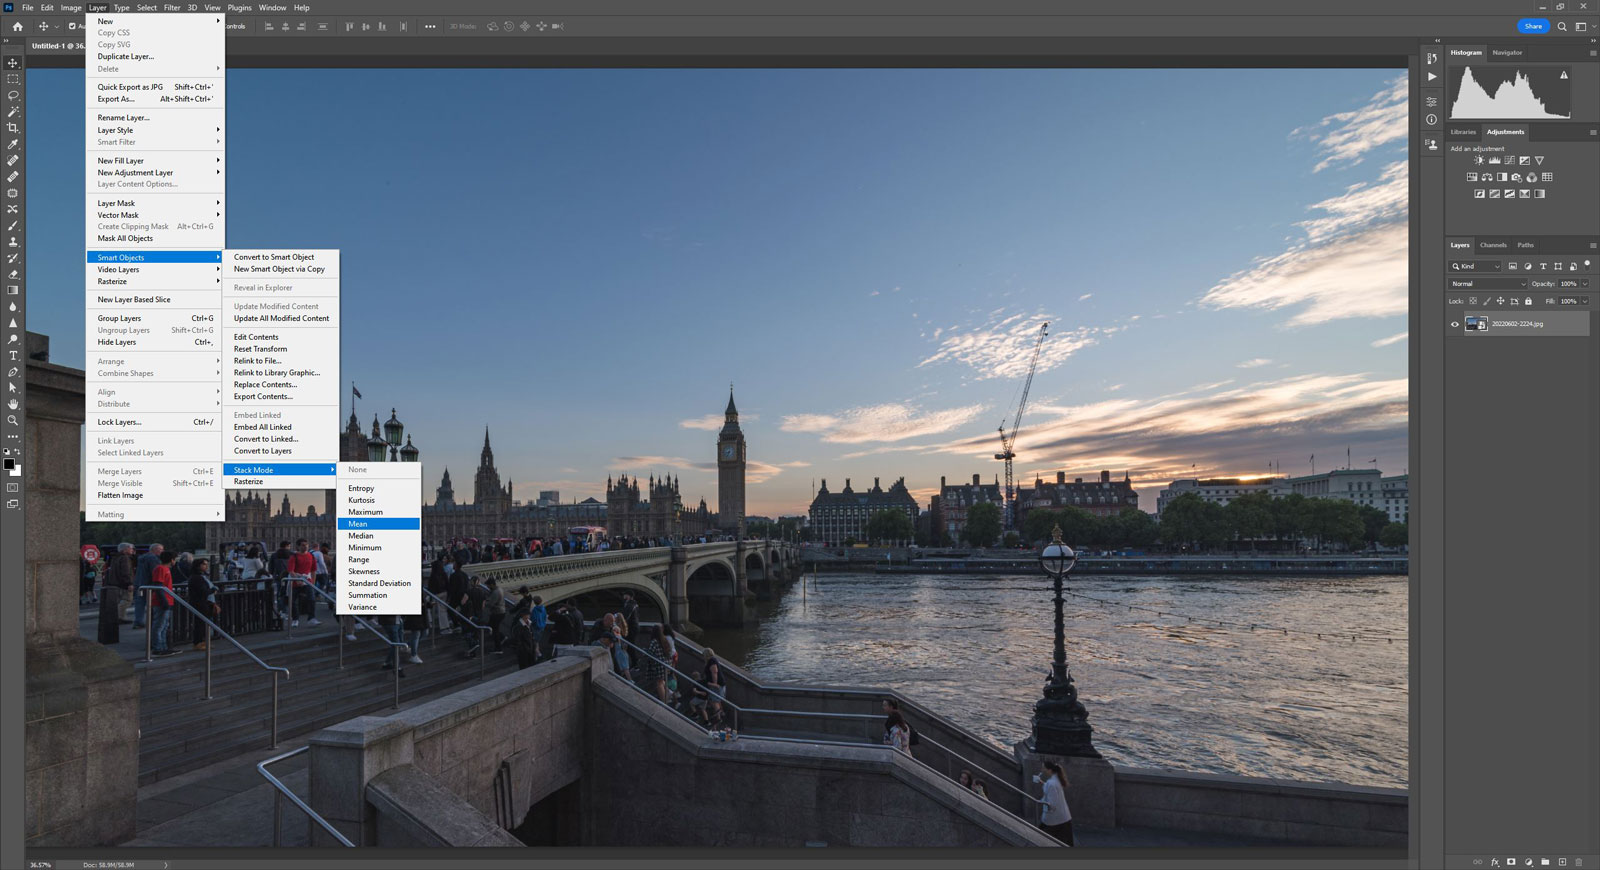
In Photoshop go to top menu > Layer > Smart Objects > Stack Mode > Mean.

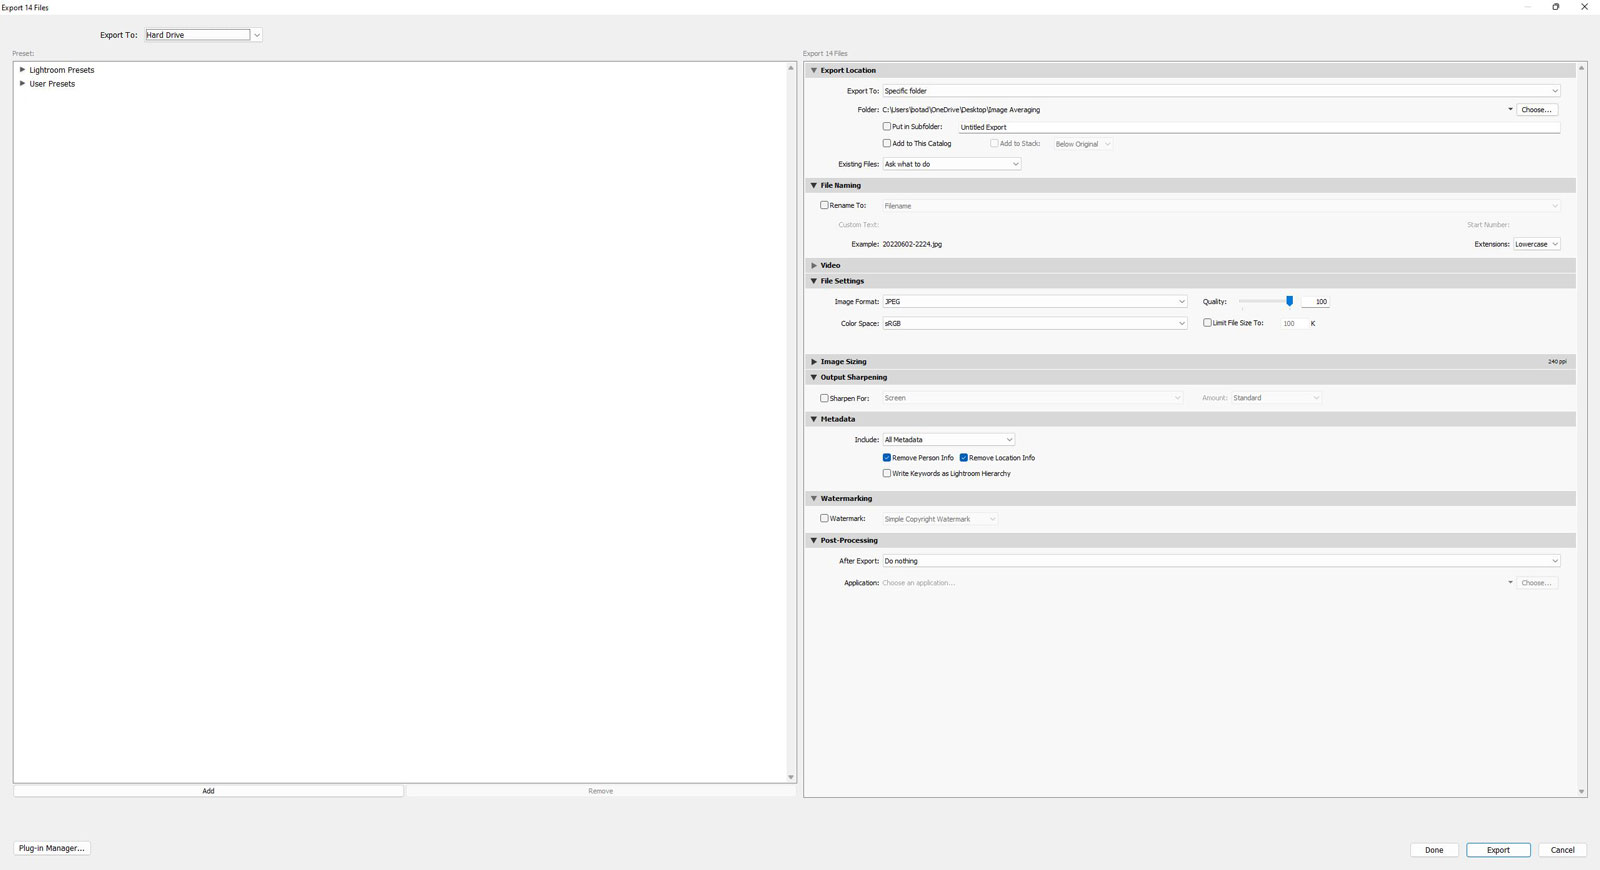
The second method lies in Lightroom selecting either all photos or just a few of them then in the Library > Export > and Choose either JPG or TIF
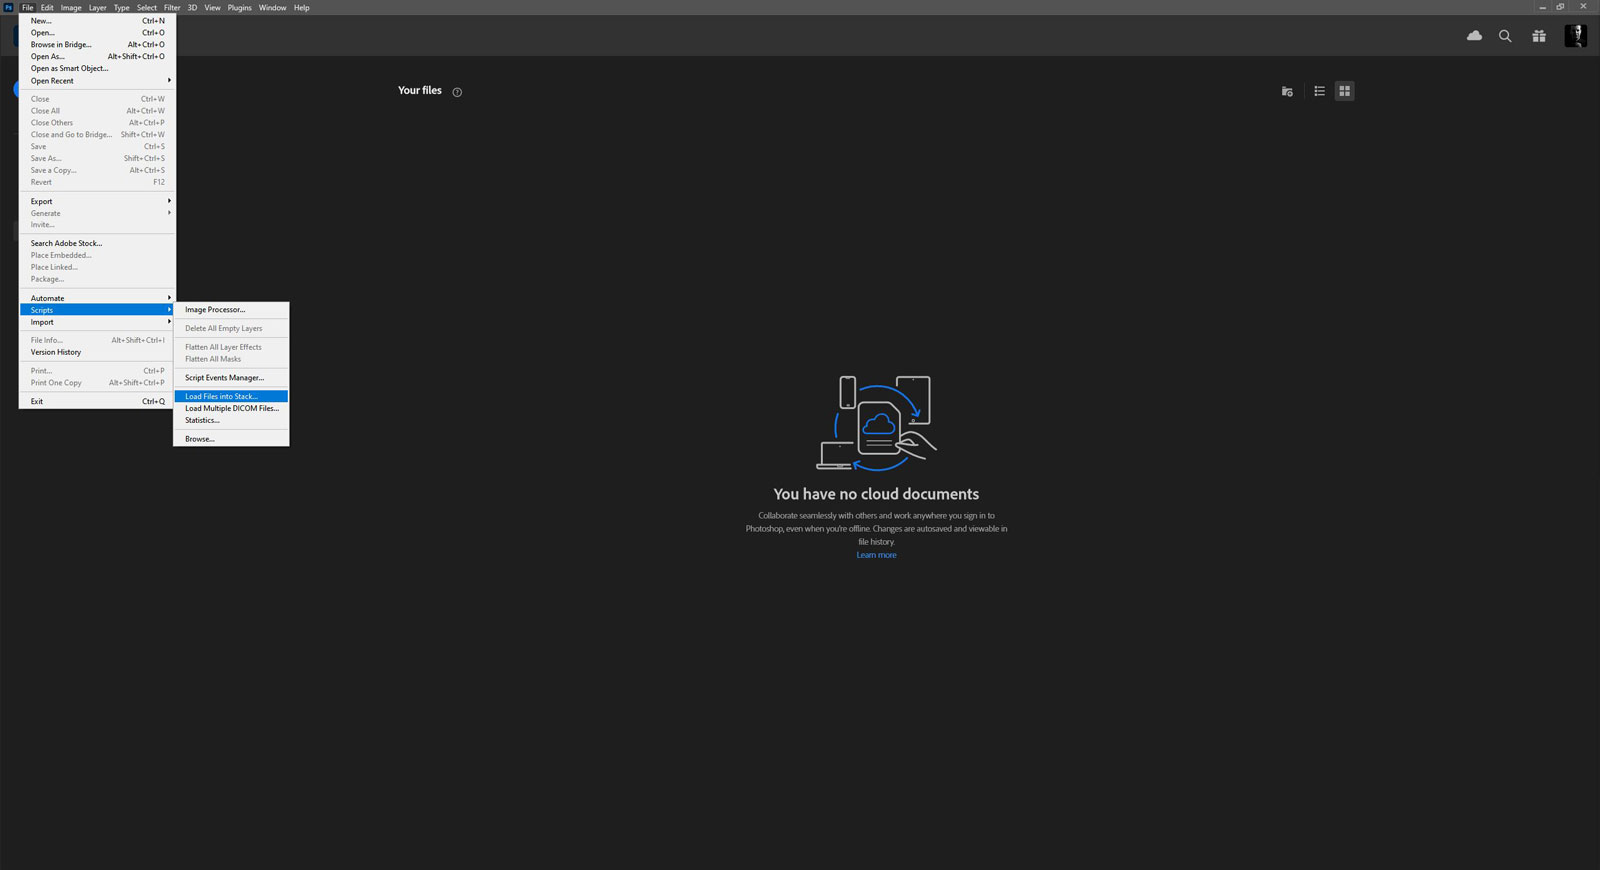
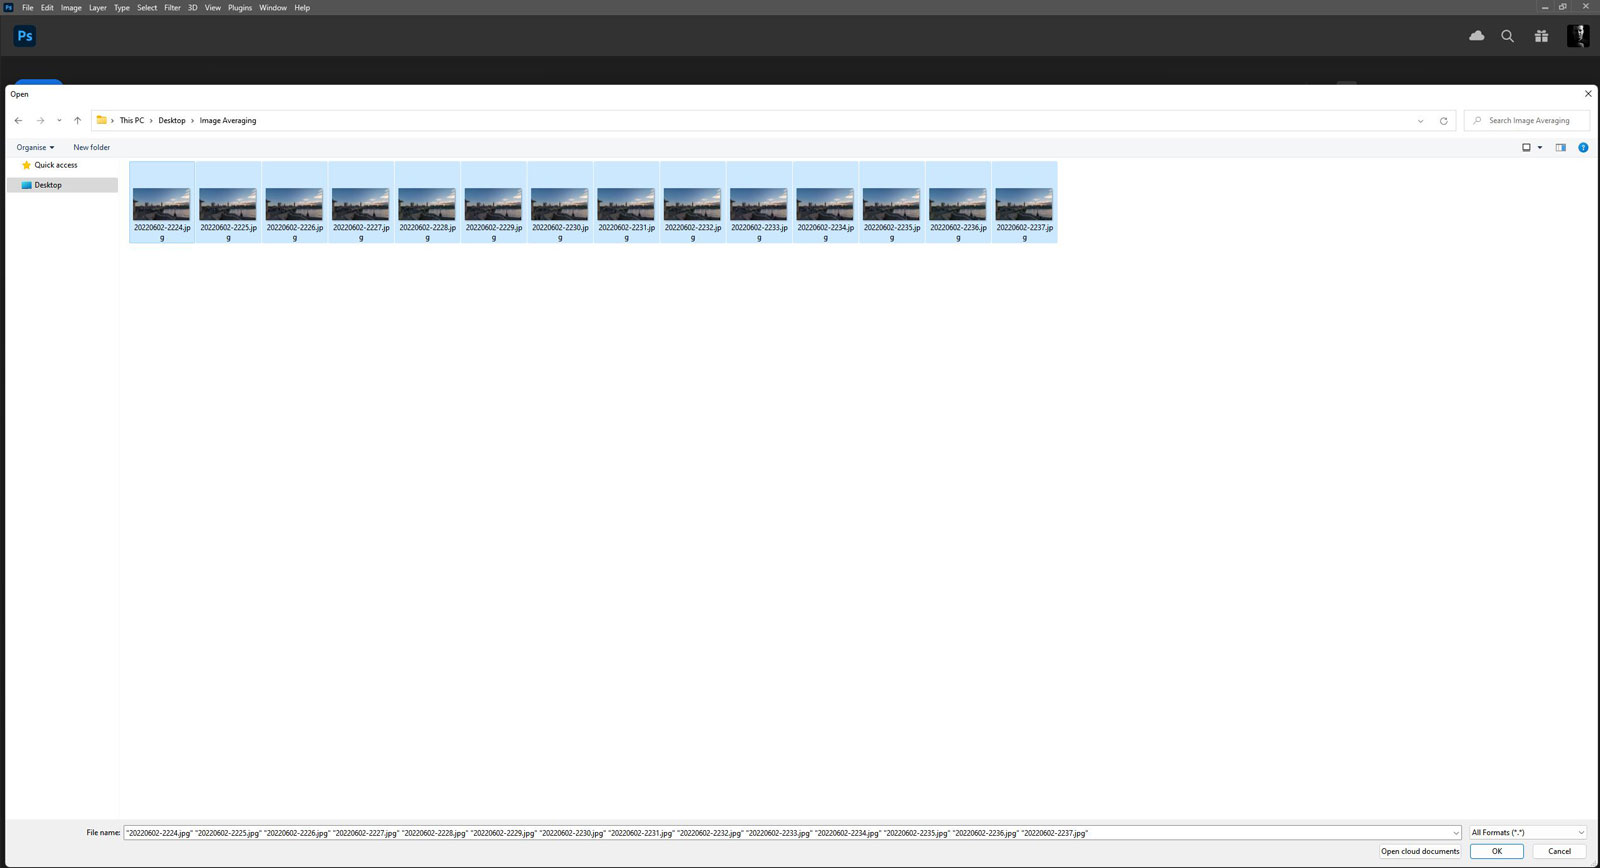
In Photoshop File>Script> Load files into stack (chose create smart layer after loading layers) now chose all the layers in Photoshop go to top menu > Layer > Smart Objects > Stack Mode > Mean.
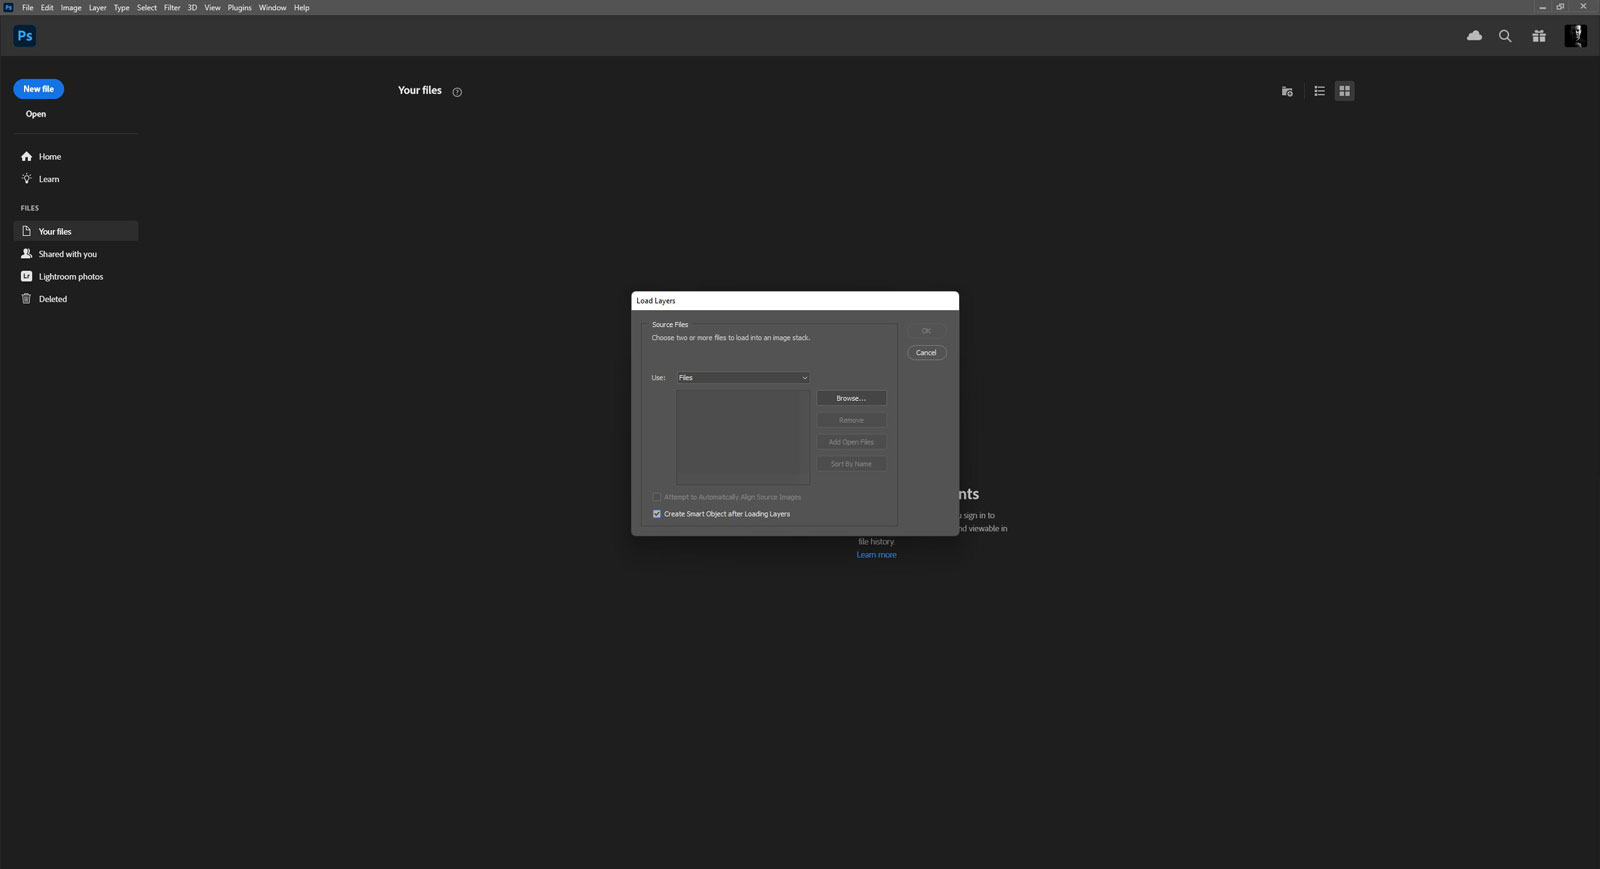
Select photos > OK.
Convert to Smart Object.
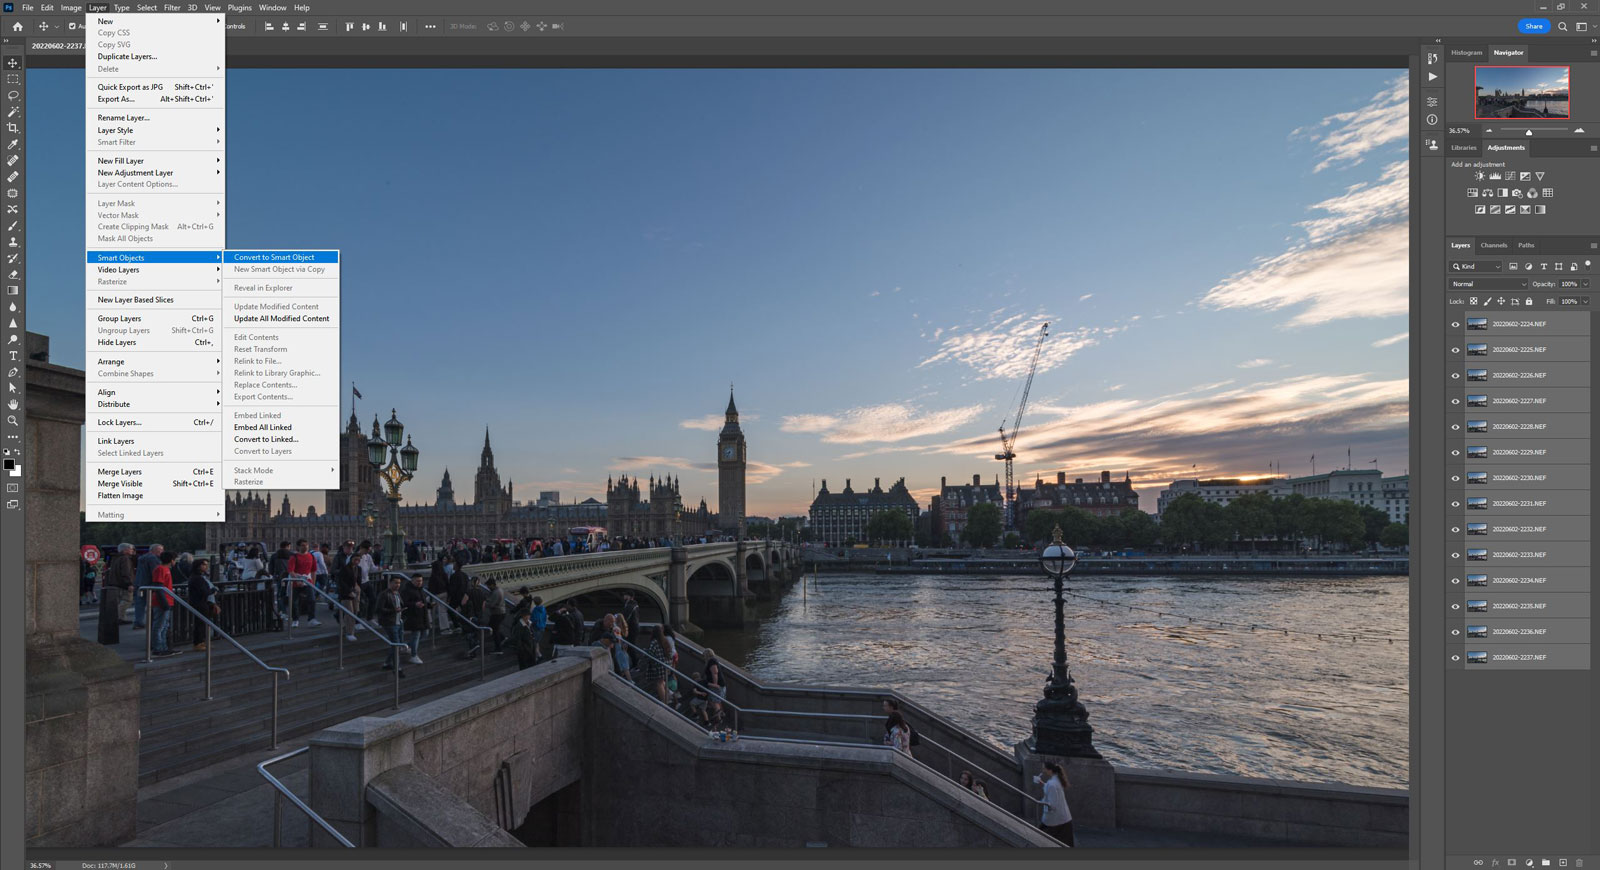
Layer > Smart Objects > Stack Mode > Mean.
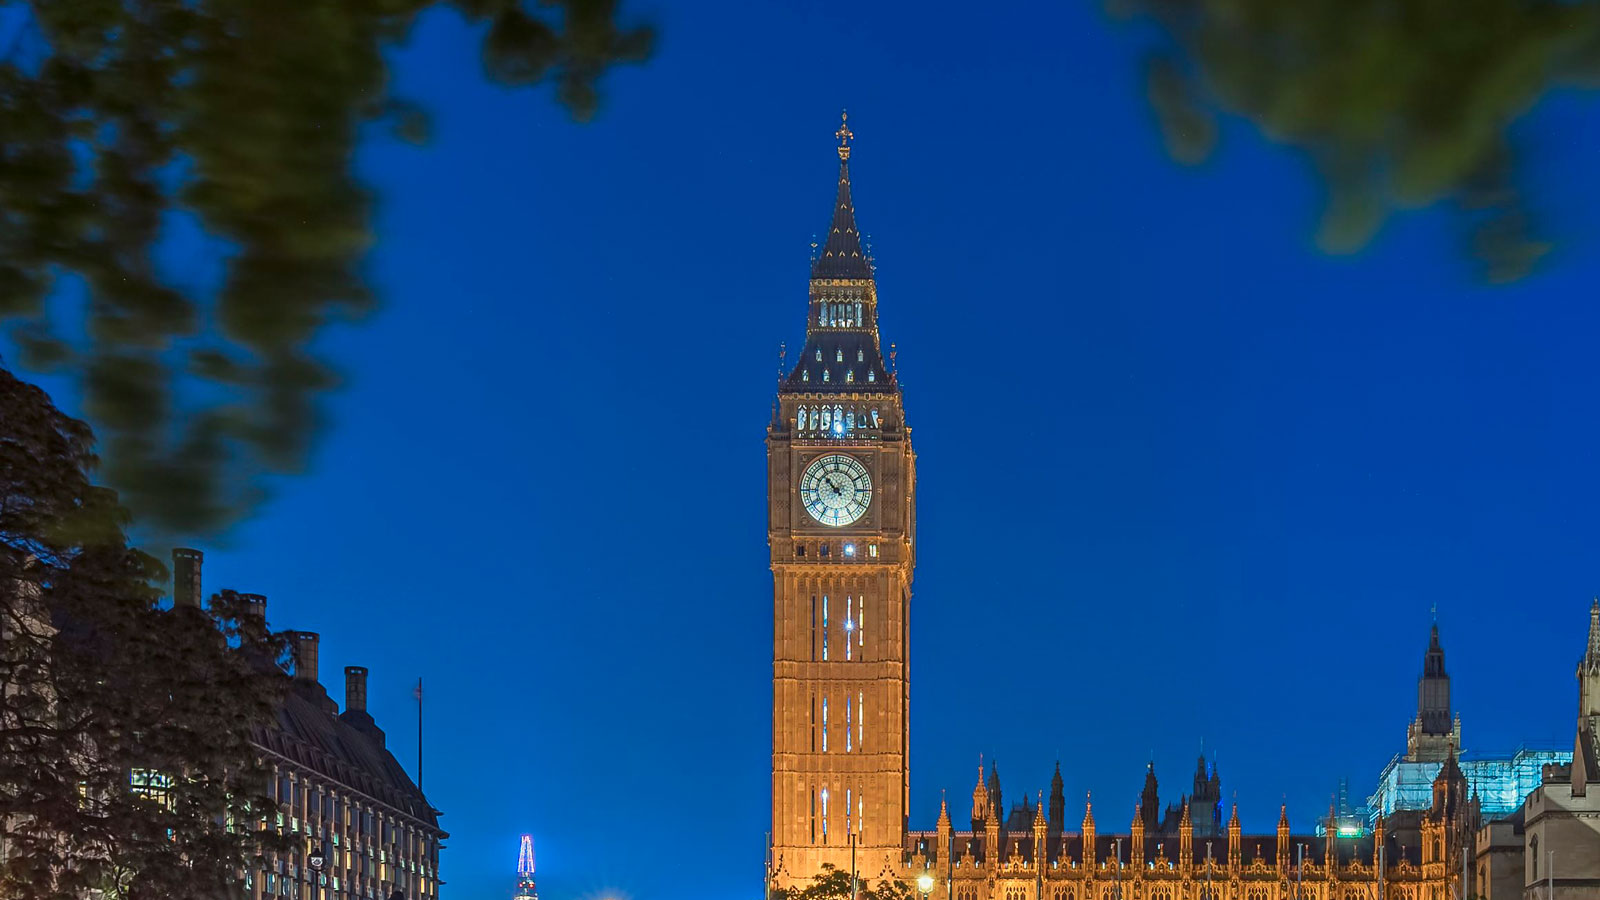
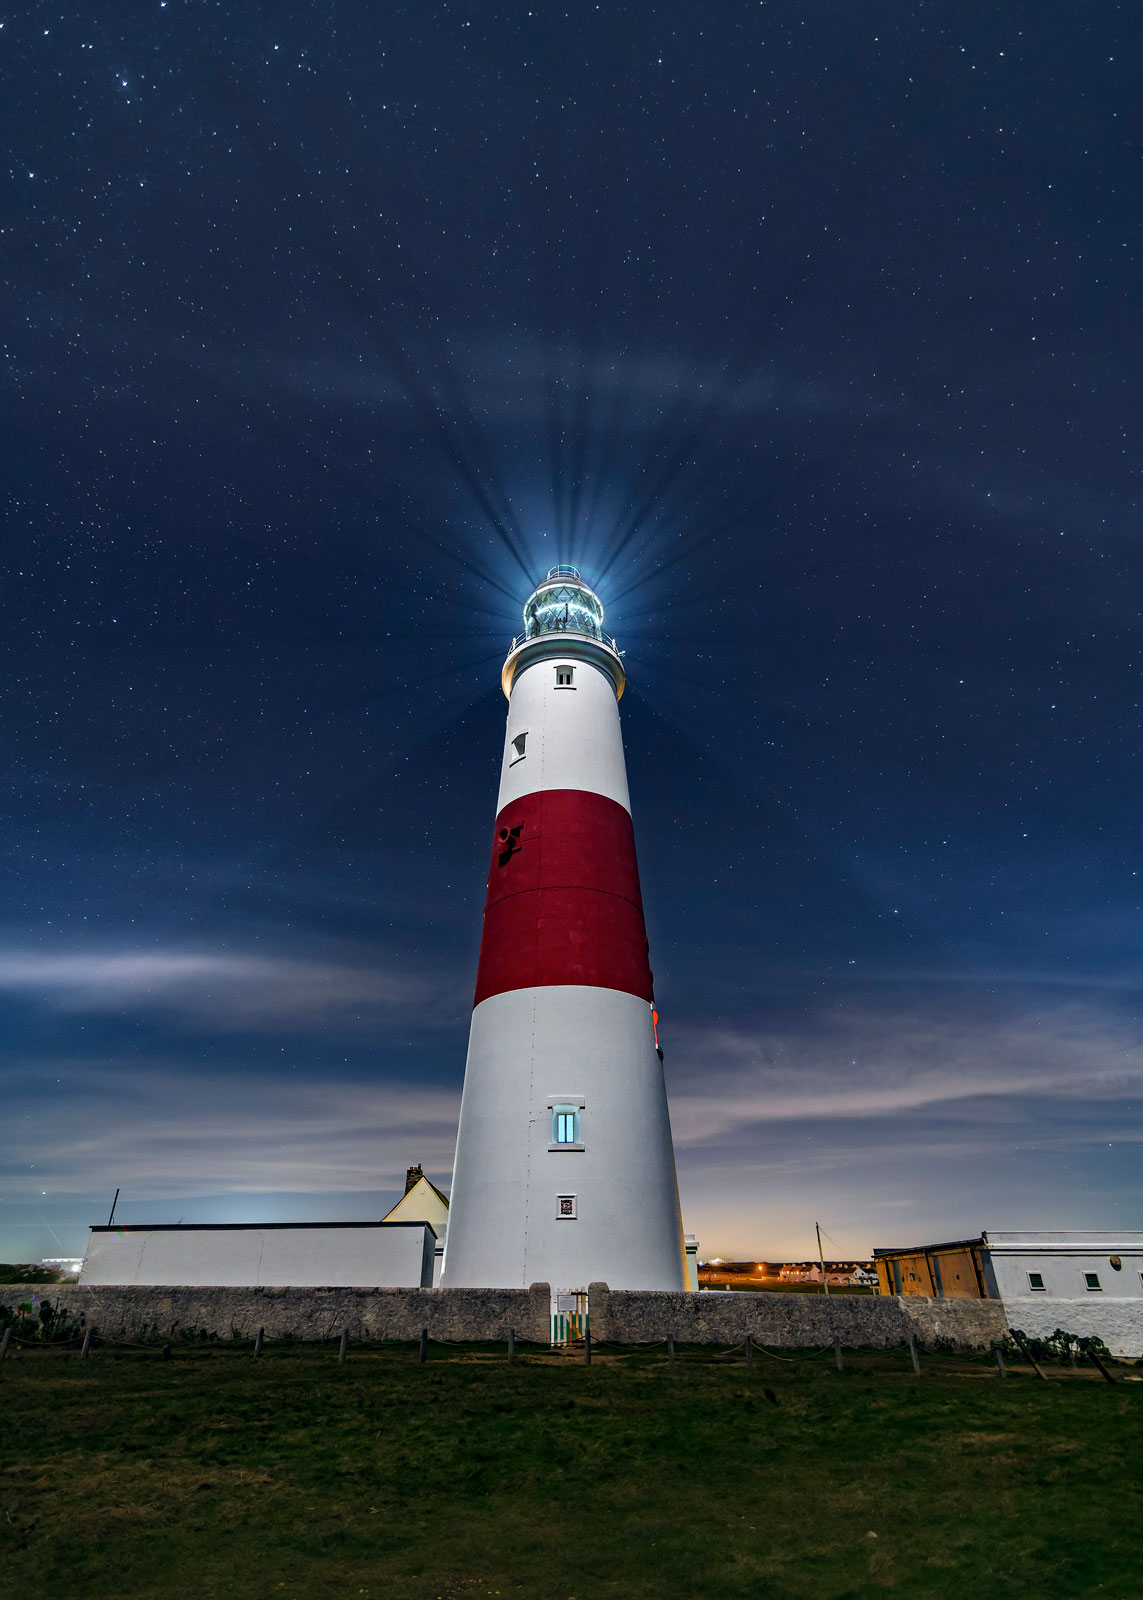
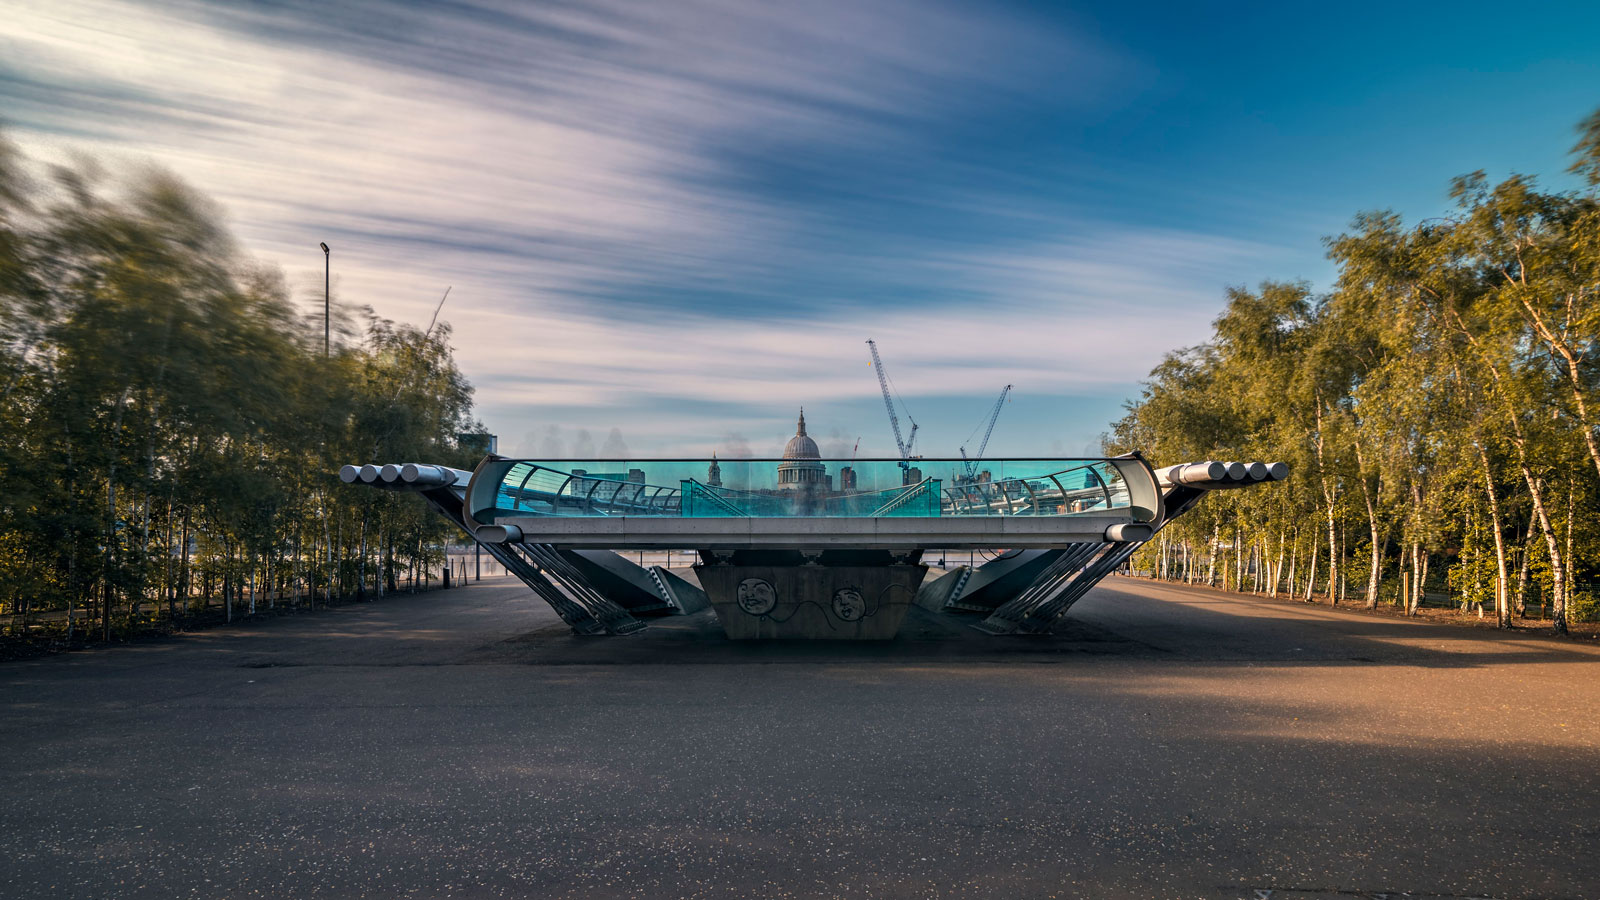
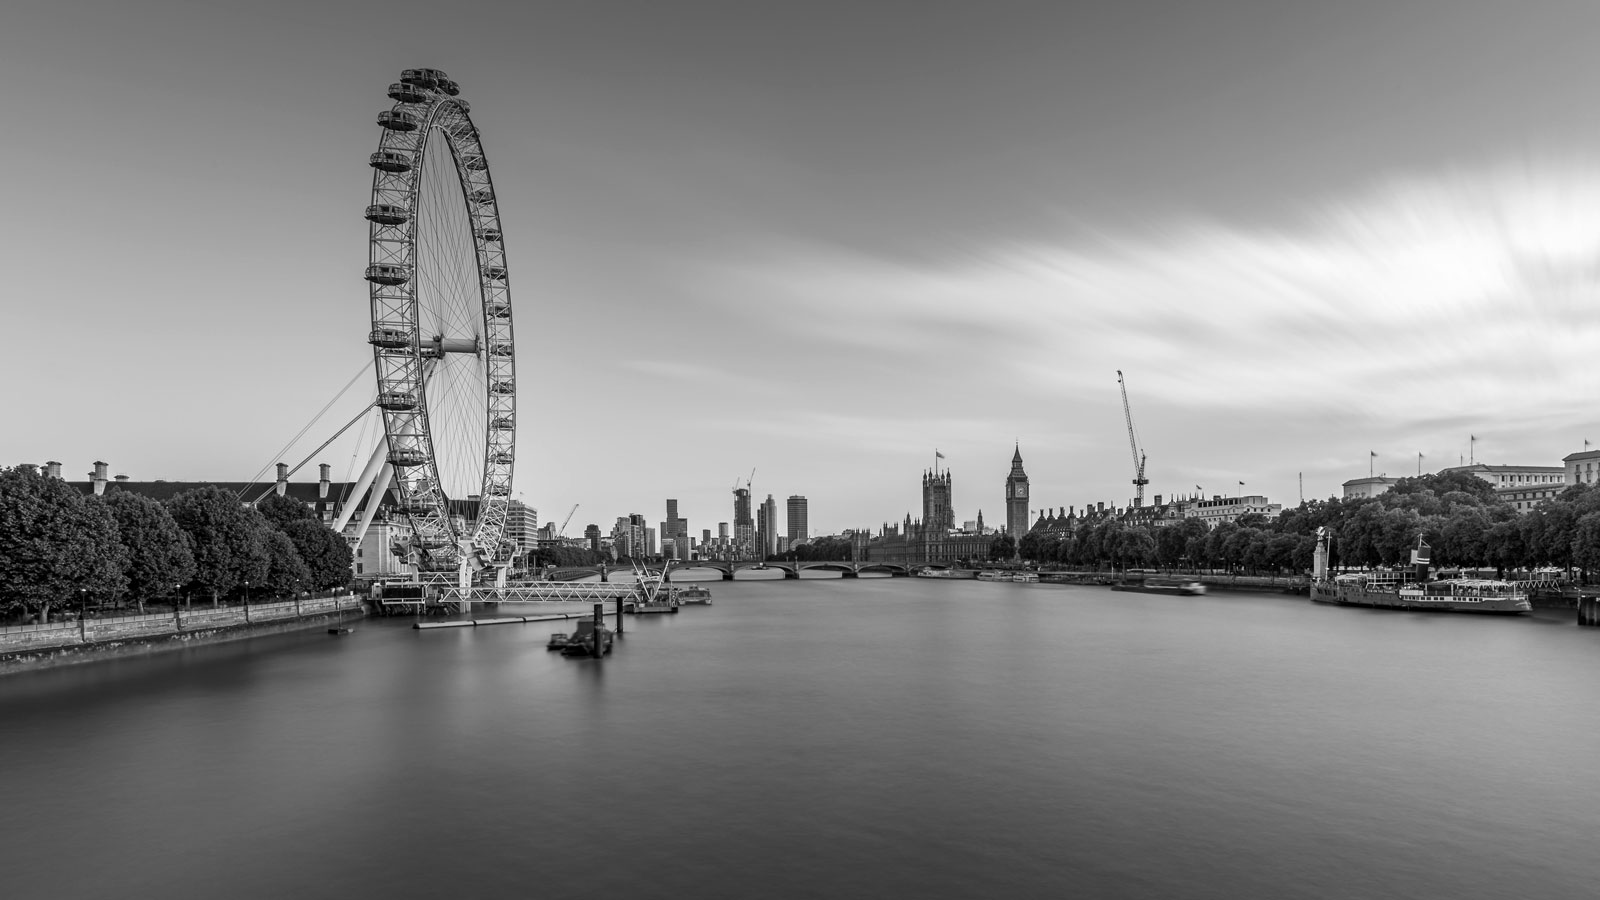
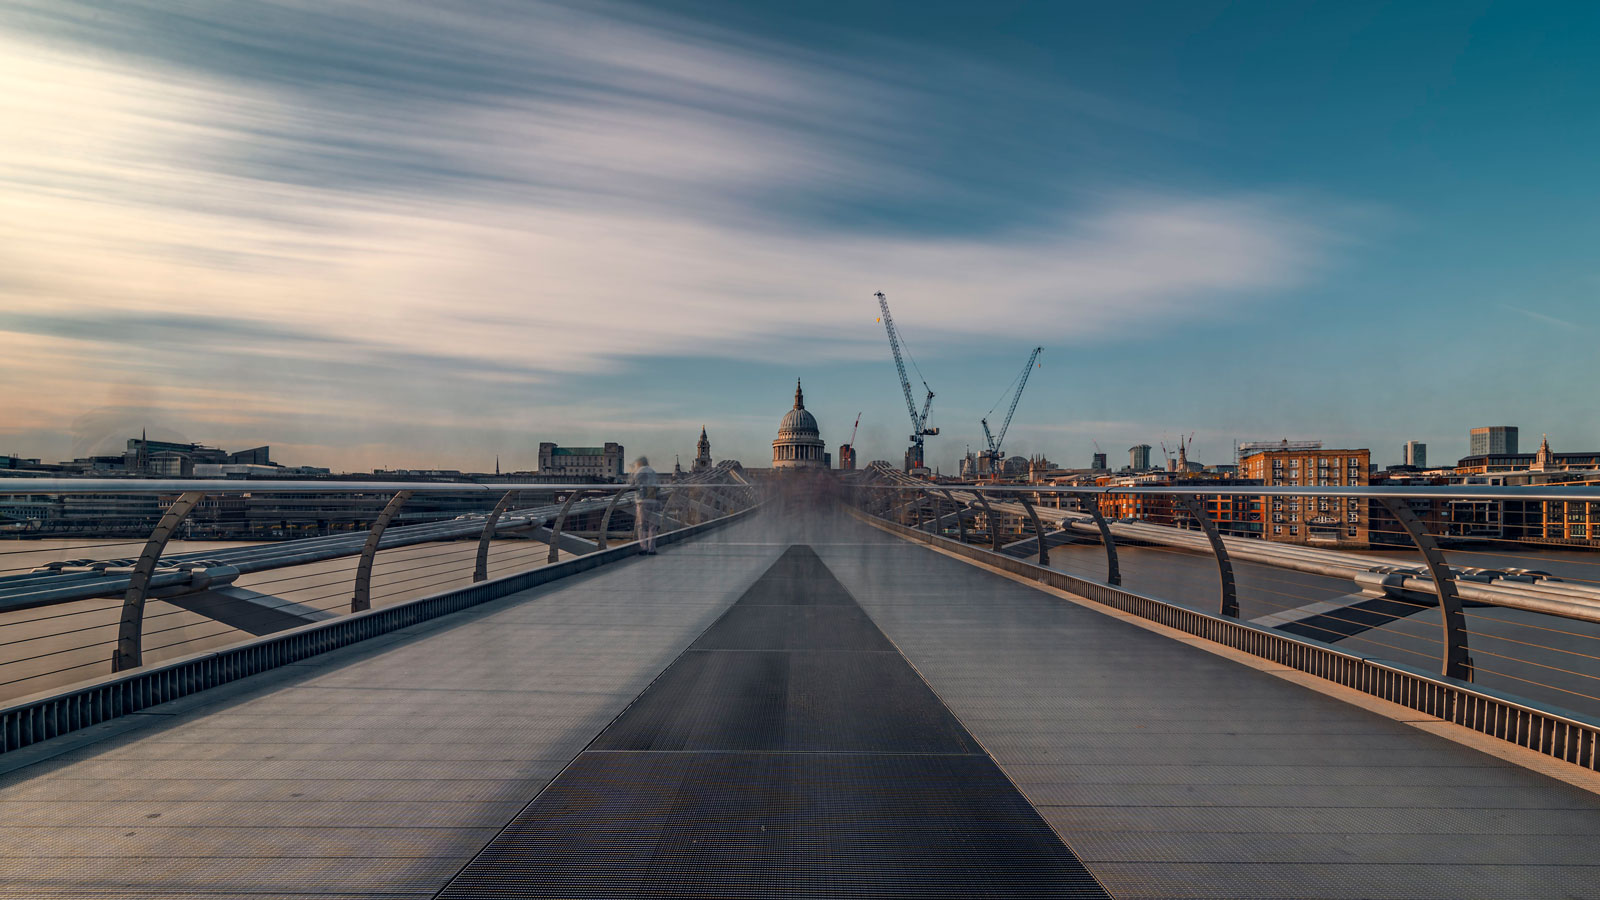
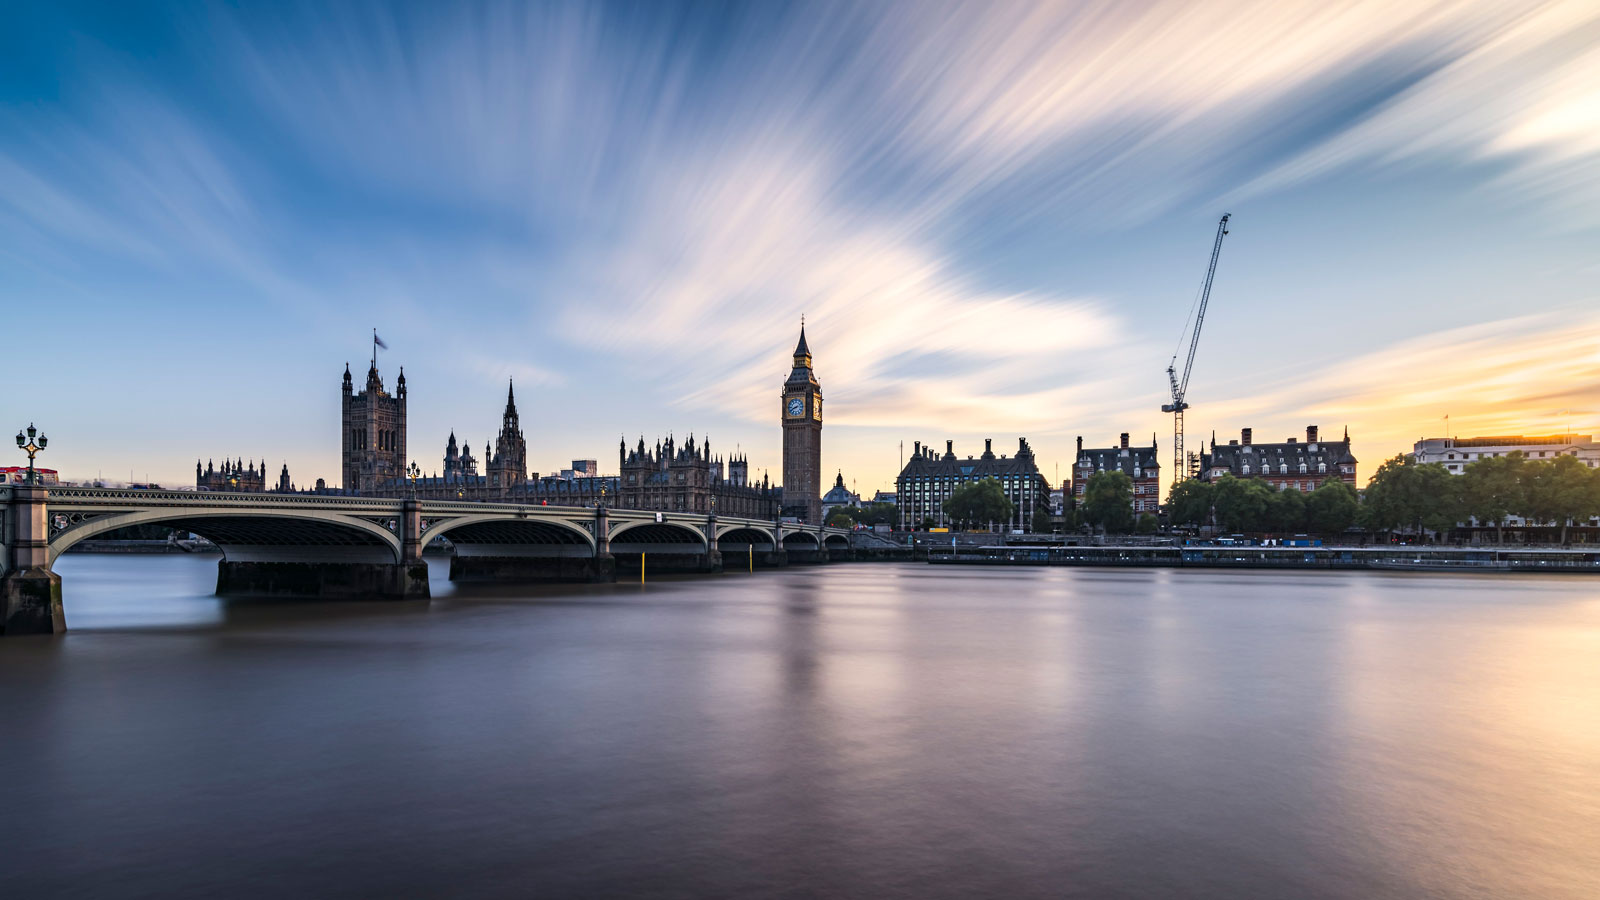
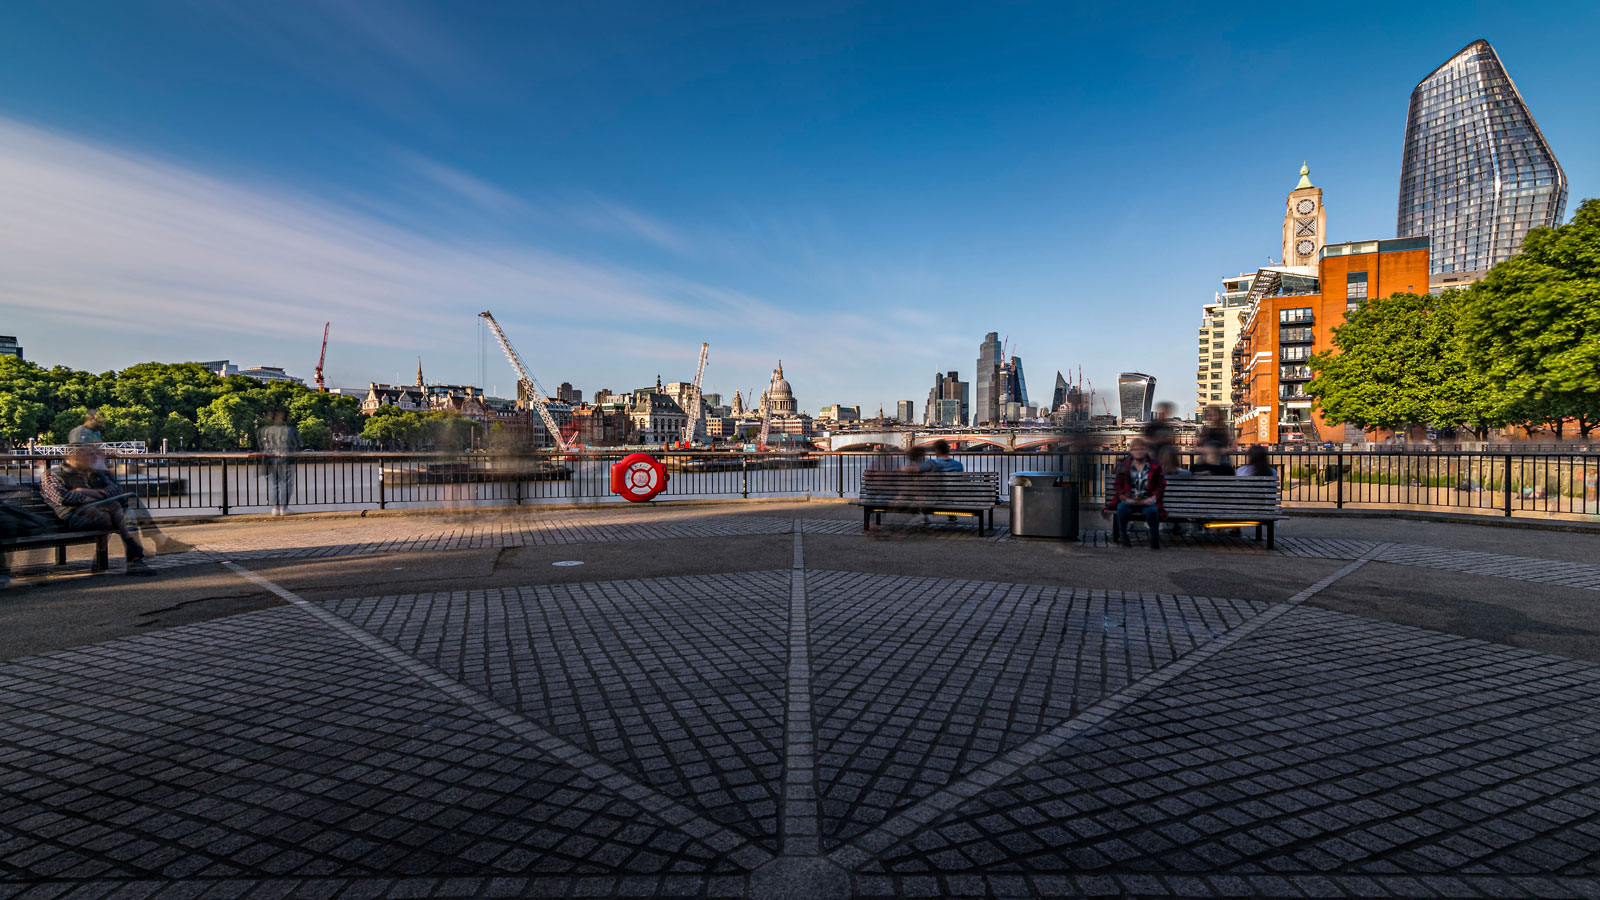
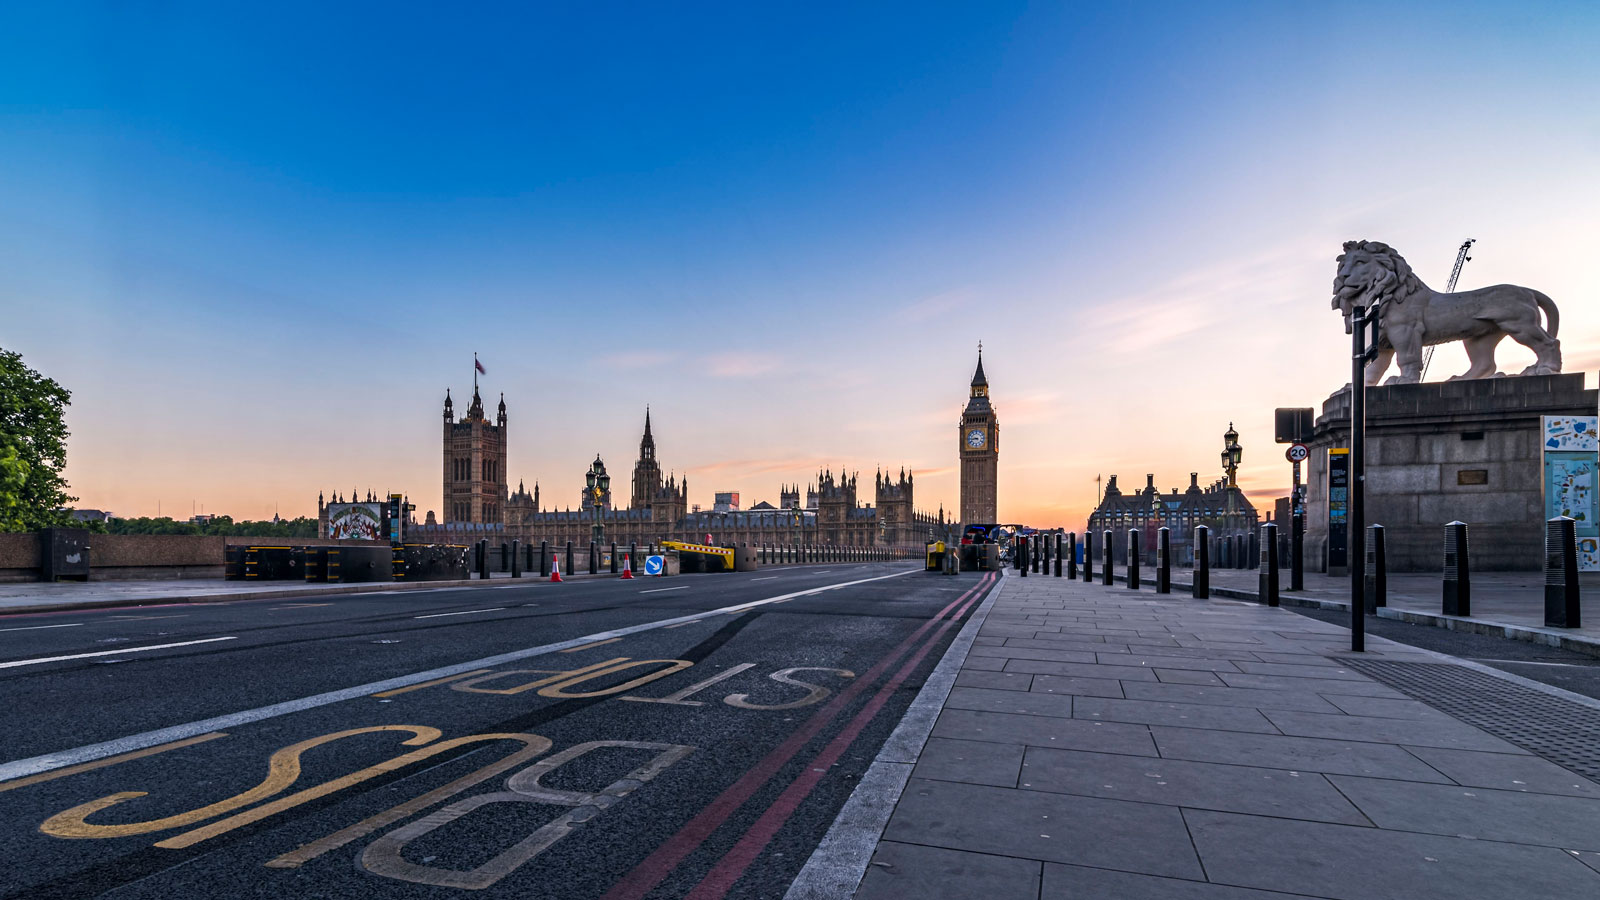
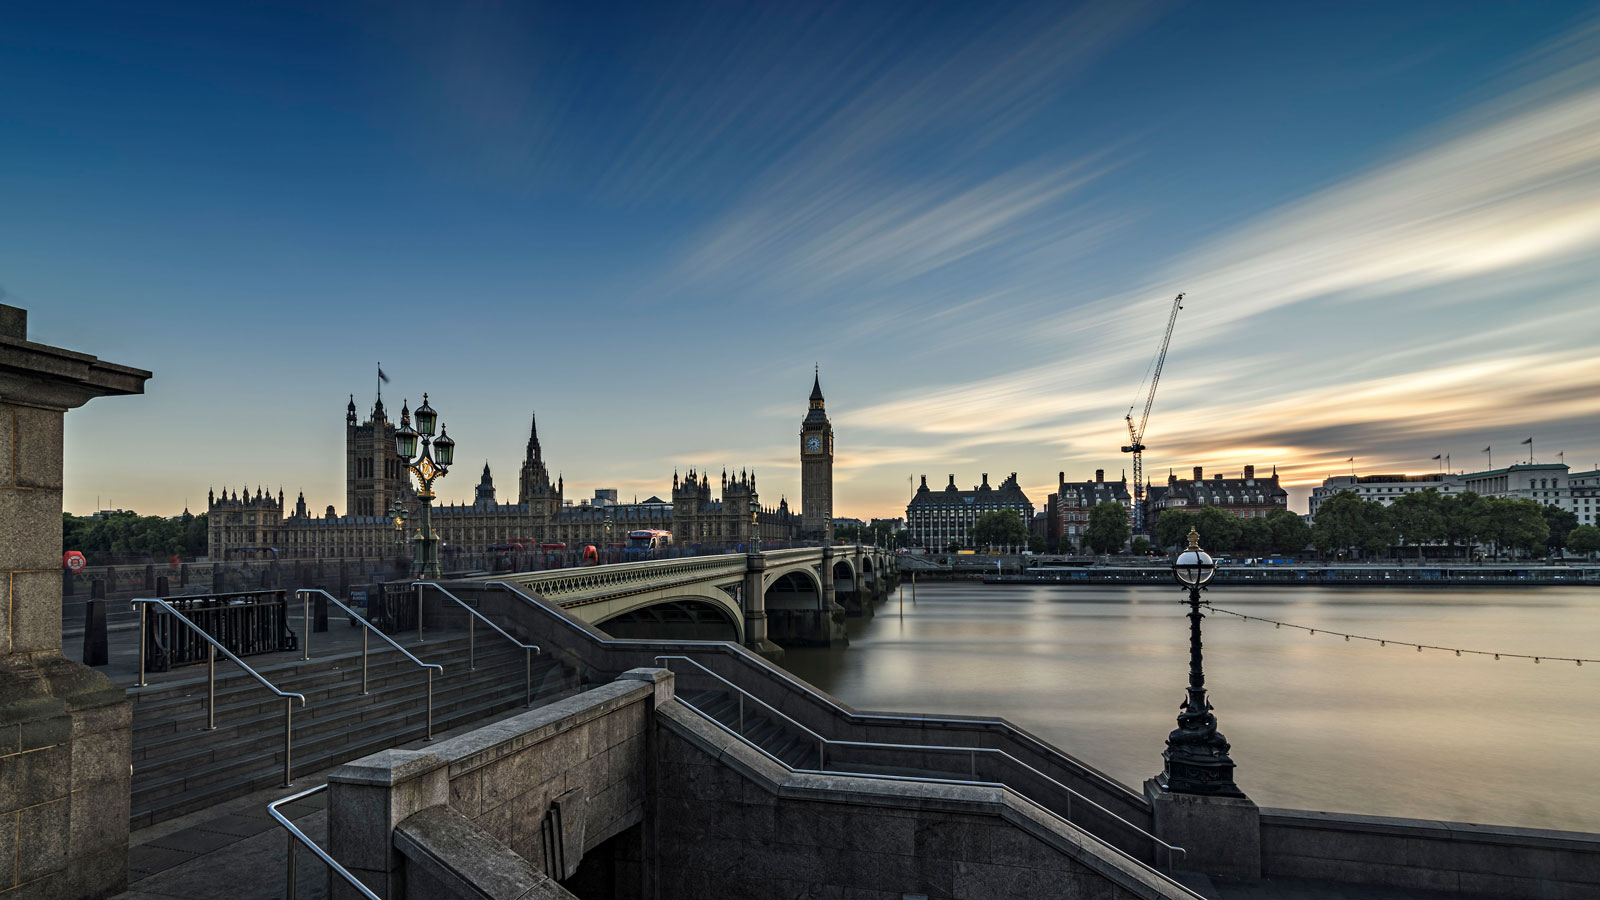
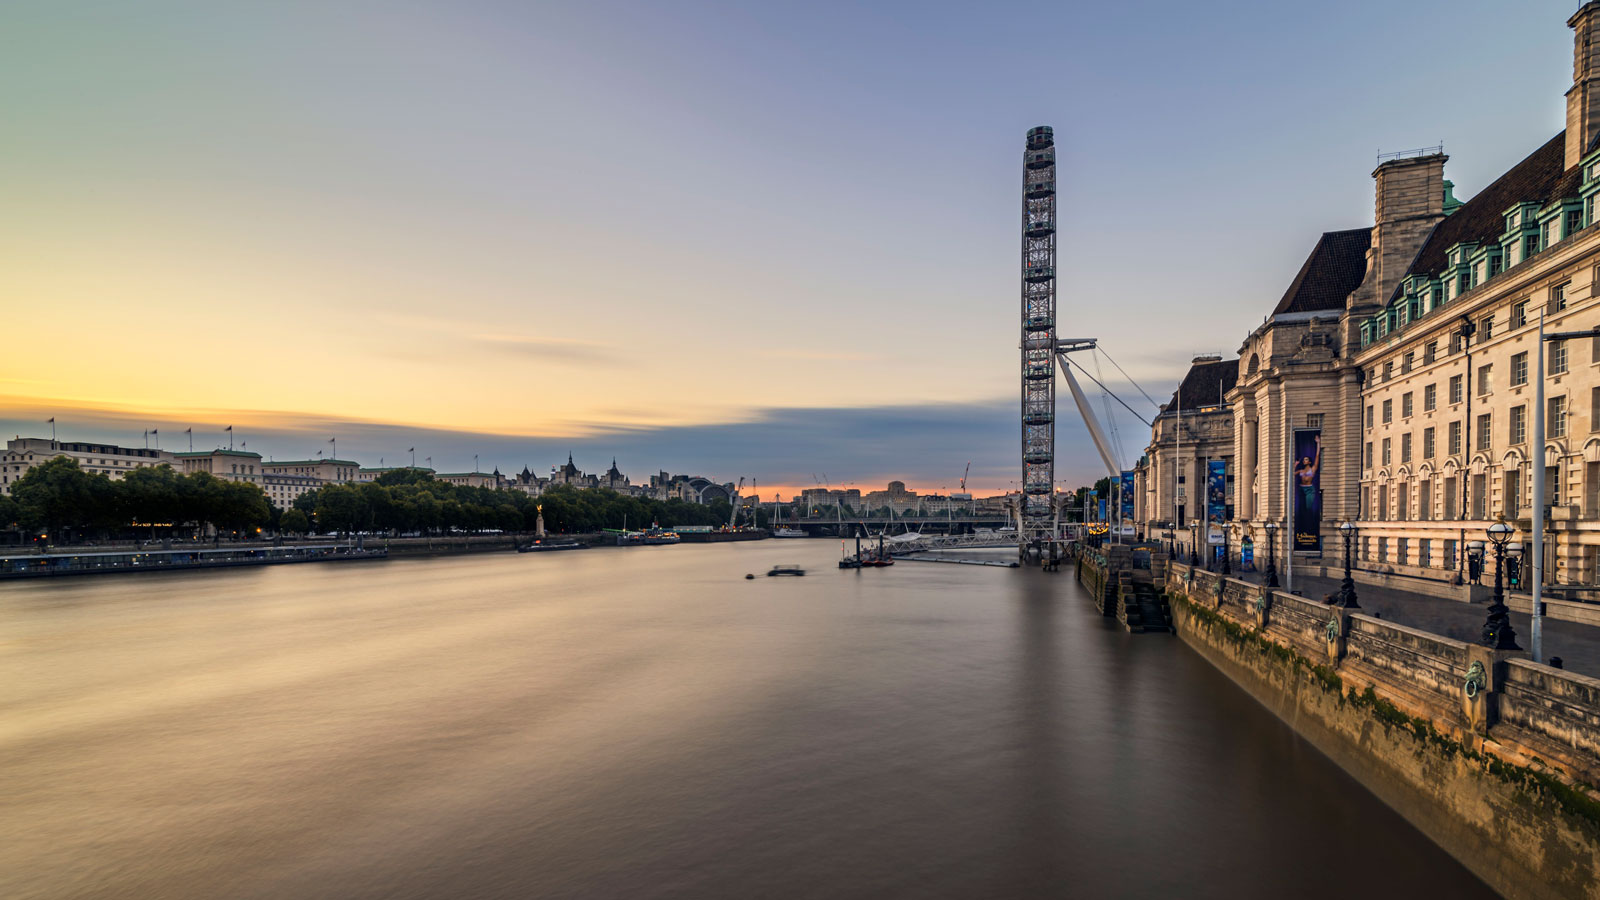
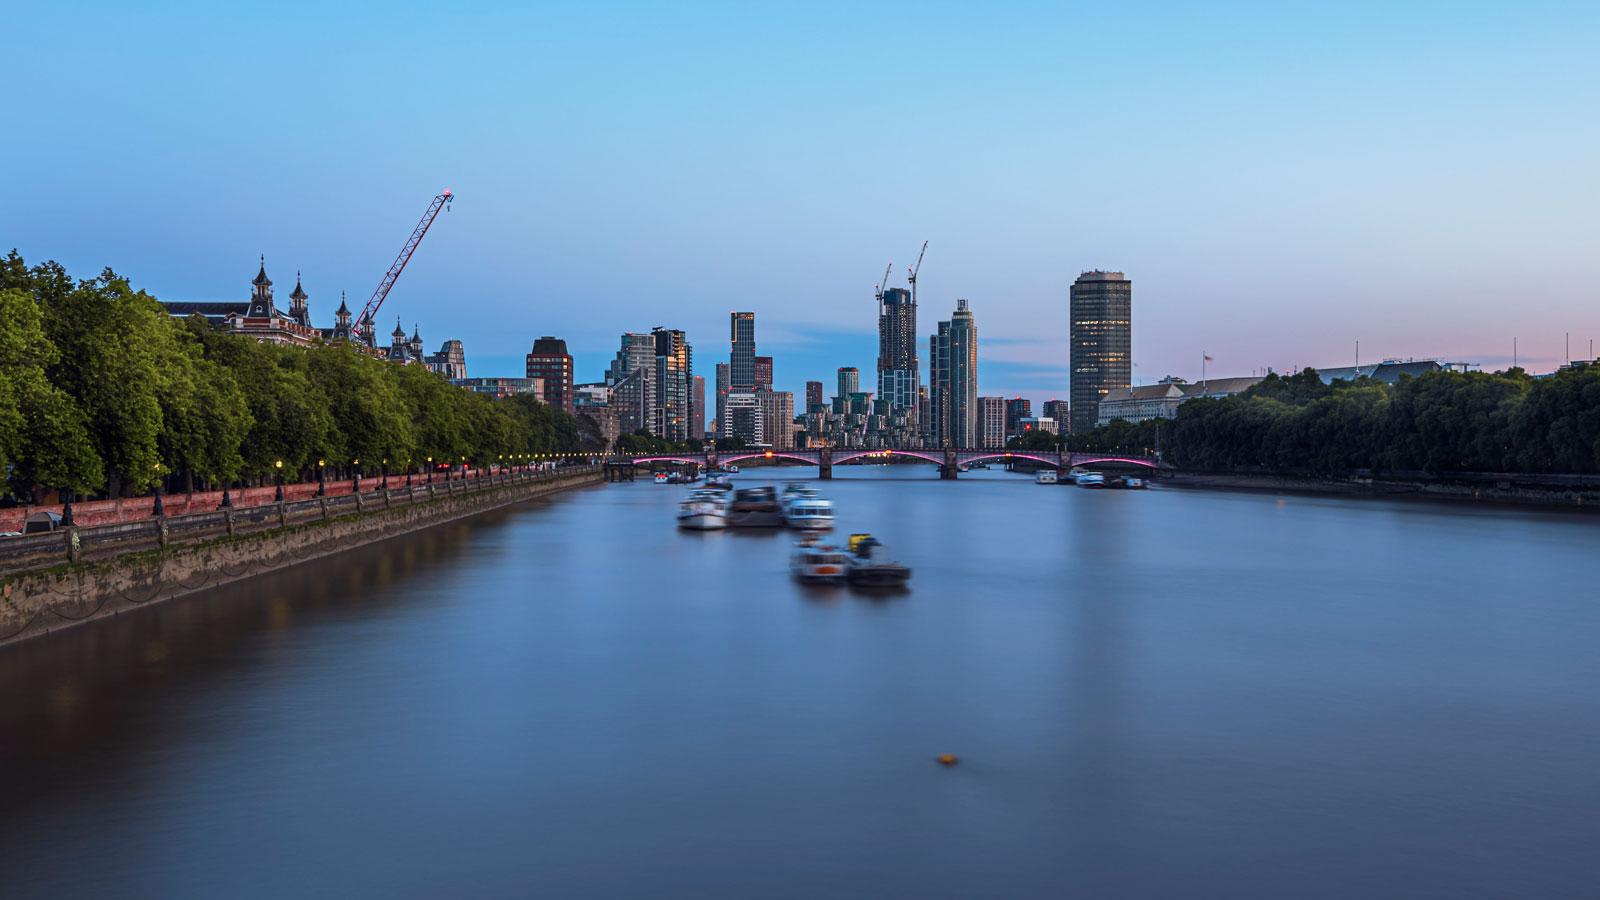
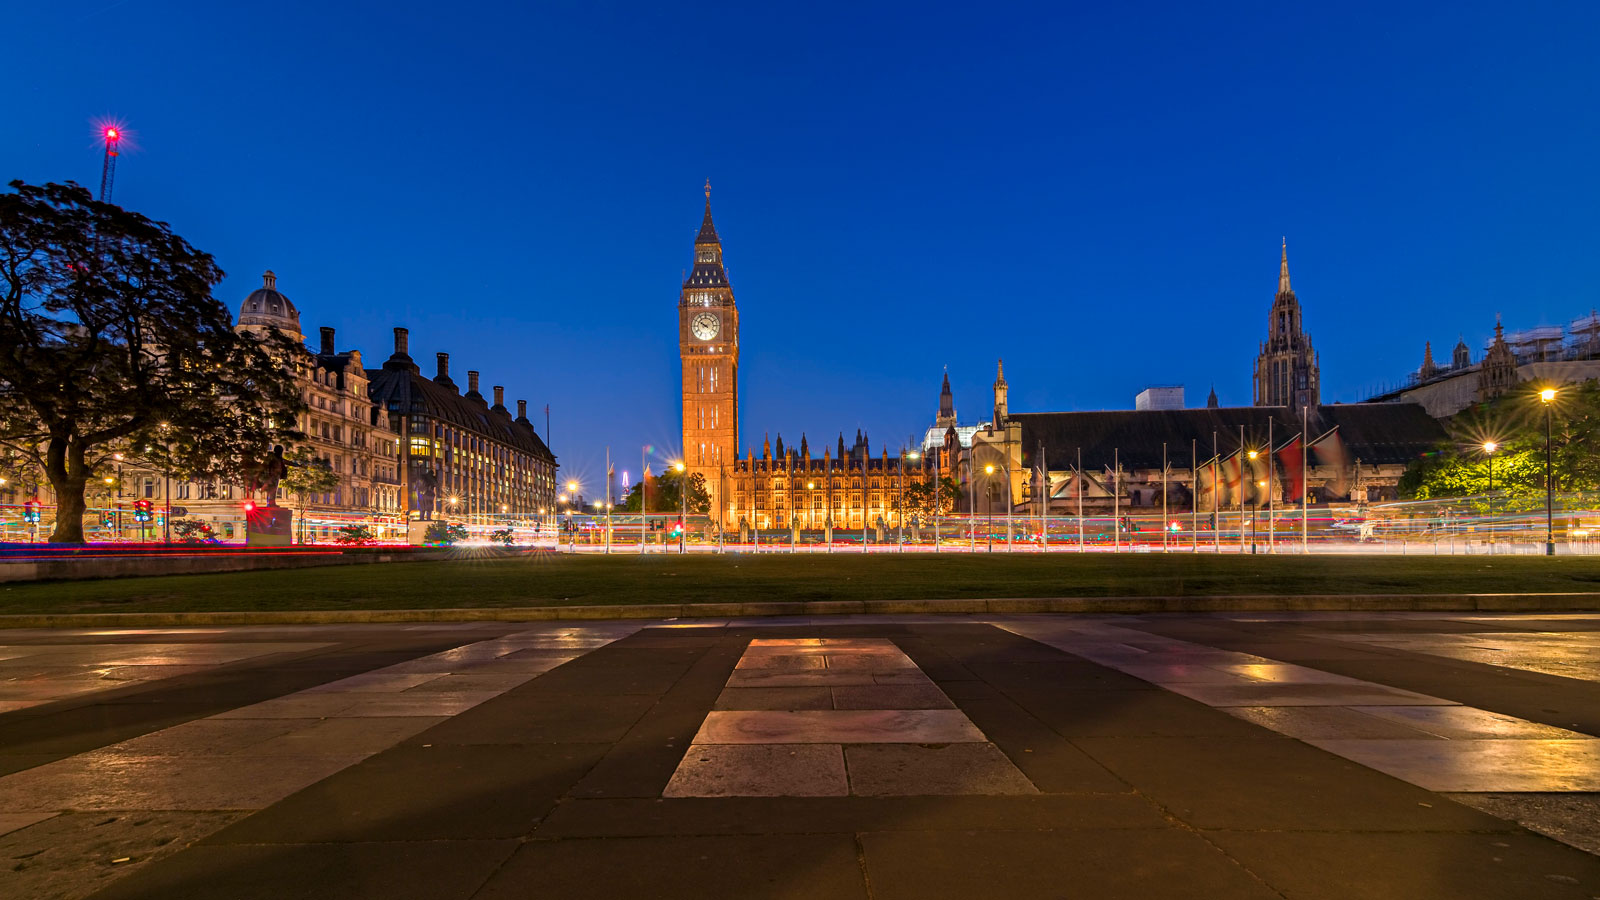
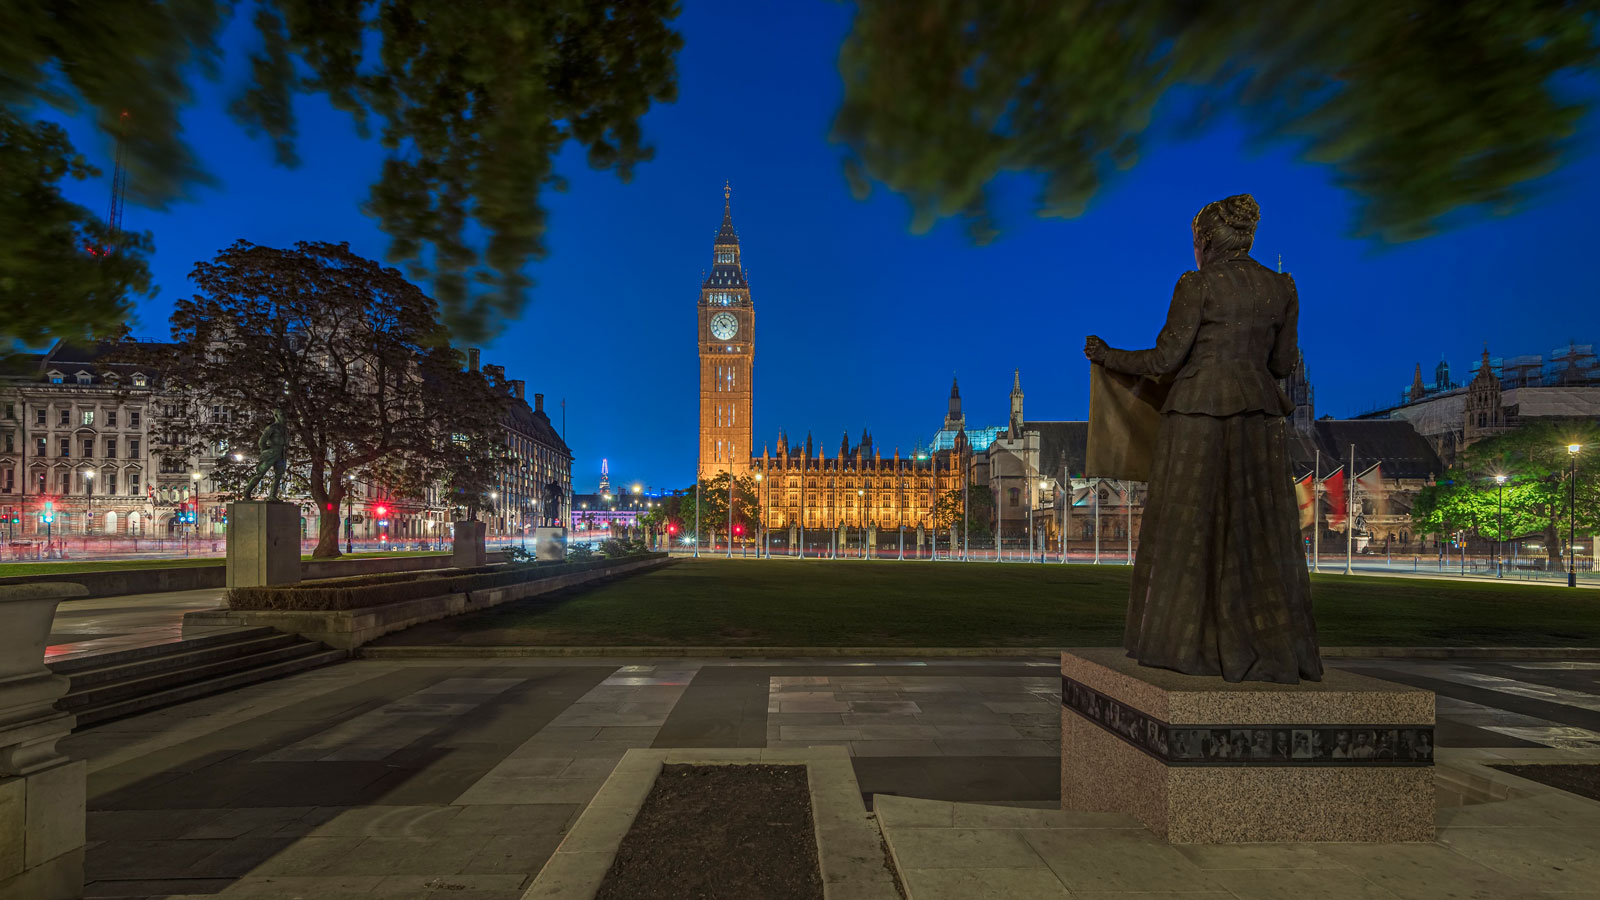
Here are some examples of pictures taken on a day out in London. All these images are accompanied by a short time-lapse and each image has is allocated time for easier identification. In A short note I deliberately chose some of the busiest areas to show the power of Image Averaging.


Bota Dorin
 Bota Dorin was born in 1985 in Romania and from 2014 has been living in London, UK. Fully self-taught photographer since 2010.
In 2014 moved to the UK, bought his first DSLR and quickly expanded his area of interest especially to architecture, long exposure, landscape, astro. His won contests in Romania and several works were published in various magazines in the UK.