Guide to capture long exposure photos
Intro
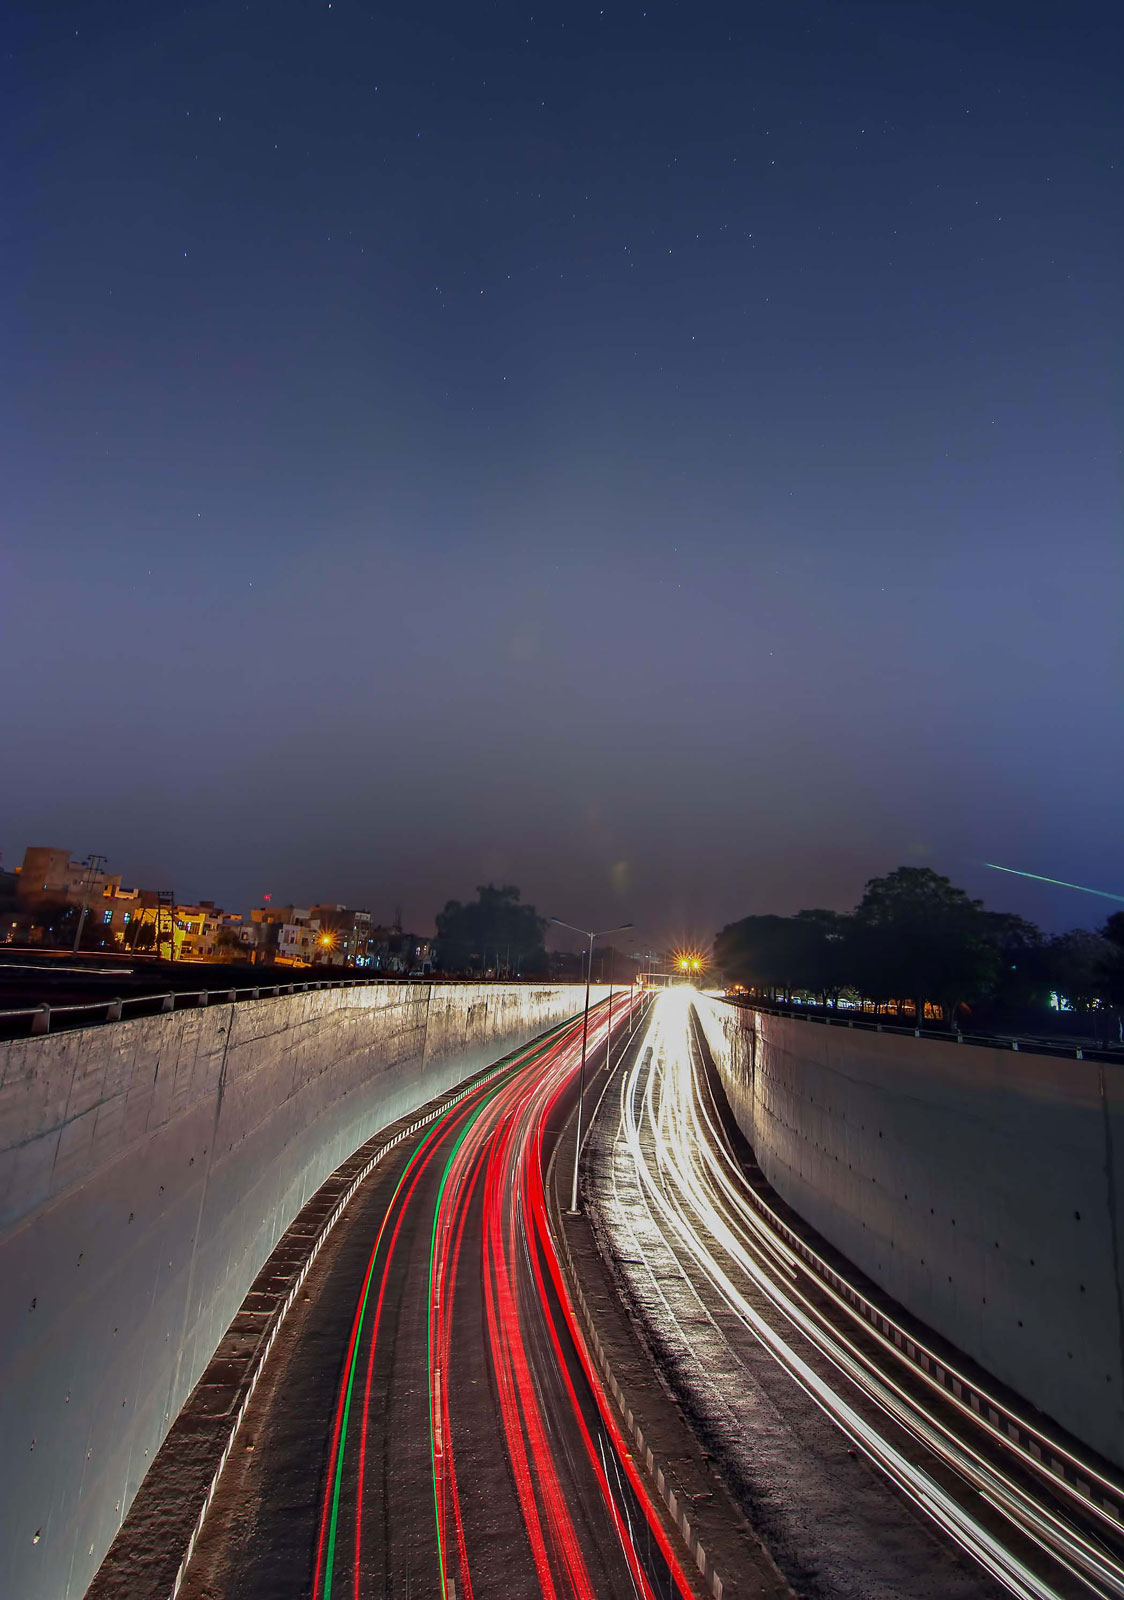
Long exposure photography is when we are using a much longer shutter speed, and it's usually used as a specific technique to achieve a certain effect. There is no defined transition point at which a shutter speed becomes slow enough to define your shooting as 'long exposure photography'. Generally speaking, I tend to think of it as when we are talking about our exposure times in terms of seconds, rather than fractions of a second. A long Exposure photography helps us in capturing the motion of our subject in seconds through which we can trace out an object on its path. Whether it be a running water, a Ferris wheel, vehicles on the roads during the night time or the motion of stars in the sky with respect to earth, we can put so much creativity in this genre of photography. When we see things differently, it naturally fascinates us and that's a significant factor in creating a compelling image.
Understanding mechanism behind long exposure photos
The shutter of a camera works like a window in a room. The longer it opens for the more light comes in. This is the mechanism that i use to explain to everybody when I am asked about long exposure photography. Generally, we tend to use shutter speeds varying from 1/50 to 1/4000 or 1/8000. But when we need more light to enter in the camera, let's say during the night time, we usually decrease the shutter speed which varies from 1/10 to 30" or sometimes we like to operate our cameras in BULB MODE*. This allows more light to enter in the camera. So, what is happening inside the camera is the shutter is being opened for that much of duration and it is letting the light hit the sensor. Now the question is, during the night time this thing is easily possible without the need of any extra equipment but would it be possible during the day time. How would be able to stop that extra sunlight hitting the camera sensor and completely white wash the picture. Yes, this is possible with a piece of glass that blocks the sunlight. This piece of black glass is called an ND filter that comes in various powers associated with it. I will explain it later in this blog.
What kind of subjects you should choose for Long Exposure Photography?
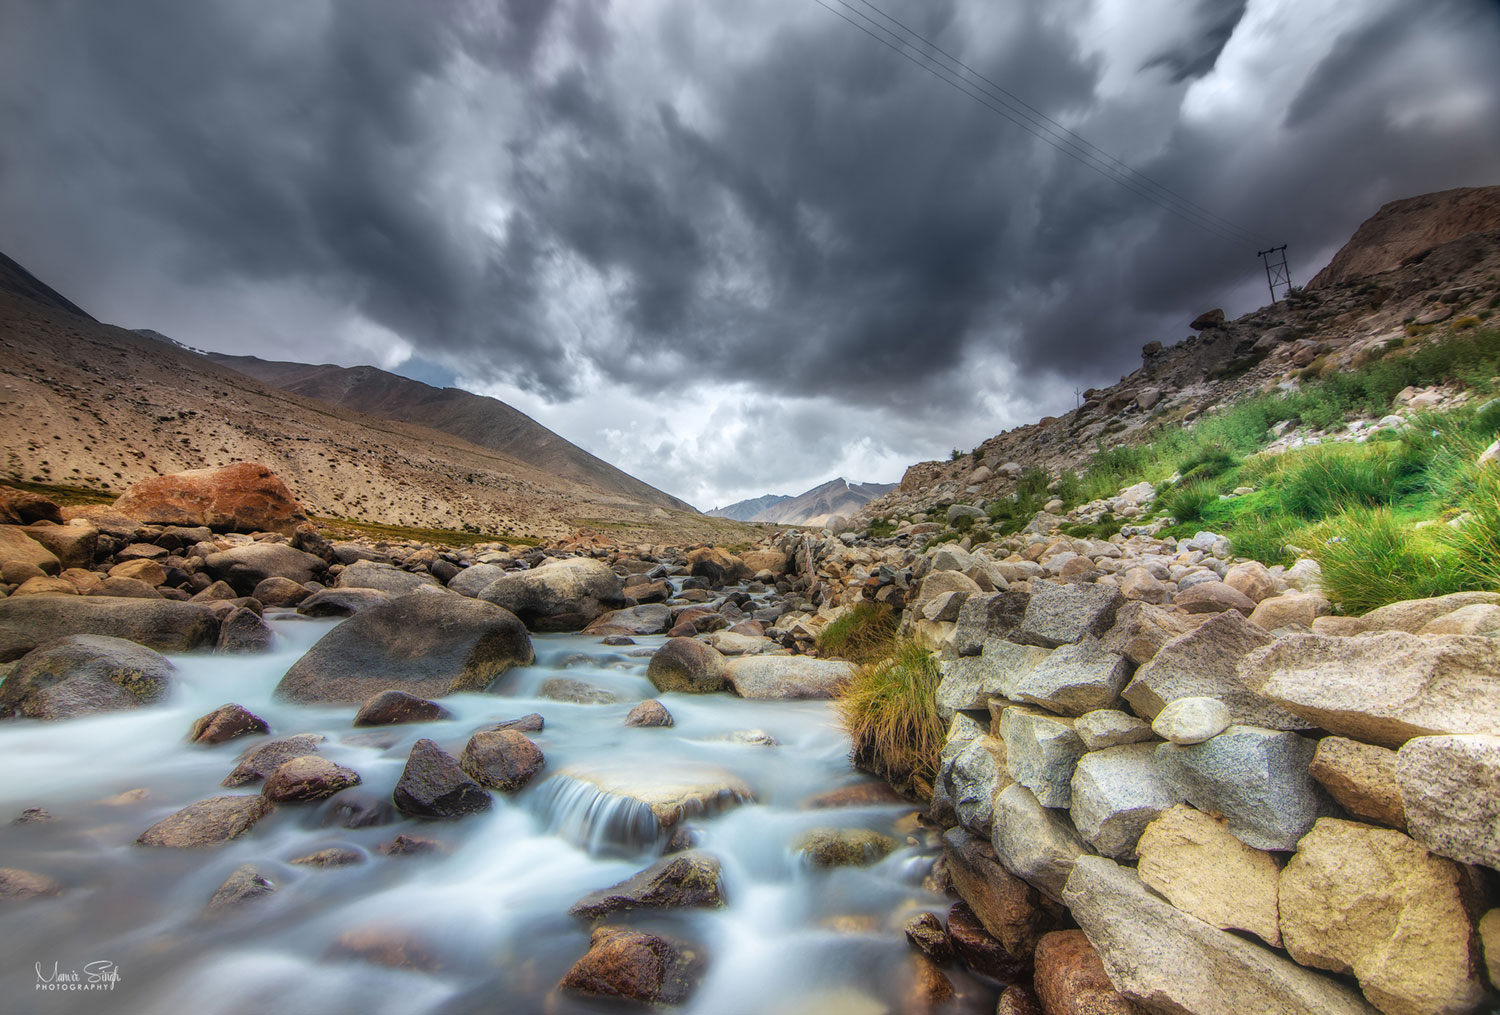
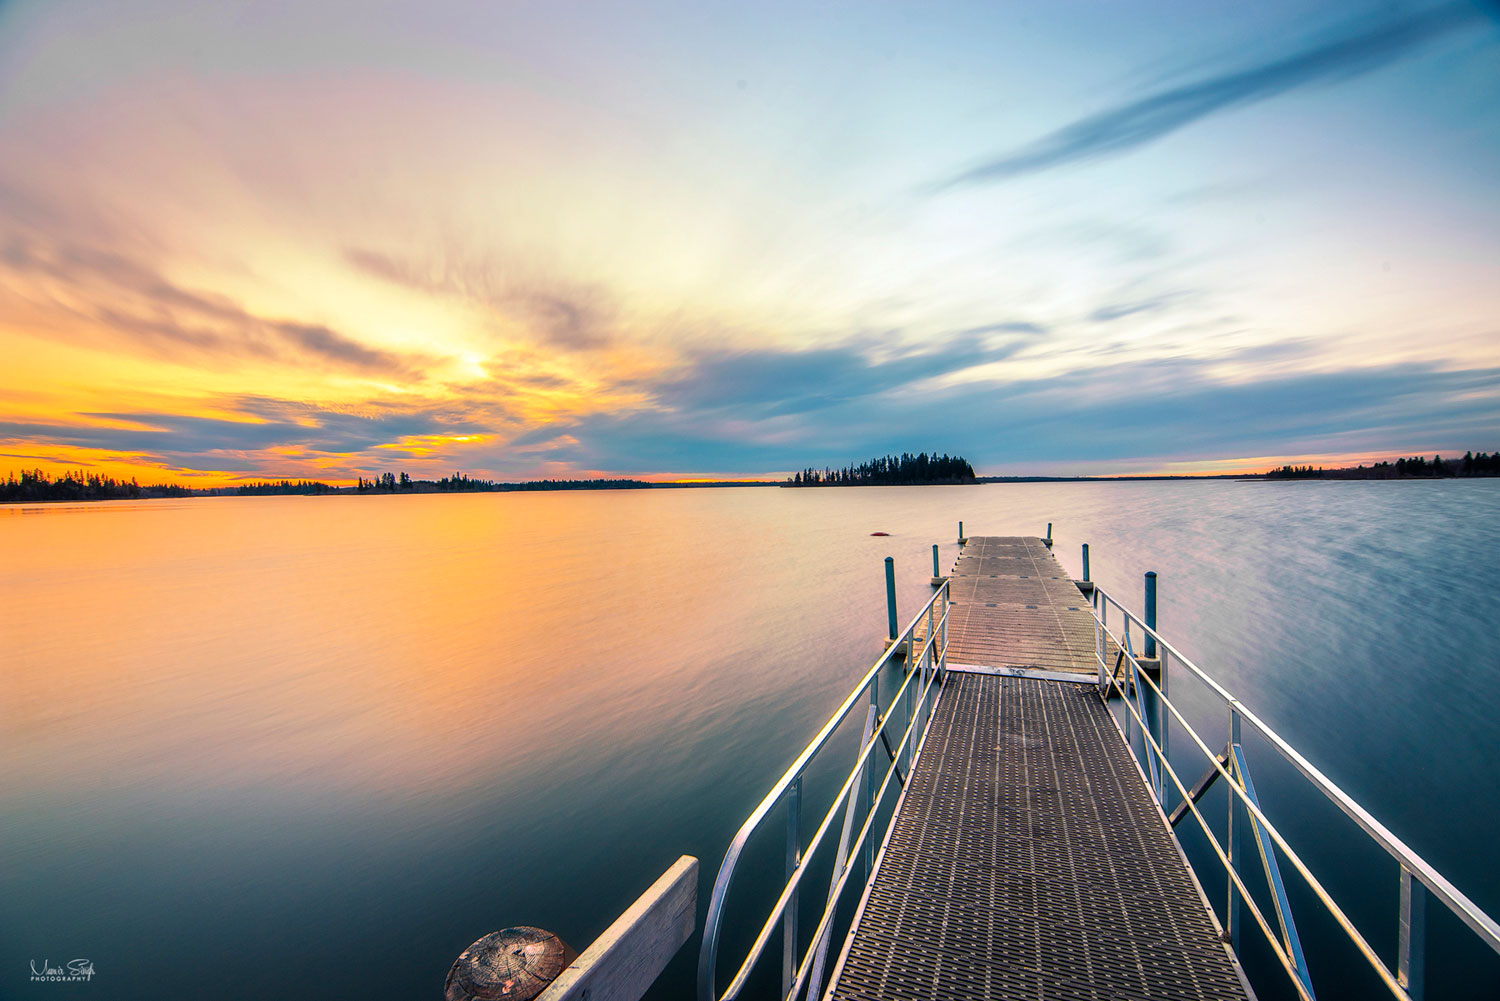
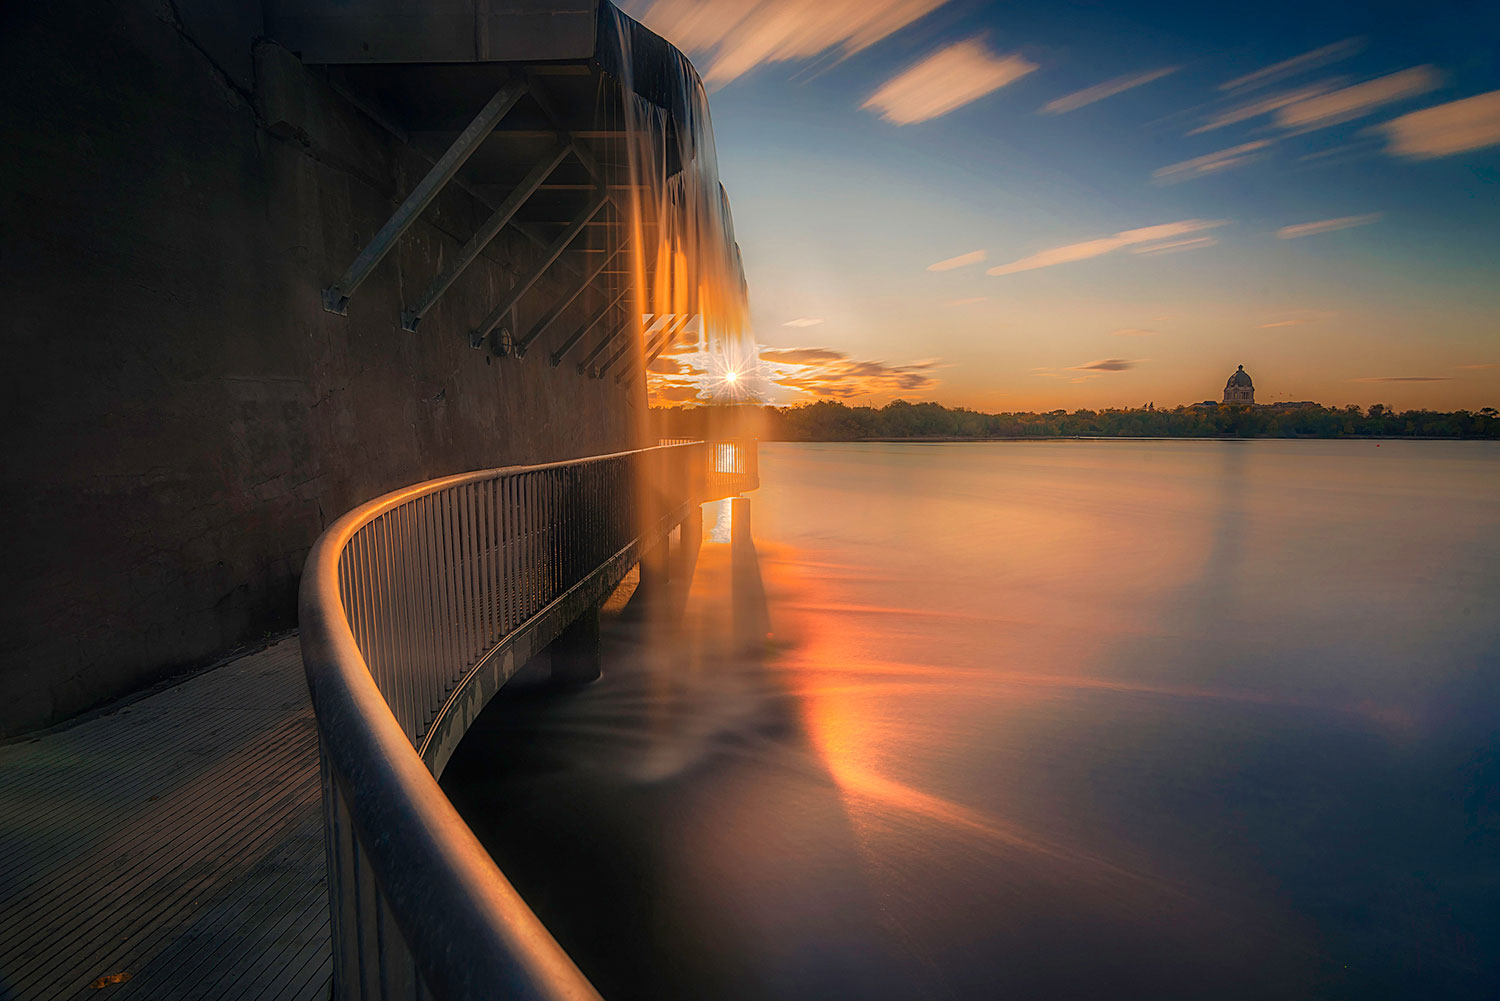
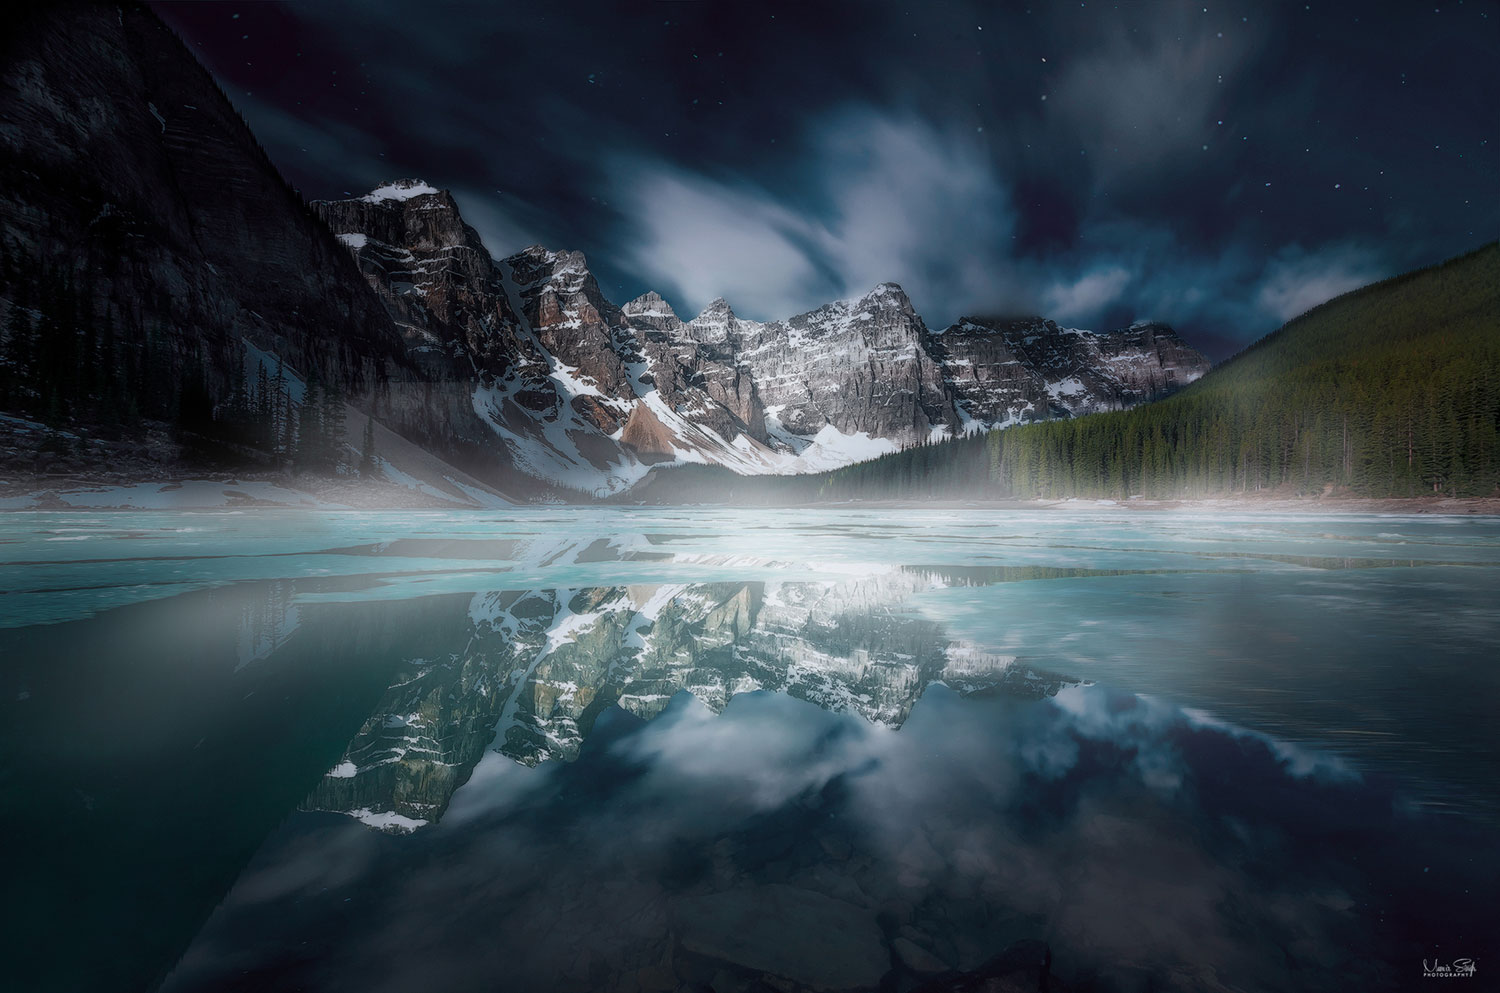
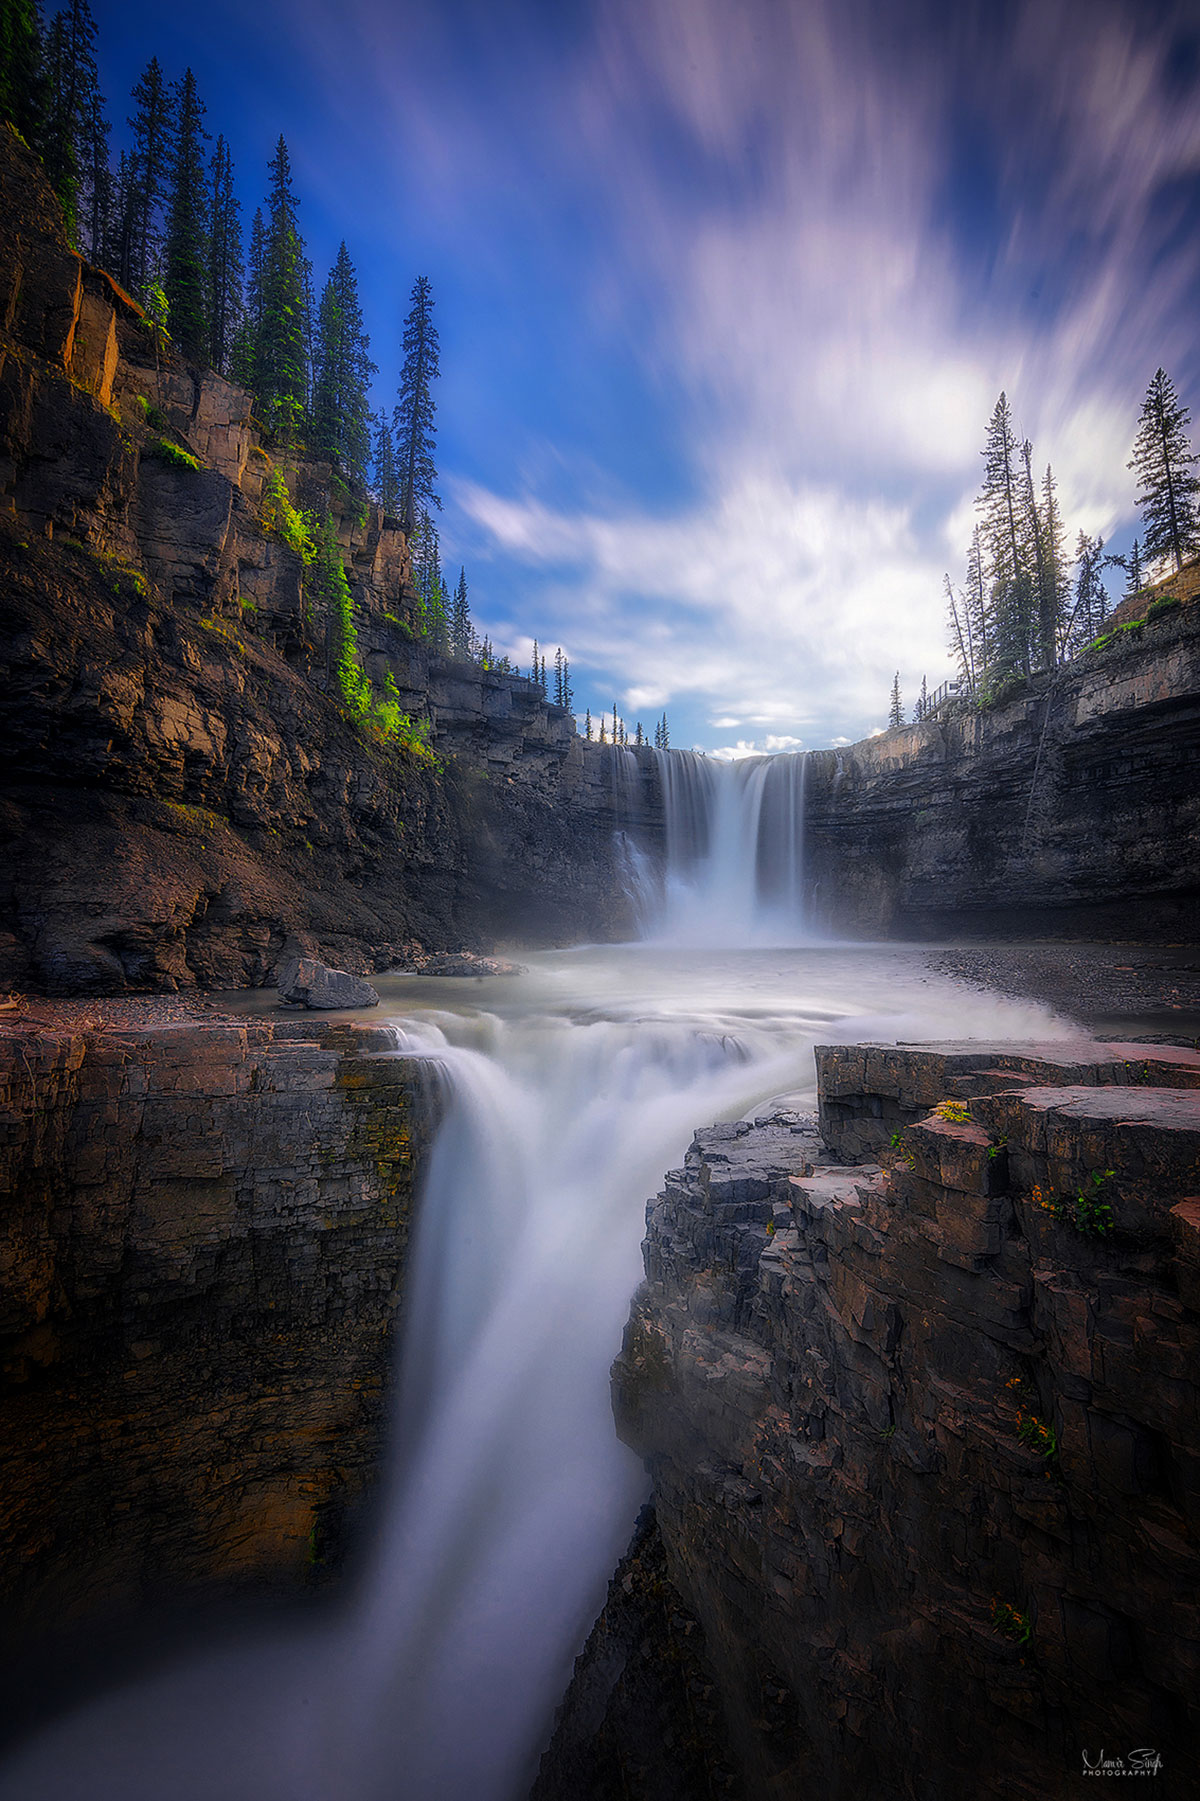
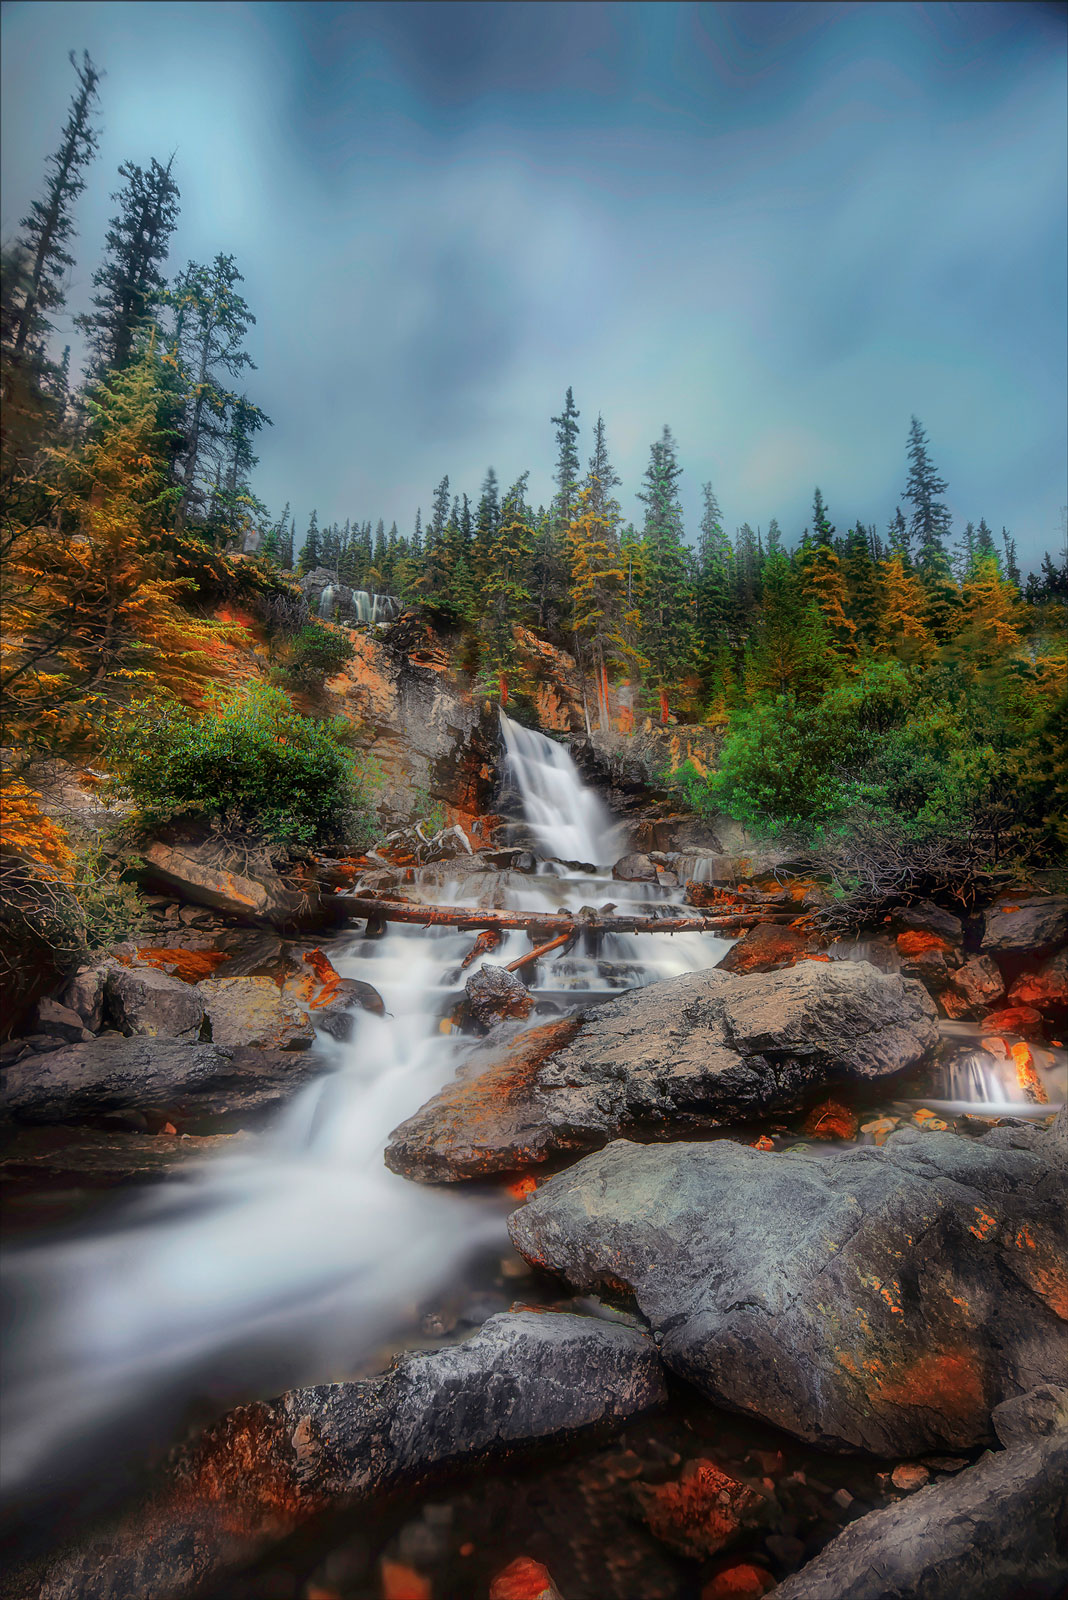
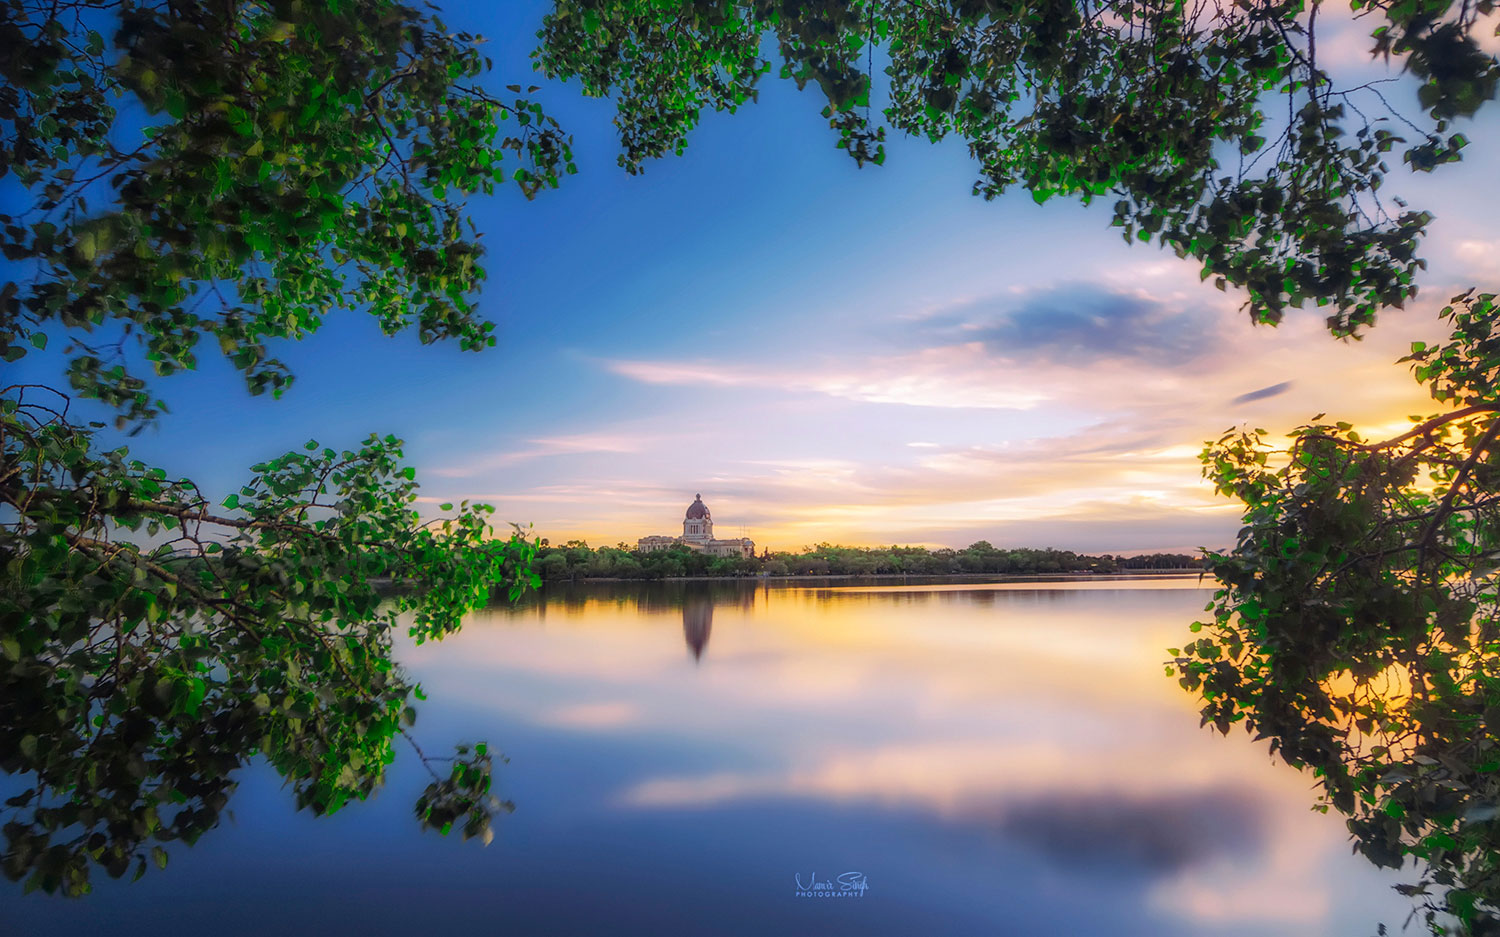
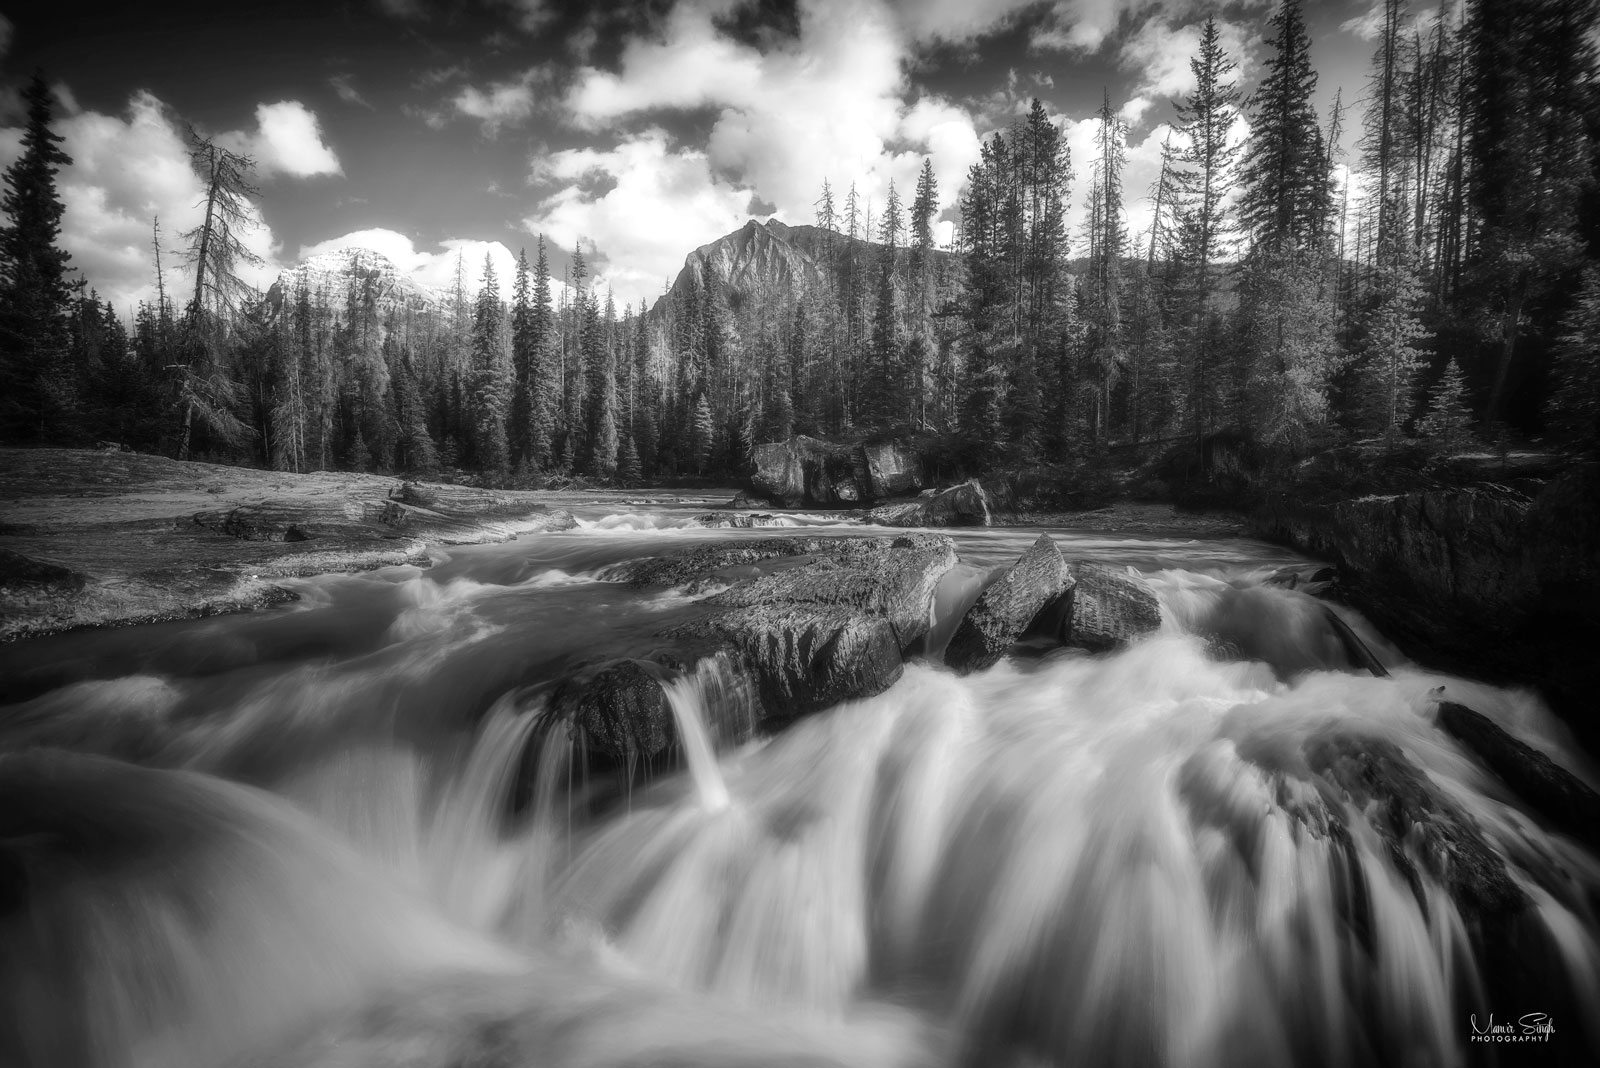
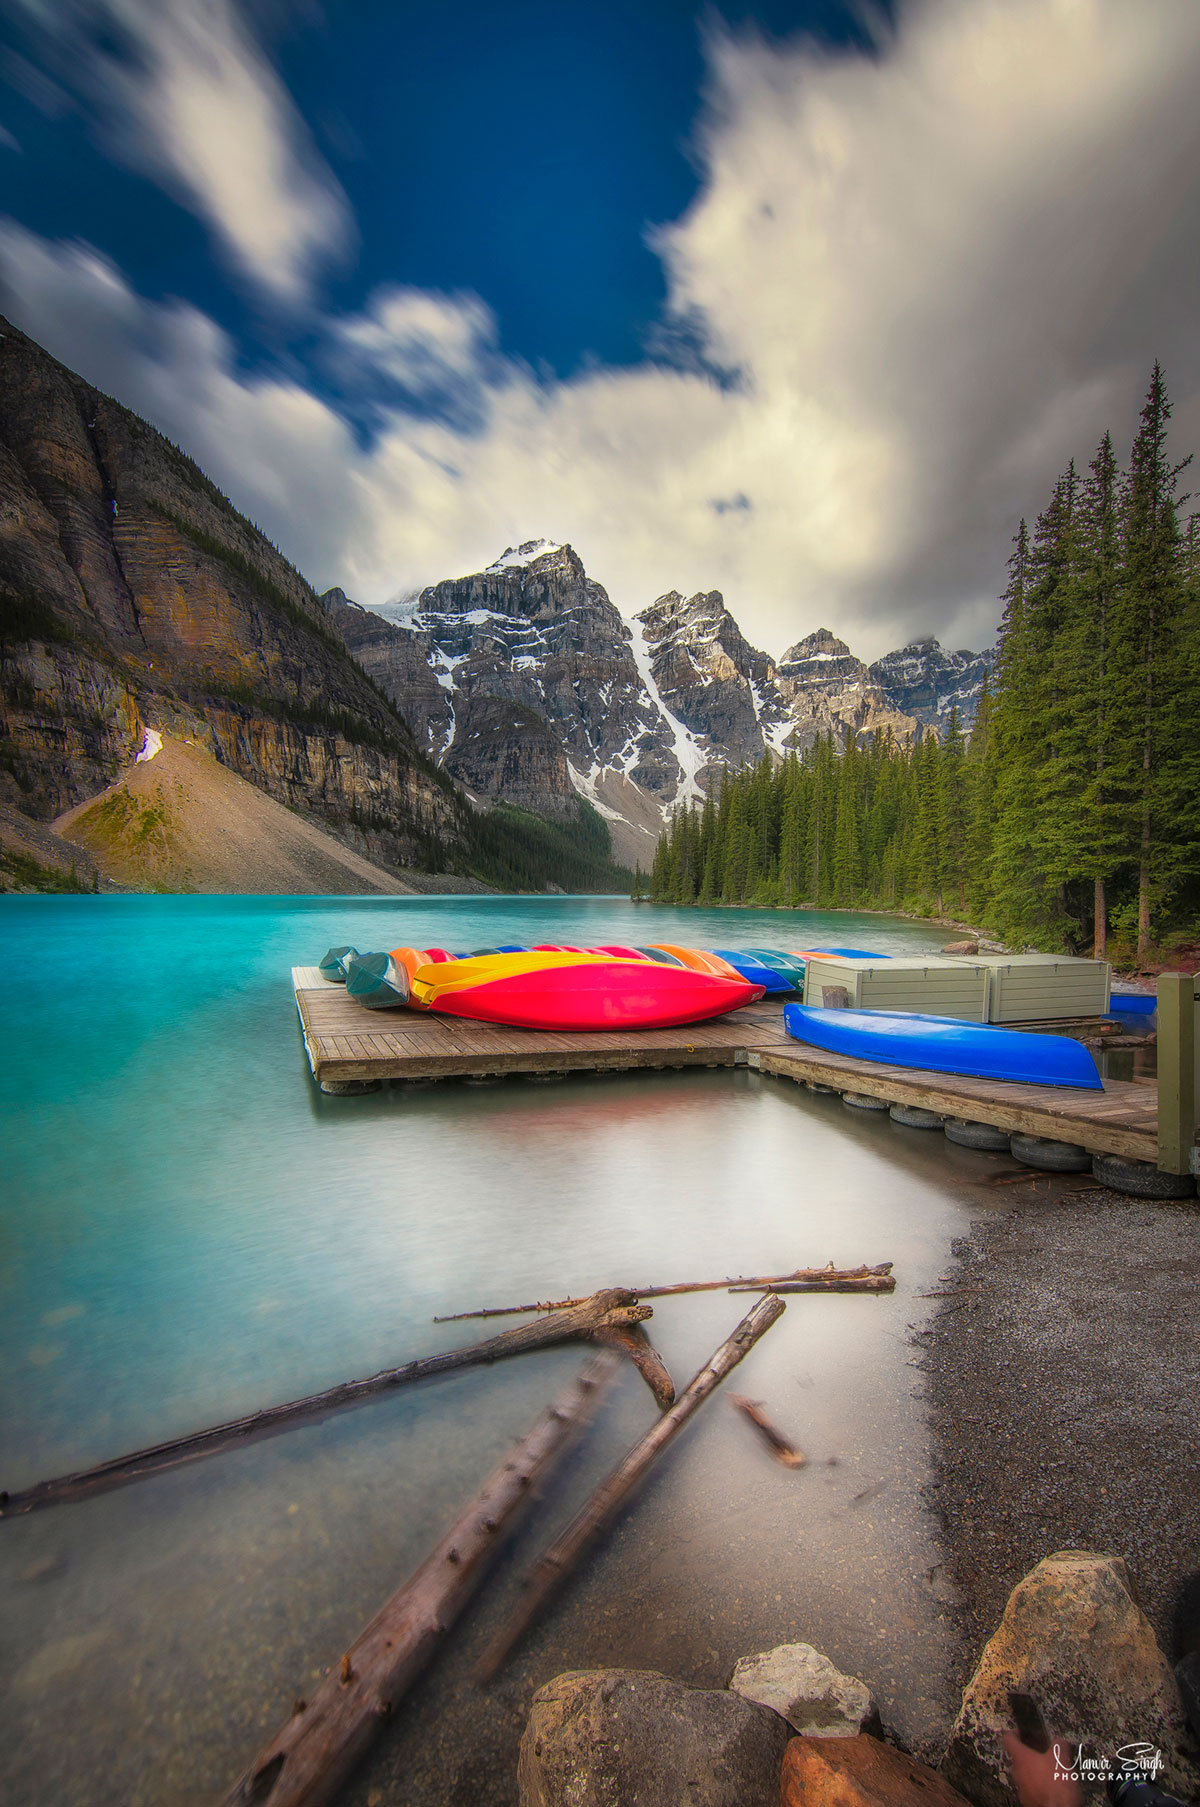
Most long exposure photos are landscapes or architecture, and the blurred elements are water or clouds. Sometimes photographers include people in the photo, either out of lack of choice because they are shooting in a busy location, or to deliberately introduce a human element into the image.
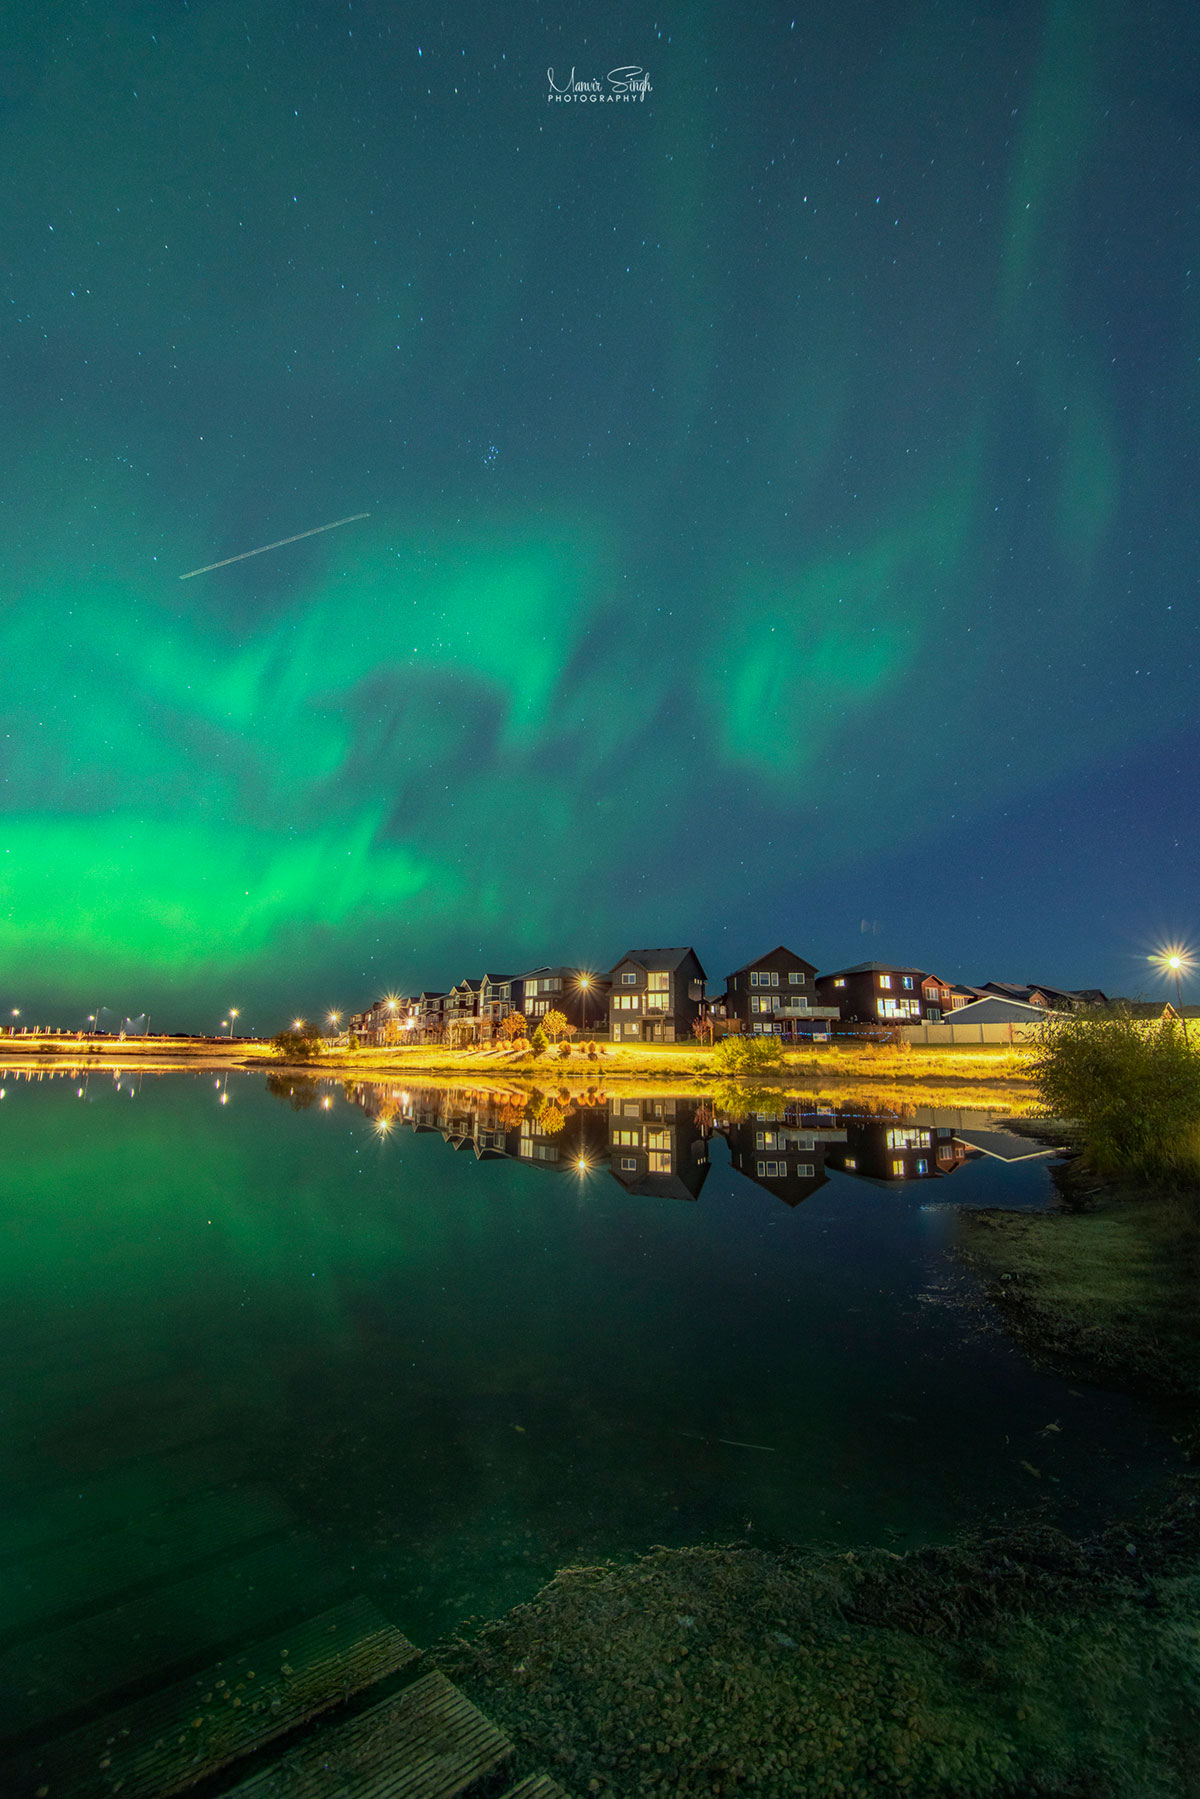
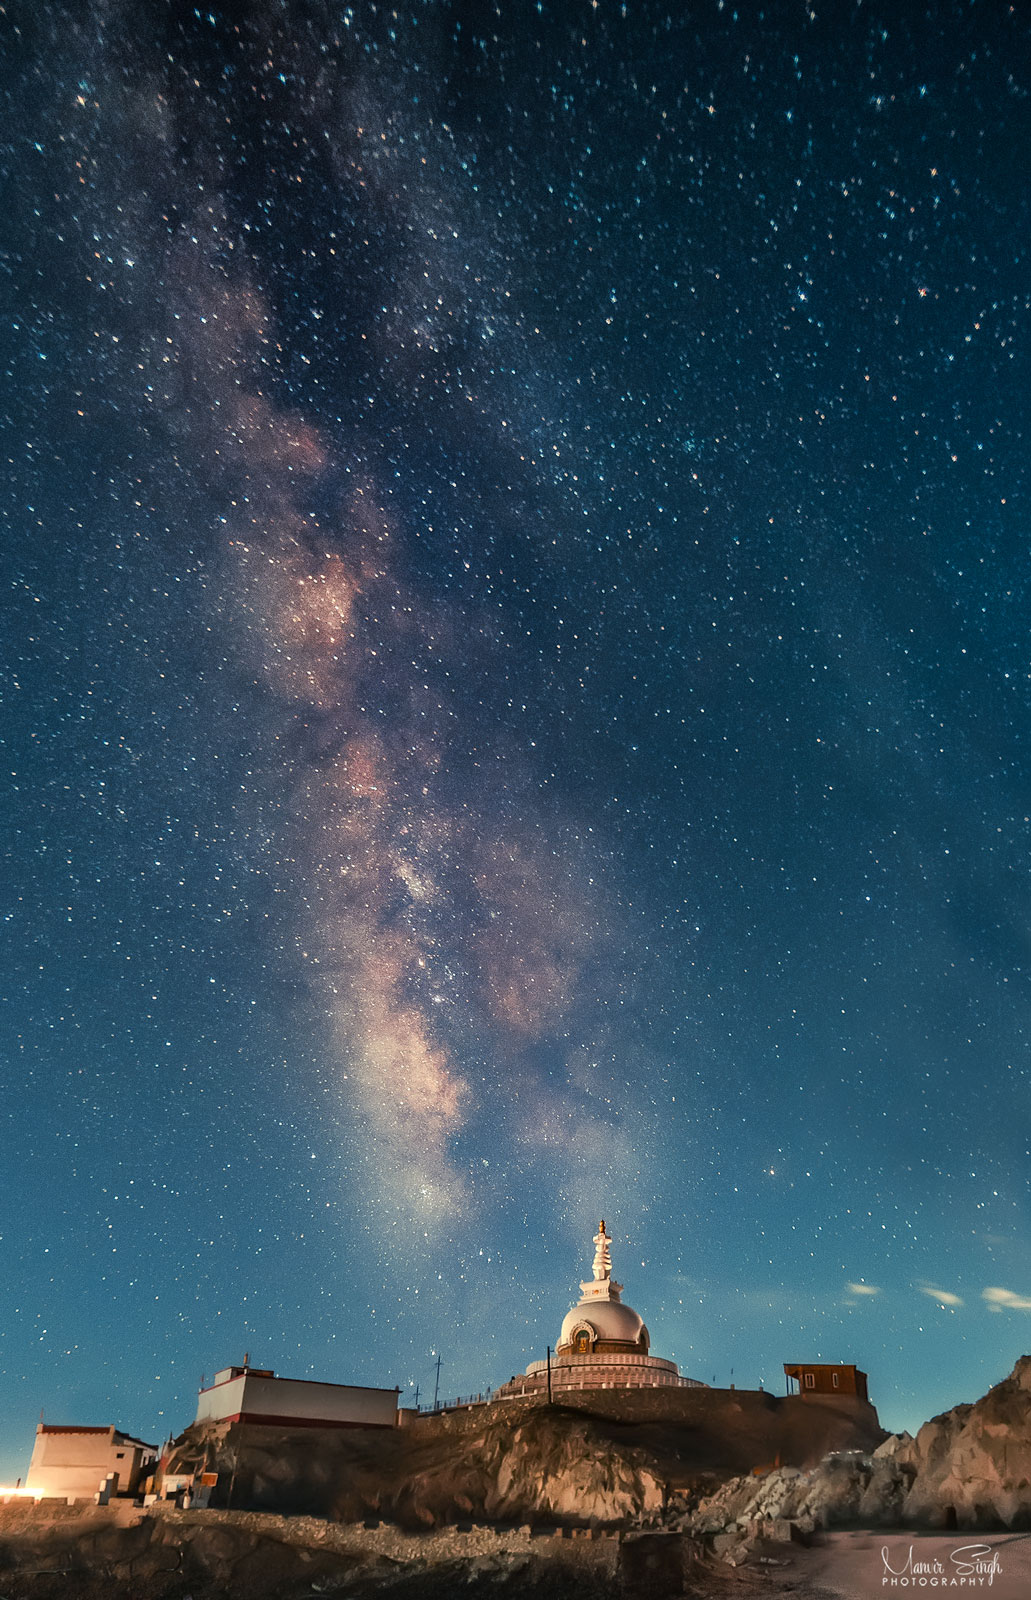
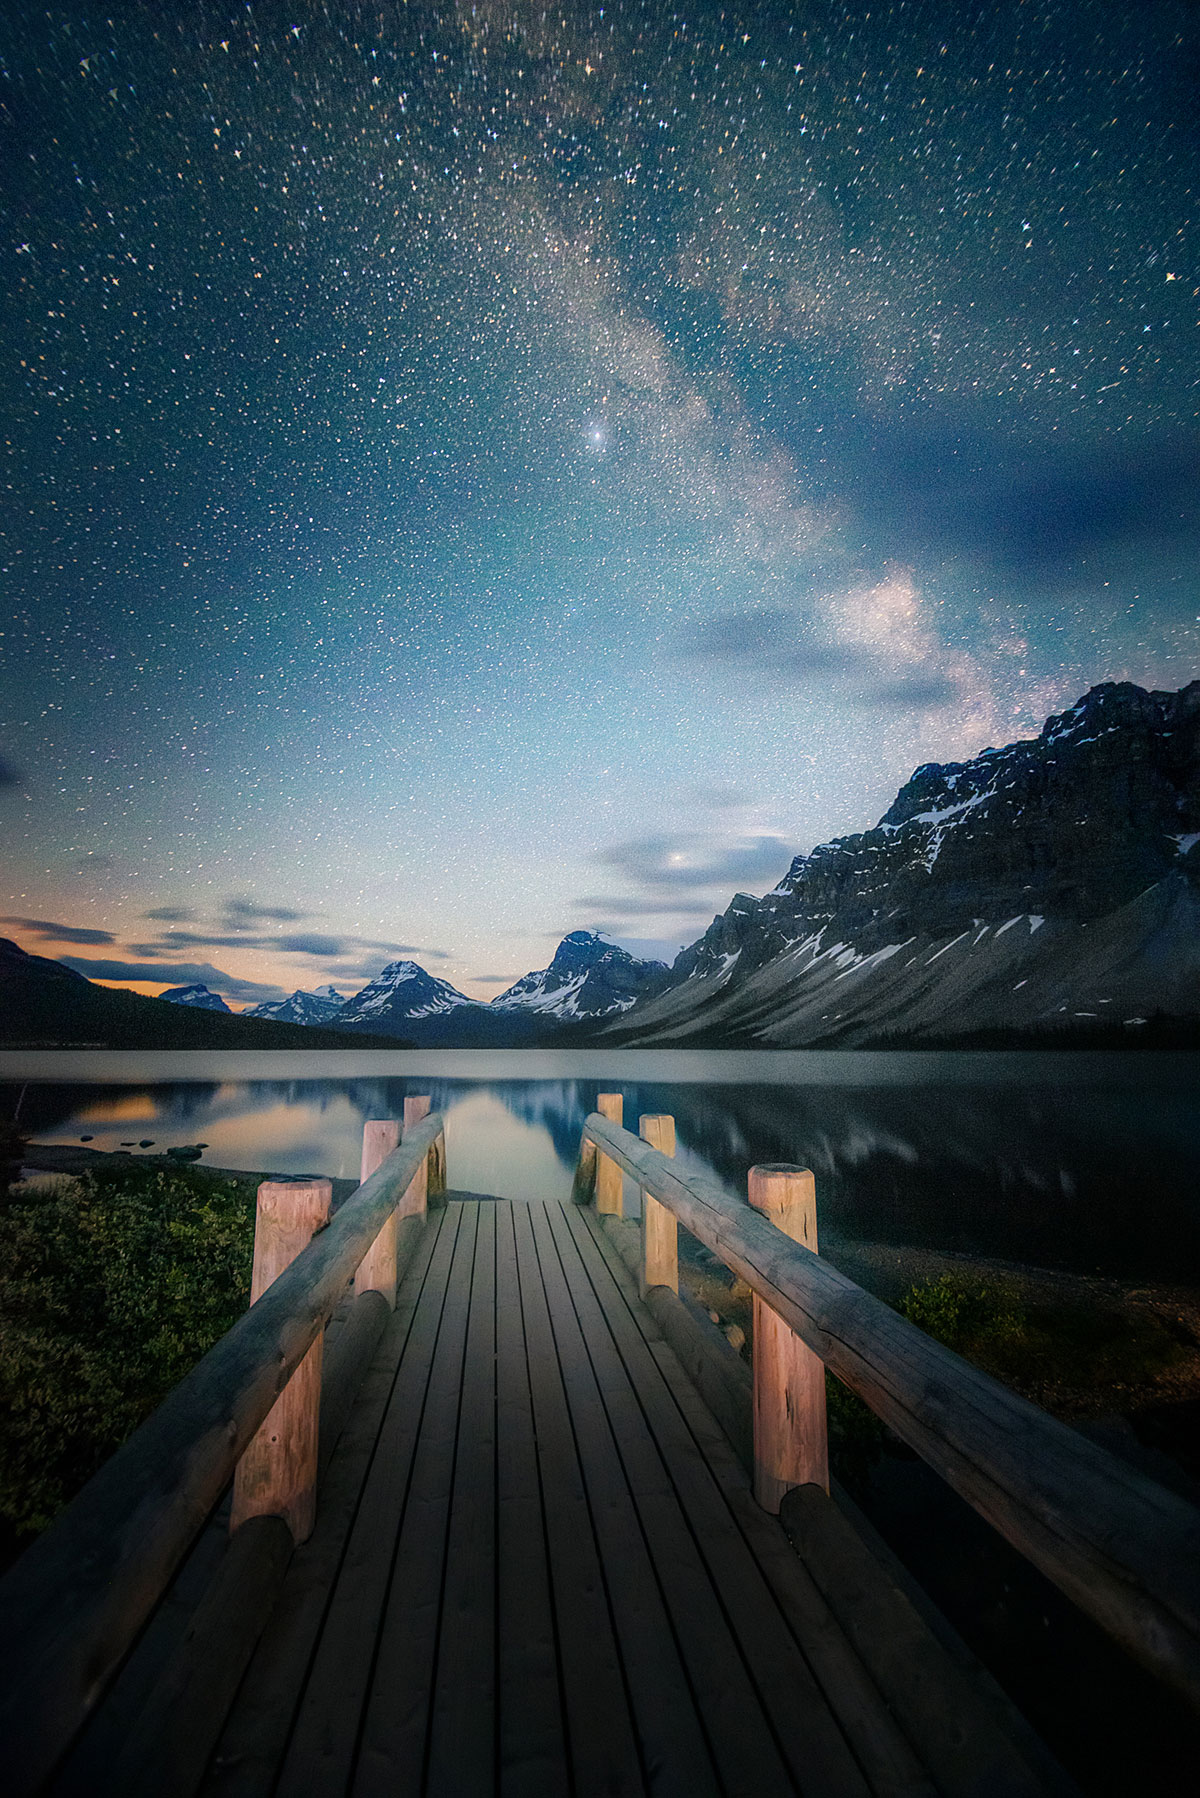
Long exposure landscape photos usually include both water and cloud, as it's the way these elements blur during long exposure that gives them their unique look. Shooting Night sky using long exposure technique is one major example. Photographers shoot milky way, star trails, shooting stars, comets and nebula (deep Astro photography).
Long exposure photography gear
The key to getting incredible long exposures isn't expensive gear. If you have a tripod, a remote shutter release (or cable release), and a camera with bulb mode, you're well on your way to taking an amazing long exposure. You might also need a neutral density (ND) filter (explained above), even when it's bright out. ND filters come in handy for daytime long exposures, but if you don't have one, plan to shoot at night or in a dark indoor setting. The equipment I have used over the years to take some exceptional long exposures are
- Camera Bodies: Nikon D750, Sony A7iii, Sony A7R iii
- Lenses: Tokina atx-i 11-16mm F2.8 CF, Tokina FíRIN 20mm F2 FE AF
- ND Filters: Kenko RealPro ND
- Tripod: ball head tripod of Vanguard & Sirui
- Shutter Release from Pixel pro
Because long exposure photography is not an easy task and it takes a lot of time and effort, I usually carry lot of food items in my bag, torch light, a compass, print maps (while exploring hidden trails), sand bag to put weight on the tripod in case of fast winds and a rain cover to protect all the equipment in case of bad weather.
Steps to follow when planning your first long exposure photography
1. Study the weather
Long exposure photography can rise and fall depending on the weather. If you look at the long exposure shots throughout this blog, you'll notice that I make extensive use of clouds to create intense, eye-catching skies. Therefore, partly cloudy skies are often best for long exposure photography, though you can also work with mostly cloudy or even moody, overcast horizons. Flat white skies (i.e., clouds with no texture) are best avoided – in general, the long exposure effect will be lost on these scenes, and you'll end up with a drab shot. If the sky is completely blue and there are no clouds, that means there is no drama and long exposure won't be of much use in this kind of situation.
2. Location
Plan to visit the location well in advance. Do proper scouting before you begin shooting. Watch out for any fall hazards or wildlife hazards. Because the long exposure photography is very time consuming, and to ensure you return home with a strong shot or two, I recommend you scout the location ahead of time. Think about any moving objects you might encounter, such as clouds, water, or even birds. Try to determine how they'll move on the day of your long exposure photoshoot (you might even take some long exposure test shots). Use any photo planning app to know more about the direction of sunrise and sunset and time associated with these events. Because long exposure photography involves opening of a shutter for longer durations, you should avoid taking the shots directly towards the sun. So, it is best recommended to plan your shoot ahead and check the direction of the sun using any photo planning app. I personally use photopills app to know more about the spot I plan to shoot from. It has all the tools you need, including an exposure calculator and hyperfocal distance tables. It's a powerful app that also tells you where and when the sun will rise and set, and (for Astro photographers) the location and timing of the Milky Way.
3. Setting up the Right Gear
The most important gear in long exposure photography is a sturdy tripod that can keep your camera steady for the duration of your shot. Otherwise, you will end up with blurry and shaky photos, no matter the power of your cameras in body image stabilization.
Apart from that, you can use any kind of camera, DSLR, mirrorless or even a cellphone to make long exposure shots. I always prefer having a shutter release to avoid the shake caused by pressing the shutter button while starting the shot. Choose the lens according to your subject. Longer focal lengths tend to have lens image stabilizations which acts weird and spoil the shots when you mount the lens on tripod. Turning off lens stabilization will solve shaky image problems in case of such lenses.
Choose the correct amount of Neutral density filter if you are taking long exposures during the day time. Mount your camera on the tripod and place it on a level surface. Make use of sand bags it it is too windy. Wind can easily shake tripod which results in shaky images. So, your ultimate goal while setting up your gear should always be focused on no camera shakes at all.
4. Setting the exposure and locking the focus
Start making your compositions, then set your focus. In general, you'll want to keep the entire shot sharp from foreground to background, so focus at the hyperfocal distance (about a third of the way into the scene). If you're struggling to determine where to focus, try using a depth of field calculator such as PhotoPills. If you are using manual focus, go ahead and set the lens's focus ring exactly where you want it. If you are using autofocus, position your active autofocus point over your main subject, half-press the shutter button to engage the focus, then toggle your lens from Autofocus to Manual. This way, the focus will remain locked, even if you accidentally press the shutter button again. Choose your camera settings wisely. If you are using filters during the day time. It is better to take the test shots without the ND Filters. This way you can easily lock your focus and calculate the settings for exposure time, aperture and iso. Try to keep iso as low as you can in order to avoid grains. After you finalize your settings without ND filters, apply the filter and calculate the right exposure time using exposure calculation app such as photo pills. For example, if your test shot was 1/15s and you're using a 10-stop filter, you'll need to decrease the shutter speed by 10 stops, for a shutter speed of approximately 60 seconds. Make use of your shutter release here at this point and take the photo. Always keep an eye on histogram.
Final words
Well, long exposure photography is particularly that genre of photography for which I can write so many of the things. These were just the basics of long exposure photography so to help you to start shooting long exposures. Follow me on my Instagram @manvirsphotography and ask me questions, I would be happy to help you. I will be bringing next blog for you guys very soon on somewhat related topic but more interesting.